dev cheatsheet link: https://docs.google.com/document/d/15gRGAB57iEFs_TGsqrk08_OZ36mX1yfsMKCYM6qX7gk/edit?usp=sharing
Topic: WordPress Theme Dev
We can develop our custom theme in wordpress. Let’s first understand the folder structure of wordpress.contact form
Let me assure you, how can you make a proper structure of a wordpress project.
front-page.php: This template is used to display the front page of the site. It's often used for the site's homepage.
index.php: This is the fallback template used when more specific templates are not available. It usually displays a list of posts.
style.css: This file contains the styles for your theme. While it can include theme author details in comments, its primary purpose is to style the HTML elements of your theme.
single.php: This template is used to display a single post's details. 404.php: handle 404 error page Header.php: contains information about header of the website footer.php : contains information about footer of website
single-post_type.php: This template is used to display a custom post type's single post detail. However, the correct naming convention should be single-{post_type}.php, where {post_type} is replaced with the name of your custom post type.
page.php: This template is used to display a static page's detail.
functions.php: This file contains PHP functions and code snippets used to enhance the functionality of your theme, add features, and hook into WordPress actions and filters.
template-parts/: This folder typically contains reusable template parts that can be included in other template files. For example, common sections like headers, footers, or sidebars.
templates/: This folder is not a standard part of WordPress themes. However, you may organize your theme templates in a folder structure if you find it beneficial for managing your theme files.
inc/: This folder typically contains included PHP files that provide additional functionality or modular components for your theme. assets/: contains files related to theme, like css files, js files, images etc. |
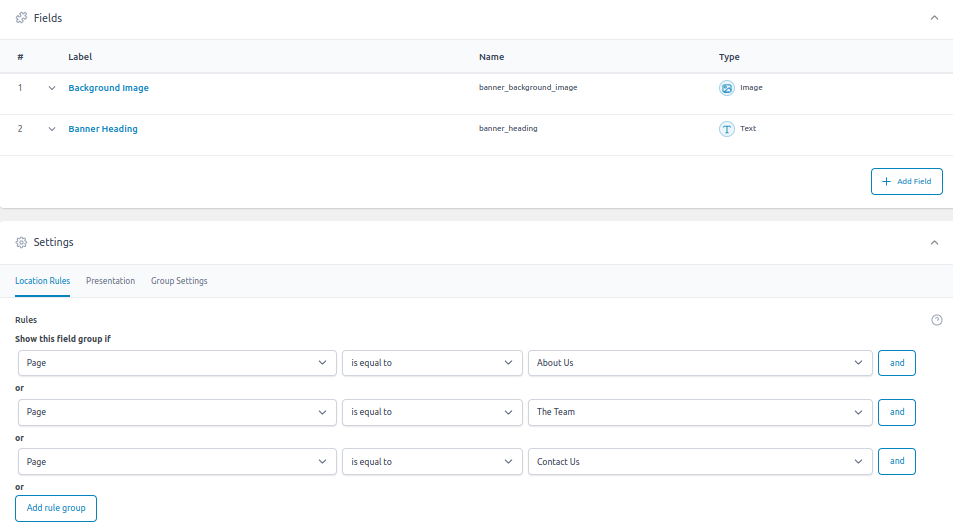
** when you making contact us page make sure only address will set to target blank and set as tel: ** only front-page will contain benner section and other pages should contains inner banner section.(acf guide) and also use sidebar functionality there. ** when you registering custom post type and it’s category -> make sure it’s name(taxonomy) will be not link ‘taxonomy’=>‘category’, it’s will different ‘taxonomy’=>‘designation’ ** when you making a new project make sure it’s page.php design must me correct. Basic flow - featured image, get_content() |
So, when you creating a new theme for your wordpress site, make sure you have putted 2 files inside /wp-content/themes/your-theme-name
Files: style.css, screenshot.png/.jpg & index.php
Now style.css contains information about this theme which we are going to develop.
Style.css
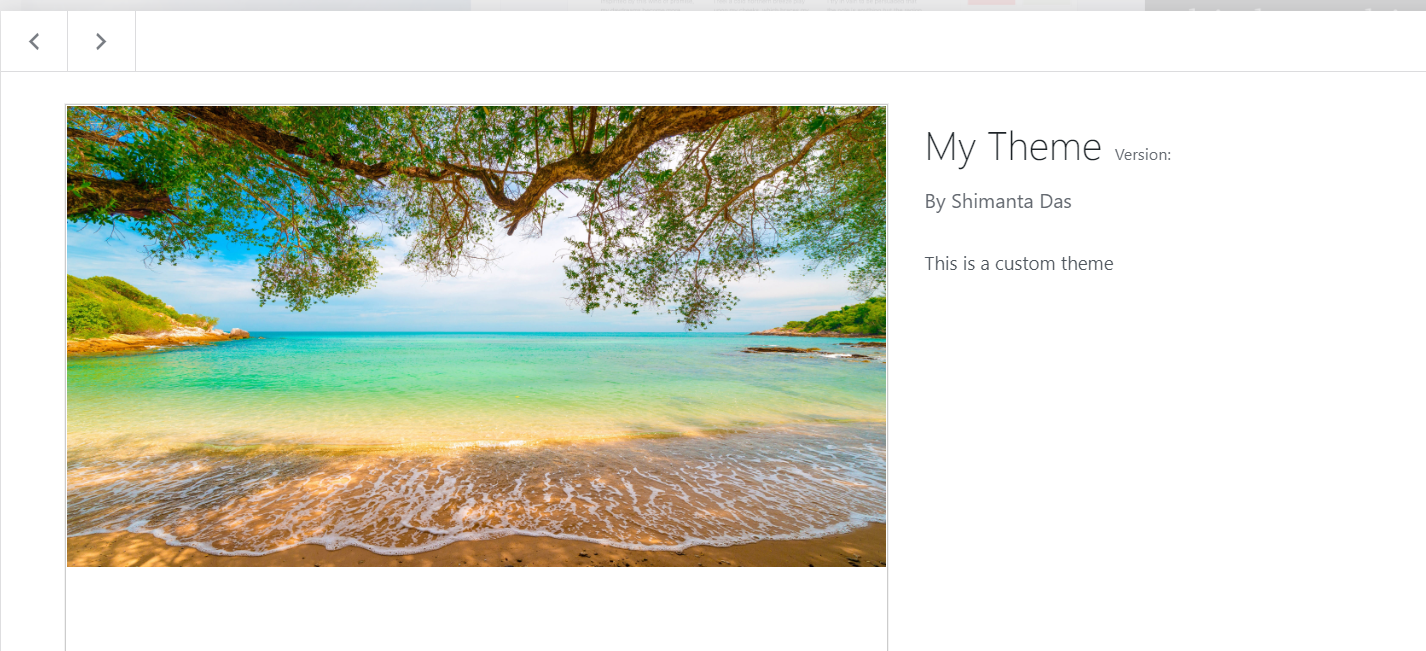
/* Theme Name: My Theme Description: This is a custom theme Author: Shimanta Das */ |
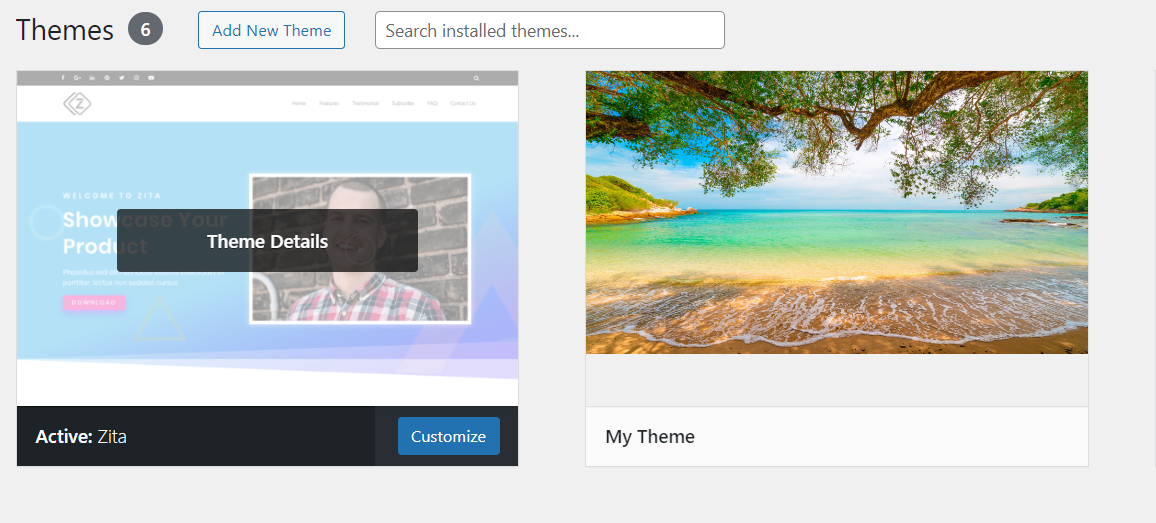
Now you can see below in our wordpress dashboard “Appearance -> Theme”
Topic: initialise .css and .js & images files for wordpress theme
First of all download a html/bootstrap theme from a site. Ex: https://themewagon.com/themes/free-bootstrap-5-digital-marketing-agency-template-growmark/
When you want to link those files you should use a function as “get_template_directory_uri()”. Let’s see an example below:
before <link href="style.css" rel="stylesheet"> after <link href="<?php echo get_template_directory_uri(); ?>/style.css" rel="stylesheet"> |
Using the function “get_template_directory_uri()” helps to get the path of the current installed theme.
Now, we should apply for body class.
// make body class dynamic <body class="home"> // will be converted into <body <?php body_class() ?>> |
Note: in wordpress hierarchy, by default it is called “front-page.php”. But if it can’t found then it calls “index.php”
When you are working on wordpress theme development, you should use “wp_header()” and “wp_footer()” functions. If you enable “wp_footer()“ so it will enable wordpress admin bar.
Topic: enqueue scripts
We can invoke scripts inside the theme without using header and footer php. Let’s see a code sample where we can invoke scripts in functions.php file.
// enque css scripts function prefix_enqueue_styles() { wp_enqueue_style('bootstrap_css', get_template_directory_uri() . '/css/bootstrap.min.css', array(), '4.5.0'); wp_enqueue_style('fontawesome_css', get_template_directory_uri() . '/css/fontawesome-all-min.css', array(), '5.15.3'); wp_enqueue_style('slick_css', get_template_directory_uri() . '/css/slick.css', array(), '1.8.1'); wp_enqueue_style('slick_theme_css', get_template_directory_uri() . '/css/slick-theme.css', array(), '1.8.1'); wp_enqueue_style('custom_css', get_template_directory_uri() . '/css/custom.css', array(), '1.0'); } add_action( 'wp_enqueue_scripts', 'prefix_enqueue_styles' );
// enque js scripts function prefix_enqueue_scripts() { wp_enqueue_script('jquery_js', get_template_directory_uri() . '/js/jquery.min.js', array(), '3.5.1', true); wp_enqueue_script('bootstrap_bundle_js', get_template_directory_uri() . '/js/bootstrap.bundle.min.js', array('jquery_js'), '4.5.0', true); wp_enqueue_script('slick_js', get_template_directory_uri() . '/js/slick.min.js', array('jquery_js'), '1.8.1', true); wp_enqueue_script('fontawesome_all_js', get_template_directory_uri() . '/js/font-awesome-all.min.js', array(), '5.15.3', true); wp_enqueue_script('custom_js', get_template_directory_uri() . '/js/custom.js', array('jquery_js'), '1.0', true); } add_action( 'wp_enqueue_scripts', 'prefix_enqueue_scripts' ); |
Topic: include custom header and footer
First make a “header.php” and cut the code from <!DOCTYPE html> up to navbar.
Now paste the code inside “header.php” and now call that file inside “index.php”
Now include the “header.php” file inside “index.php” then call using the “get_header()” function.
Now let’s assume you have more than one “header.php” file in your theme, then how should you call them ?
Say I have 3 files in wordpress theme, Ex: header.php, header-contact.php, header-offer.php
When you call <?php get_header(); ?> you generally call by default “header.php”.
But for calling ’header-contact.php’, ‘header-offer.php’ just use:
<?php get_header(‘contact’); ?> | Automatically calls header-contact.php file |
<?php get_header(‘offer’); ?> | Automatically calls header-offer.php file |
Note: same analogy will be applied for footers too. You should create a “footer.php” and then cut the footer part to the last </html> tag and paste into the file. Now for calling the file simply use the “get_footer()” function.
Note: we should call the wp_head(); inside after <head> tag in ‘header.php’ and we should call wp_footer(); inside </body> tag in ‘footer.php’
Topic: how to create menus in wordpress theme
For adding a menu option to the theme just add ‘Primary Menu’ and give it a value as ‘Top Menu’ and you will see the option in appearance.
<?php register_nav_menus( array( 'primary-menu'=>'Top Menu' ) ) ?> |
Now let’s create and add pages inside the menu. After that I called this..
<?php
wp_nav_menu(array(‘theme_location’=>'primary-menu', ‘menu_class’=>’something’))
?>
Trick: let’s catch up with some short cart tricks.
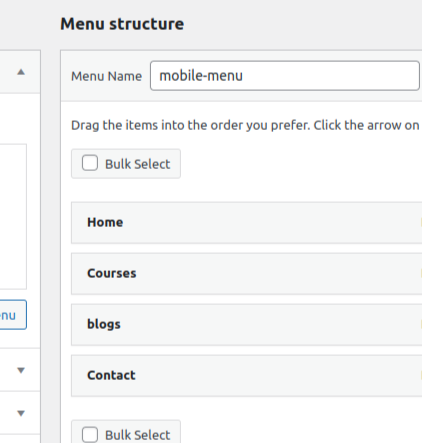
So I have created a manu called “mobile-menu” and added some pages inside it.
<ul class="mobile-menu-only"> <?php wp_nav_menu(array( 'menu' => 'mobile-menu', 'container' => false, 'items_wrap' => '%3$s' )); ?> </ul> |
One thing to note, when you use ‘items_wrap’ you generally remove <ul> tags.
Topic: add css classes to <li> and <a> tags using wp_nav_menu()
Let’s see first HTML part of wp_nav_menu
<div class="collapse navbar-collapse offset" id="navbarSupportedContent"> <ul class="nav navbar-nav menu_nav ml-auto"> <?php wp_nav_menu(array('menu'=>'Navbar-Menu','container'=>'false', 'items_wrap' => '%3$s',)); ?> </ul> </div> |
Let’s see functions.php
// add classes to <a> tags inside <li> tags function add_menu_link_class($atts, $item, $args) { $atts['class'] = 'nav-link'; return $atts; } add_filter('nav_menu_link_attributes', 'add_menu_link_class', 1, 3);
// add classes to <li> tags function _namespace_menu_item_class( $classes, $item ) { $classes[] = "nav-item"; // you can add multiple classes here return $classes; } add_filter( 'nav_menu_css_class' , '_namespace_menu_item_class' , 10, 2 ); |
Topic: how to display pages in wordpress on call
First make a file as “page.php” and follow the below skeleton structure
If you want to know the page name then simply use function: the_title()
Note: if you want to get the project’s url then simply use: site_url()
Your page.php will look like…
<?php get_header(); ?> <?php get_footer(); ?> |
But for showing content of “page.php” simply use the “the_content()” function.
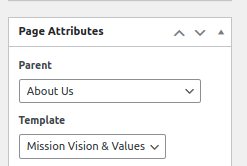
Topic: get page parent

<li> <a href="<?php echo get_permalink($post->post_parent); ?>"> <?php echo get_the_title($post->post_parent); ?> </a> </li> |
Topic: Single File upload in php/wordpress
index.html
<form action="upload.php" method="post" enctype="multipart/form-data"> <div class="mb-3"> <label for="exampleInputEmail1" class="form-label">Email address</label> <input type="email" name="email" class="form-control" id="exampleInputEmail1" aria-describedby="emailHelp"> <div id="emailHelp" class="form-text">We'll never share your email with anyone else.</div> </div> <div class="mb-3"> <label for="formFile" class="form-label">Default file input example</label> <input class="form-control" type="file" name="formFile" id="formFile"> </div> <button type="submit" class="btn btn-primary">Submit</button> </form> |
upload.php
<?php if ($_SERVER['REQUEST_METHOD'] == 'POST') { // Ensure the uploads directory exists $target_dir = "uploads/"; if (!is_dir($target_dir)) { mkdir($target_dir, 0777, true); } // Generate a unique hash for the file $file_temp = $_FILES["formFile"]["tmp_name"]; $file_name = basename($_FILES["formFile"]["name"]); $unique_id = uniqid(); // Generate a unique ID based on the current time in microseconds $file_hash = hash('md5', file_get_contents($file_temp) . $unique_id); // Include the unique ID in the hash $file_ext = strtolower(pathinfo($file_name, PATHINFO_EXTENSION)); $target_file = $target_dir . $file_hash . '.' . $file_ext; $uploadOk = 1; // Check if file already exists if (file_exists($target_file)) { echo "Sorry, file already exists."; $uploadOk = 0; } // Check if $uploadOk is set to 0 by an error if ($uploadOk == 0) { echo "Sorry, your file was not uploaded."; } else { if (move_uploaded_file($_FILES["formFile"]["tmp_name"], $target_file)) { // echo "The file ". htmlspecialchars(basename($_FILES["formFile"]["name"])) . " has been uploaded."; echo "The file has been uploaded as " . htmlspecialchars($target_file) . "."; echo "<br/>"; echo getcwd(); } else { echo "Sorry, there was an error uploading your file."; } } } ?> |
** for bulk upload
index.html
<form action="bulkuploads.php" method="post" enctype="multipart/form-data"> <div class="mb-3"> <label for="formFile" class="form-label">Default file input example</label> <input class="form-control" type="file" name="formFile" id="formFile"> </div> <div class="mb-3"> <label for="formFile" class="form-label">Default file input example</label> <input class="form-control" type="file" name="formFile2" id="formFile2"> </div> <div class="mb-3"> <label for="formFile" class="form-label">Default file input example</label> <input class="form-control" type="file" name="formFile3" id="formFile3"> </div> <button type="submit" class="btn btn-primary">Submit</button> </form> |
bulkupload.php
<?php if ($_SERVER['REQUEST_METHOD'] == 'POST') { // Ensure the uploads directory exists $target_dir = "uploads/"; if (!is_dir($target_dir)) { mkdir($target_dir, 0777, true); } /** formfile1 - first file upload */ // Generate a unique hash for the file $file_temp = $_FILES["formFile"]["tmp_name"]; $file_name = basename($_FILES["formFile"]["name"]); $unique_id = uniqid(); // Generate a unique ID based on the current time in microseconds $file_hash = hash('md5', file_get_contents($file_temp) . $unique_id); // Include the unique ID in the hash $file_ext = strtolower(pathinfo($file_name, PATHINFO_EXTENSION)); $target_file = $target_dir . $file_hash . '.' . $file_ext; $uploadOk = 1; // Check if file already exists if (file_exists($target_file)) { echo "Sorry, file already exists."; $uploadOk = 0; } // Check if $uploadOk is set to 0 by an error if ($uploadOk == 0) { echo "Sorry, your file was not uploaded."; } else { if (move_uploaded_file($_FILES["formFile"]["tmp_name"], $target_file)) { // echo "The file ". htmlspecialchars(basename($_FILES["formFile"]["name"])) . " has been uploaded."; echo "The file has been uploaded as " . htmlspecialchars($target_file); echo "<br/>"; echo getcwd(); } else { echo "Sorry, there was an error uploading your file."; } } /** second file upload - formfile 2 */ // Generate a unique hash for the file $file_temp = $_FILES["formFile2"]["tmp_name"]; $file_name = basename($_FILES["formFile2"]["name"]); $unique_id = uniqid(); // Generate a unique ID based on the current time in microseconds $file_hash = hash('md5', file_get_contents($file_temp) . $unique_id); // Include the unique ID in the hash $file_ext = strtolower(pathinfo($file_name, PATHINFO_EXTENSION)); $target_file = $target_dir . $file_hash . '.' . $file_ext; $uploadOk = 1; // Check if file already exists if (file_exists($target_file)) { echo "Sorry, file already exists."; $uploadOk = 0; } // Check if $uploadOk is set to 0 by an error if ($uploadOk == 0) { echo "Sorry, your file was not uploaded."; } else { if (move_uploaded_file($_FILES["formFile2"]["tmp_name"], $target_file)) { // echo "The file ". htmlspecialchars(basename($_FILES["formFile"]["name"])) . " has been uploaded."; echo "The file has been uploaded as " . htmlspecialchars($target_file); echo "<br/>"; echo getcwd(); } else { echo "Sorry, there was an error uploading your file."; } } /** third file upload - formfile 3 */ // Generate a unique hash for the file $file_temp = $_FILES["formFile3"]["tmp_name"]; $file_name = basename($_FILES["formFile3"]["name"]); $unique_id = uniqid(); // Generate a unique ID based on the current time in microseconds $file_hash = hash('md5', file_get_contents($file_temp) . $unique_id); // Include the unique ID in the hash $file_ext = strtolower(pathinfo($file_name, PATHINFO_EXTENSION)); $target_file = $target_dir . $file_hash . '.' . $file_ext; $uploadOk = 1; // Check if file already exists if (file_exists($target_file)) { echo "Sorry, file already exists."; $uploadOk = 0; } // Check if $uploadOk is set to 0 by an error if ($uploadOk == 0) { echo "Sorry, your file was not uploaded."; } else { if (move_uploaded_file($_FILES["formFile3"]["tmp_name"], $target_file)) { // echo "The file ". htmlspecialchars(basename($_FILES["formFile"]["name"])) . " has been uploaded."; echo "The file has been uploaded as " . htmlspecialchars($target_file); echo "<br/>"; echo getcwd(); } else { echo "Sorry, there was an error uploading your file."; } } } ?> |
Topic: file upload using AJAX & PHP
We can upload files and form field string data using ajax.
index.html |
<form id="form1"> <div class="mb-3"> <label for="name" class="form-label">Name</label> <input type="text" class="form-control" name="name" id="name"> </div> <div class="mb-3"> <label for="email" class="form-label">Email address</label> <input type="email" class="form-control" name="email" id="email" aria-describedby="emailHelp"> <div id="emailHelp" class="form-text">We'll never share your email with anyone else.</div> </div> <div class="mb-3"> <label for="formFile" class="form-label">Default file input example</label> <input class="form-control" type="file" name="formFile" id="formFile"> </div> <button type="submit" class="btn btn-primary">Submit</button> </form> |
<script> jQuery('#document').ready(function () { jQuery('#form1').on("submit", function(e){ e.preventDefault(); console.log("form submitted"); var formdata = new FormData(this); console.log(formdata);
jQuery.ajax({ url: 'data.php', method: 'POST', data: formdata, contentType: false, processData: false, success: function (response) { console.log(response); }, error: function (response) { console.alert(response); } }); });
}); </script> |
data.php |
<?php if($_SERVER['REQUEST_METHOD'] == 'POST'){ $name = $_POST['name']; $email = $_POST['email'];
// Ensure the uploads directory exists $target_dir = "uploads/"; if (!is_dir($target_dir)) { mkdir($target_dir, 0777, true); } // Generate a unique hash for the file $file_temp = $_FILES["formFile"]["tmp_name"]; $file_name = basename($_FILES["formFile"]["name"]); $unique_id = uniqid(); // Generate a unique ID based on the current time in microseconds $file_hash = hash('md5', file_get_contents($file_temp) . $unique_id); // Include the unique ID in the hash $file_ext = strtolower(pathinfo($file_name, PATHINFO_EXTENSION)); $target_file = $target_dir . $file_hash . '.' . $file_ext; $uploadOk = 1; // Check if file already exists if (file_exists($target_file)) { echo "Sorry, file already exists."; $uploadOk = 0; } // Check if $uploadOk is set to 0 by an error if ($uploadOk == 0) { echo "Sorry, your file was not uploaded."; } else { if (move_uploaded_file($_FILES["formFile"]["tmp_name"], $target_file)) { // echo "The file ". htmlspecialchars(basename($_FILES["formFile"]["name"])) . " has been uploaded."; echo "The file has been uploaded as " . htmlspecialchars($target_file) . "."; echo "<br/>"; echo getcwd(); } else { echo "Sorry, there was an error uploading your file."; } }
echo "your submitted form info: ".$name." ".$email;
}else{ echo "bad method call"; } ?> |
Note: alternate code if you upload files like click on button event
Here is the sample code when you click on submit button it will upload that file
<form> <div class="mb-3"> <label for="name" class="form-label">Name</label> <input type="text" class="form-control" name="name" id="name"> </div> <div class="mb-3"> <label for="email" class="form-label">Email address</label> <input type="email" class="form-control" name="email" id="email" aria-describedby="emailHelp"> <div id="emailHelp" class="form-text">We'll never share your email with anyone else.</div> </div> <div class="mb-3"> <label for="formFile" class="form-label">Default file input example</label> <input class="form-control" type="file" name="formFile" id="formFile"> </div> <button type="button" id="submit_btn" class="btn btn-primary">Submit</button> </form> |
<script> jQuery('#document').ready(function () { jQuery('#submit_btn').click(function(e){ e.preventDefault();
var name = jQuery('#name').val(); var email = jQuery('#email').val(); var file = jQuery('#formFile').prop('files')[0]; var formdata = new FormData(); formdata.append('name', name); formdata.append('email', email); formdata.append('formFile', file);
jQuery.ajax({ url: 'data.php', method: 'POST', data: formdata, contentType: false, processData: false, success: function (response) { console.log(response); }, error: function (response) { console.error(response); } }); });
}); </script> |
Topic: enable featured/thumbnail image.
When you are working on a custom theme, sometimes you do not show the option of featured image. To enable this just add a function inside the “functions.php” file.
<?php add_theme_support(‘post-thumbnails’) ?>
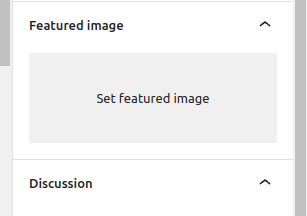
To get the thumbnail image of a page or post …
<?php wp_get_attachment_image_src(get_post_humbnail_id(),’small/medium/custom’) ?>
Topic: how to set up a header image for a wordpress site.
First of all we need to enable the header image option. For this add a function in the “functions.php”.
“add_theme_support(‘custom-header’);”
After that you will get the “Menus” option inside the “Appearance” tab.
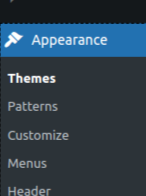
You will also find an option as “Header Image”, where you can set the header image.
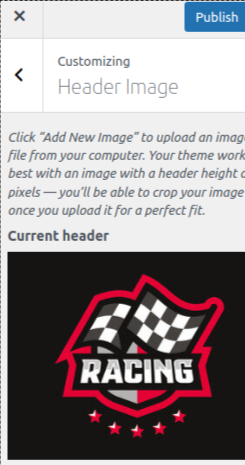
Now for calling the header image use the function, get_header_image()
Topic: set site logo in wordpress
Note: if you want to set favicon of your wordpress site, then use function - get_site_icon_url()
see below code sample:
<!--favicon-->
<link rel="icon" type="images/favicon.png" href="<?php echo get_site_icon_url(); ?>">
Topic: set custom template page template
When you create a wordpress site from an HTML theme, whenever you create and call a page it’s always called via “page.php”. But in the page.php we can’t set a custom template which will be applicable for a particular page.
Let’s install a plugin named as “classic editor”
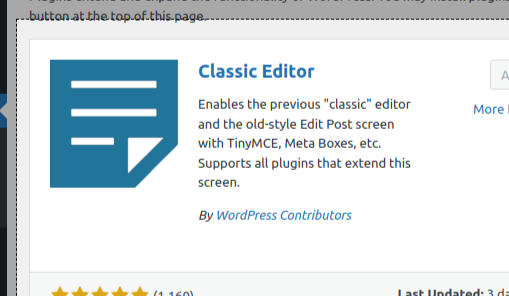
For example, we need to set a “contact us” page. First create a “contact us” page from wordpress admin. Now, let’s make a file called “template-contact.php”.
Now let’s add the short-code in this file.
<?php /** * Template Name: contact us */ get_header(); ?>
your content
<?php get_footer(); ?> |
Alternative video: https://www.youtube.com/watch?v=q777alqFa0Y
Note: when you make template pages, make sure to include under ‘templates/’ names folder and paste all the files here. Make name using /*Template Name: your-set-name */
Topic: current active page css class
When you working on custom template of wordpress you might find a class as “current_page_item”
This class is applicable if the current item is a page and it’s in active condition.
Note: you will also find a class as “current_menu_item”. It's applicable for many use cases like page, post, archive etc. if it’s in active condition.
Topic: create posts and show the number of posts in the “blogs” page.
In wordpress we can create posts and display them. But one thing to note:
Every “posts are posts” and ”every pages are posts”, just the thing for posts:type=’posts’ and for pages type=’pages’.
Step 1: create posts by wordpress admin.
Step 2: go to the desired file ex: “first-page.php” or “index.php” or “template-blogs.php”
Step 3: now for getting all the posts where their type=“posts”
<!-- post loop start --> <?php $args = array( 'posts_per_page' => -1, 'offset' => 0, 'orderby' => 'date', 'order' => 'ASC', 'post_type' => 'post',
); $wq = new WP_Query($args); if ($wq->have_posts()): while ($wq->have_posts()): $wq->the_post(); $thumbnail = wp_get_attachment_image_src(get_post_thumbnail_id(), 'medium'); ?> <div class="col-lg-4 col-sm-6"> <div class="single-blog-grid"> <a href="#"> <figure> <img src="<?php echo $thumbnail[0]; ?>" alt="" /> </figure> <figcaption class="text-white"> <h3><?php echo the_title(); ?></h3> <p class="white-dash"><?php echo get_the_date(); ?></p> </figcaption> </a> </div> </div> <?php endwhile; endif; wp_reset_postdata(); ?> <!-- post loop end --> |
Note: when you make template pages, make sure to include under ‘templates/’ names folder and paste all the files here. Make name using /*Template Name: your-set-name */
If you want to skip any post in page, the use the code … 'post__not_in'=> [get_the_ID()]
Topic: how does wp_query(), get_posts() work ?
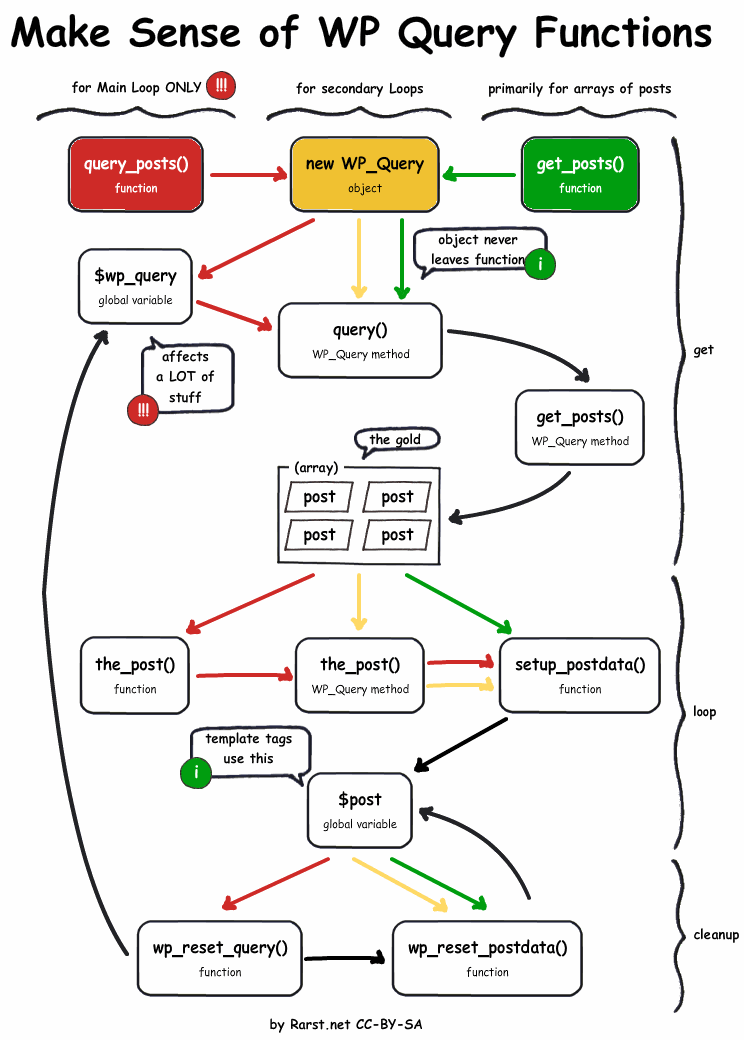
Ref link: https://wordpress.stackexchange.com/questions/1753/when-should-you-use-wp-query-vs-query-posts-vs-get-posts
Topic: Create post type by services
In wordpress theme development, We see the posts types generally by either ‘posts’ or ‘pages’. Let’s create a post type by ‘services’.
Note: you should mention all post-type name’s first letter in capital.
Open “functions.php” and paste the below code
// adding custom post type - function custom_post_type_services() { $supports = array( 'title', 'editor', 'author', 'thumbnail', 'excerpt', 'custom-fields', 'comments', 'revisions', 'post-formats', ); $labels = array( 'name' => _x('Services', 'plural'), 'singular_name' => _x('Services', 'singular'), // make first letter as capital in menu name. 'menu_name' => _x('Services', 'admin menu'), 'name_admin_bar' => _x('Services', 'admin bar'), 'add_new' => _x('Add New', 'add new'), 'add_new_item' => __('Add New Services'), 'new_item' => __('New Services'), 'edit_item' => __('Edit Services'), 'view_item' => __('View Services'), 'all_items' => __('All Services'), 'search_items' => __('Search Services'), 'not_found' => __('No Services found.'), ); $args = array( 'supports' => $supports, 'labels' => $labels, 'public' => true, // post type icon 'menu_icon' => 'dashicons-welcome-write-blog', 'query_var' => true, 'rewrite' => array('slug' => 'services'), 'has_archive' => true, 'hierarchical' => false, 'show_in_menu' => true, // Ensure this is set to true ); register_post_type('services', $args); } add_action('init', 'custom_post_type_services'); |
After adding this you will find a section as “services” in wordpress admin panel.
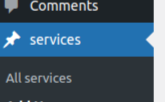
For showing service’s post … I will create a “template-services.html”
<?php $args = array( 'posts_per_page' => -1, 'offset' => 0, 'orderby' => 'date', 'order' => 'ASC', 'post_type' => 'services',
); $wq = new WP_Query($args); if ($wq->have_posts()): while ($wq->have_posts()): $wq->the_post(); $thumbnail = wp_get_attachment_image_src(get_post_thumbnail_id(), 'medium'); ?> <!-- services start --> <div class="col-lg-4 col-md-6 service-col"> <div class="single-blog-grid service-grid"> <figure> <img src="<?php echo $thumbnail[0]; ?>" alt=""/> </figure> <figcaption class="text-white service_cnt_wrap"> <h3><?php echo the_title(); ?></h3> <p> <?php echo get_the_excerpt(); ?> </p> <a href="#">Read More</a> </figcaption> </div> </div> <!-- servives end --> <?php endwhile; endif; ?> |
Helpful doc:https://www.cloudways.com/blog/wordpress-custom-post-type/
Sub Topic: display all categories of related post
We can display the category of the current post.
// taxonomy type $taxonomy = 'our_programmes_type'; // padding post id $terms = wp_get_post_terms($post_id, $taxonomy); if (!empty($terms) && !is_wp_error($terms)) { foreach ($terms as $term) { echo $term->name; } } |

Sub topic: get the category page name
We can list the category page name using the_archive_title().
Topic: set category for custom post type
We can set a custom post type category in our wordpress project.
function add_custom_taxonomies() { // Add new "Category" taxonomy to Posts register_taxonomy('service_category', 'services', array( // Hierarchical taxonomy (like categories) 'hierarchical' => true, 'show_ui' => true, 'show_admin_column' => true, // Ensures the taxonomy shows up in the admin post listing
// This array of options controls the labels displayed in the WordPress Admin UI 'labels' => array( 'name' => _x( 'Service Category', 'taxonomy general name' ), 'singular_name' => _x( 'Service Category', 'taxonomy singular name' ), 'search_items' => __( 'Search Service Category' ), 'all_items' => __( 'All Service Category' ), 'parent_item' => __( 'Parent Service Category' ), 'parent_item_colon' => __( 'Parent Service Category:' ), 'edit_item' => __( 'Edit Service Category' ), 'update_item' => __( 'Update Service Category' ), 'add_new_item' => __( 'Add New Service Category' ), 'new_item_name' => __( 'New Service Category Name' ), 'menu_name' => __( 'Service Category' ), ), // Control the slugs used for this taxonomy 'rewrite' => array( 'slug' => 'service-category', // This controls the base slug that will display before each term 'with_front' => false, // Don't display the category base before "/Category/" 'hierarchical' => true // This will allow URL's like "/Category/boston/cambridge/" ), )); } add_action( 'init', 'add_custom_taxonomies', 0 ); |
Note: ‘service_category’ has been registered for taxonomy against custom post type ex: services and also need to fix the slug as ‘service-category’
Note: if you want to set category against post type then follow this global process…
Wordpress follows categories and tags as ‘taxonomy’. So we can assign them as taxonomy .
function create_posts(){ $arr = array(); $category = wp_insert_term( 'shimanta das', // The term name 'service_category' // The taxonomy name ); if (!is_wp_error($category)) { $catid = $category['term_id']; array_push($arr, $catid); } $category = wp_insert_term( 'dominick', // The term name 'service_category' // The taxonomy name ); if (!is_wp_error($category)) { $catid = $category['term_id']; array_push($arr, $catid); } if($arr != NULL){ $new_post = array( 'post_title' => 'dummy post', 'post_content' => 'something bro', 'post_status' => 'publish', 'tax_input' => array( 'service_category' => $arr // Assigning the term ID(s) to the 'service_category' taxonomy ), 'post_type' => 'services', ); wp_insert_post($new_post); } } add_action('init', 'create_posts'); |
Topic: show custom post type in wordpress.
If you create a custom post type, ex: services and create several posts under it. Then for displaying a single post we use the_permalink() function.
For displaying a single post we use a file named “single-post_type.php”
Topic: pagination
We can apply pagination when we work with custom HTML templates. I have apply pagination for custom post type in a page named as ‘templates/reviews.php’
reviews.php |
<section class="review-sec common-padd"> <div class="container"> <div class="row"> <div class="col-lg-23">
<?php $paged = (get_query_var('paged')) ? get_query_var('paged') : 1;
$args = array( 'posts_per_page' => 3, 'post_type' => 'reviews', 'paged' => $paged, ); $wq = new WP_Query($args); if ($wq->have_posts()): while ($wq->have_posts()): $wq->the_post(); $thumbnail = wp_get_attachment_image_src(get_post_thumbnail_id(), 'medium'); ?>
<div class="review-box"> <div class="icon-wrap"> <img src="<?php echo esc_url(get_template_directory_uri()); ?>/images/testimonial-icon.png"> </div> <h2><?php echo esc_html(get_the_content()); ?></h2> <div class="user-wrap"> <img src="<?php echo esc_url(get_field('user_profile_image')); ?>"> <div class="user-info"> <h5><?php echo esc_html(get_field('users_name')); ?></h5> <p><?php echo esc_html(get_field('user_designation')); ?></p> </div> </div> </div>
<?php endwhile; ?>
<div class="pagination-wrap"> <?php echo paginate_links(array( 'base' => get_pagenum_link(1) . '%_%', 'format' => 'page/%#%/', 'total' => $wq->max_num_pages, 'current' => max(1, $paged), 'show_all' => false, 'end_size' => 1, 'mid_size' => 2, 'prev_next' => true, 'prev_text' => __('<i class="fa-solid fa-arrow-left"></i>','test'), 'next_text' => __('<i class="fa-solid fa-arrow-right"></i>','test'), 'type' => 'list', )); ?> </div>
<?php endif; wp_reset_postdata(); ?> </div> </div> </div> </section> |
Let’s see the html part of these …
<div class="pagination-wrap"> <ul> <li class="arrow"><a href="#"><i class="fa-solid fa-arrow-left"></i></a></li> <li><a href="#">1</a></li> <li><a href="#">2</a></li> <li><a href="#">3</a></li> <li>...</li> <li><a href="#">10</a></li> <li class="arrow"><a href="#"><i class="fa-solid fa-arrow-right"></i></a></li> </ul> </div> |
Let’s see a custom.css file for this…
.pagination-wrap { padding: 30px 0 0; }
.pagination-wrap ul { display: flex; align-items: center; margin: 0; padding: 0; list-style: none; justify-content: center; }
.pagination-wrap ul li { width: fit-content; padding: 0 10px; font-size: 24px; font-weight: 700; }
.pagination-wrap ul li a { width: 60px; height: 60px; border-radius: 50%; display: flex; justify-content: center; align-items: center; border: 2px solid var(--orange); color: var(--black); font-weight: 700; font-size: 24px; background: var(--white); }
.pagination-wrap ul li a:hover { background: var(--orange); color: var(--white); }
.pagination-wrap ul li.arrow a { border: 1px solid #E9E9E9; }
@media only screen and (max-width: 767px) { .pagination-wrap ul li { display: none; }
.pagination-wrap ul li.arrow { display: block; } } |
But when you apply wordpress pagination it by defaults generates <span> tags for active page , so we need to apply custom css effect for that too .
.pagination-wrap ul li span { width: 60px; height: 60px; border-radius: 50%; display: flex; justify-content: center; align-items: center; border: 2px solid var(--orange); color: var(--black); font-weight: 700; font-size: 24px; background: var(--white); }
.pagination-wrap ul li span:hover { /* background: var(--grey); color: var(--white); */ }
.pagination-wrap ul li.arrow span { border: 1px solid #E9E9E9; } |
Note: ‘offset’ should be added when applying this custom pagination.
Topic: how to display single post with details - post display
For showing a post details into a particular page you should make a file as “single.php”
For this in the details page ex:blog details, we need to configure “the_permaink()” it will automatically generate blog details according to permalink()
template-blogs.php <a href="<?php the_permalink(); ?>">view more</a>
single.php <?php the_post(); ?> <div class="col-lg-12"> <?php $path = wp_get_attachment_image_src(get_post_thumbnail_id(),'small'); ?> <div class="blog_feature_thumnb"> <img src="<?php echo $path[0]; ?>"></div> <div class="blog_feature_content"> <h2><?php echo the_title(); ?></h2> <br> <h4><?php echo the_author(); ?></h4> <br> <h4><?php echo get_the_date(); ?></h4> <br> <p> <?php echo the_content(); ?> </p> </div> |
Topic: comment form
We can apply a comment form in our post. For that we need to apply a function: <?php echo comment_form(); ?>
We can apply custom css style too for that we need to pass args into comment_form().
<div class="row"> <div class="col-1"></div> <div class="col-10"> <?php $comment_args = array( 'class_submit' => 'btn btn-default submit', 'comment_field' => '<p class="comment-form-comment"><label for="comment">' . _x('Comment', 'noun') . '</label> <textarea id="comment" name="comment" class="form-control" cols="45" rows="8" aria-required="true" required="required"></textarea></p>', 'fields' => array( 'author' => '<p class="comment-form-author">' . '<label for="author">' . __('Name') . ($req ? ' <span class="required">*</span>' : '') . '</label> ' . '<input id="author" name="author" class="form-control" type="text" value="' . esc_attr($commenter['comment_author']) . '" size="30"' . $aria_req . $html_req . ' /></p>', 'email' => '<p class="comment-form-email"><label for="email">' . __('Email') . ($req ? ' <span class="required">*</span>' : '') . '</label> ' . '<input id="email" name="email" class="form-control" ' . ($html5 ? 'type="email"' : 'type="text"') . ' value="' . esc_attr($commenter['comment_author_email']) . '" size="30" aria-describedby="email-notes"' . $aria_req . $html_req . ' /></p>', 'url' => '<p class="comment-form-url"><label for="url">' . __('Website') . '</label> ' . '<input id="url" name="url" class="form-control" ' . ($html5 ? 'type="url"' : 'type="text"') . ' value="' . esc_attr($commenter['comment_author_url']) . '" size="30" /></p>', ) ); echo comment_form($comment_args); ?> </div> <div class="col-1"></div> </div> |
Topic: comment list
After making the comment form it’s time to display all the comments. For that we need to use a built-in function called “comment_template()”.
<?php comments_template(); ?> |
After using this it lists all the submitted comments for that post and also calls the “comment_form()” function too.

Note: generally you do not get the css style so I added it into “custom.css” file.
/* comment list css */ .commentlist { list-style: none; padding: 0; } .comment { margin-bottom: 20px; padding: 10px; border: 1px solid #ccc; } .comment .comment-author { font-weight: bold; } .comment p { margin: 10px 0; } .comment .reply { margin-top: 10px; } .comment-respond { margin-top: 30px; } .comment-form input[type="text"], .comment-form textarea { width: 100%; padding: 10px; margin-bottom: 10px; border: 1px solid #ccc; border-radius: 5px; } .comment-form input[type="submit"] { background-color: #007bff; color: #fff; border: none; padding: 10px 20px; cursor: pointer; border-radius: 5px; } .comment-form input[type="submit"]:hover { background-color: #0056b3; } |
Topic: Fetch posts related to category
If you want to fetch posts by category, then make a file as “category.php” and put the below code …
<!-- post loop start --> <?php if (have_posts()): while (have_posts()): the_post(); $thumbnail = wp_get_attachment_image_src(get_post_thumbnail_id(), 'medium'); ?> <div class="col-lg-4 col-sm-6"> <div class="single-blog-grid"> <a href="#"> <figure> <img src="<?php echo $thumbnail[0]; ?>" alt="" /> </figure> <figcaption class="text-white"> <h3><?php echo the_title(); ?></h3> <p class="white-dash"><?php echo get_the_date(); ?></p> <br> </figcaption> </a> </div> <b> <a href="<?php the_permalink(); ?>">view more</a> </b> </div>
<?php endwhile; endif; ?> <!-- post loop end --> |
Topic: enable sidebar/widgets for theme
To enable the sidebar in wordpress admin, you should first register this sidebar.
register_sidebar(array(
‘name’=>’set name’,
‘id’=>’set a unique name’,
));
After this it will show a “widgets” option in the admin panel.
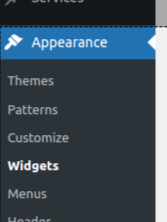
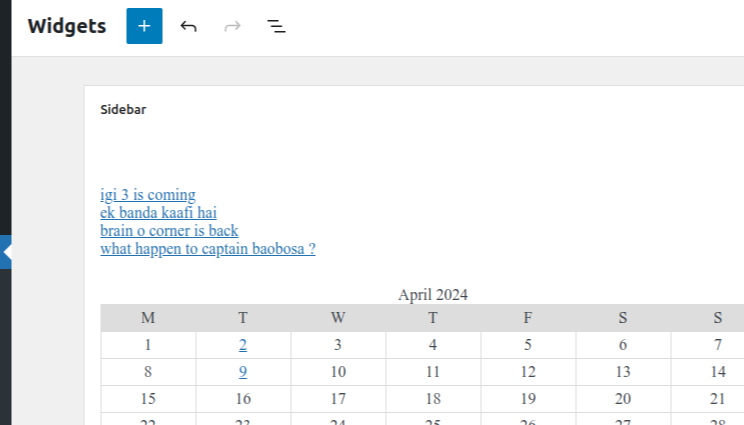
In the “functions.php“
// enable widgets option in sidebar wordpress admin register_sidebars(array( 'name'=>'custom sidebar', 'id'=>'sidebar', )); |
Now inside this thing inside like ‘template-blogs.php’
<?php dynamic_sidebar('sidebar'); ?> |
Note: when you call sidebar you can call using “get_sidebar(‘sidebar-name’)”.
Topic: set the title of page/website
So we can set the website all pages title using function:
bloginfo(‘name’)
We can get the tagline also by using
bloginfo(‘description’)
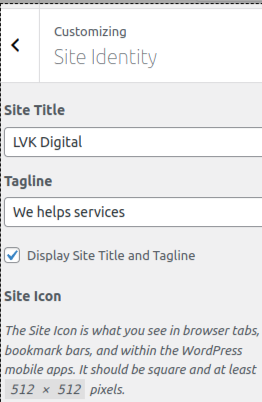
Topic: set 404 page
For settings 404 - not found page inside wordpress, we need to create a page as “404.php”
Topic: Get the category listing
We can get all the categories by the “get_categories()” function and it will return a php array.
We can get the category link by using, “get_category_link($cat->termid)”. Follow the below code …
<?php $categories = get_categories( array( 'taxonomy' => 'category', // Taxonomy to retrieve terms for. We want 'category'. Note that this parameter is default to 'category', so you can omit it 'orderby' => 'name', 'parent' => 0, 'hide_empty' => 0, // change to 1 to hide categores not having a single post ) );
foreach($categories as $category) { echo '<div class="col-md-4"><a href="' . get_category_link($category->term_id) . '">' . $category->name . '</a>'.$category->count.'</div>'; } ?> |
Topic: excerpt text support
sometimes you might find an excerpt text option in post, then you can use this function…. add_post_type_support( ‘page’, ‘excerpt’ );
Topic: taxonomy
In WordPress, taxonomy refers specifically to a system for classifying and organizing your content. It's like a filing cabinet for your website's posts, pages, or custom post types.
In simple words, we can say the category is also a type of taxonomy. we found a category inside the “post” option in wordpress admin.
In post taxonomy becomes like: http://localhost/site6/wp-admin/edit-tags.php?taxonomy=category
If we create a custom taxonomy then it may becomes: http://localhost/site6/wp-admin/edit-tags.php?taxonomy=service_category&post_type=services
Let’s see the code on how to create a custom taxonomy.
// custom taxonomy creation - functions.php function register_custom_taxonomy() { $labels = array( 'name' => _x('Categories', 'taxonomy general name'), 'singular_name' => _x('Category','taxonomy singular name'), 'search_items' => __('Search Category'), 'all_items' => __('All Category'), 'parent_item' => __('Parent Category'), 'parent_item_colon' => __('Parent Category:'), 'edit_item' => __('Edit Category'), 'update_item' => __('Update Category'), 'add_new_item' => __('Add New Category'), 'new_item_name' => __('New Category Name'), 'menu_name' => __('Categories'), );
$args = array( 'hierarchical' => true, 'labels' => $labels, 'show_ui' => true, 'show_admin_column' => true, 'query_var' => true, 'show_in_rest' => true, 'rewrite' => array('slug' => 'service_detail'), );
register_taxonomy('service_category', 'services', $args); } add_action('init', 'register_custom_taxonomy'); |
Here are 2 things that should be understood… ‘service_category’ is the name of a taxonomy which will be generated against post type ‘services’. When you click on any post related to ‘service_category’ it will open browser url inside ‘service_detail’
Topic: how to filter/shows taxonomy posts
Here I will guide you on how to display posts depending upon taxonomy. Let’s assume a scenario where we are building a project, where we have services-> online and offline services. We have relevant posts regarding those. But customers may select one category to show posts against that.
We have 2 files - “template-service.php”, “taxonomy-service_category.php” and “functions.php”. Inside the service's page I have listed down all the codes….
template-service.php |
<?php $values = get_terms('service_category'); foreach ($values as $term) { echo "<a href='" . get_term_link($term) . "'>" . $term->name . "</a><br>"; } ?> |
taxonomy-service_category.php |
<div class="row"> <?php if (have_posts()): while (have_posts()): the_post(); $thumbnail = wp_get_attachment_image_src(get_post_thumbnail_id(), 'medium'); ?> <!-- services start --> <div class="col-lg-4 col-md-6 service-col"> <div class="single-blog-grid service-grid"> <figure> <img src="<?php echo $thumbnail[0]; ?>" alt="" /> </figure> <figcaption class="text-white service_cnt_wrap"> <h3><?php echo the_title(); ?></h3> <p> <?php echo get_the_excerpt(); ?> </p> <a href="<?php the_permalink(); ?>">Read More</a> </figcaption> </div> </div> <!-- servives end --> <?php endwhile; endif; ?>
</div> |
Topic: custom forms fields - ACF
We can make dynamic form’s fields in our wordpress site. For that we will use a plugin called ACF. you can manually download from plugins or also use a PRO version.
Let’s first install or shift the zip folder to wp-incldes/plugin folder.
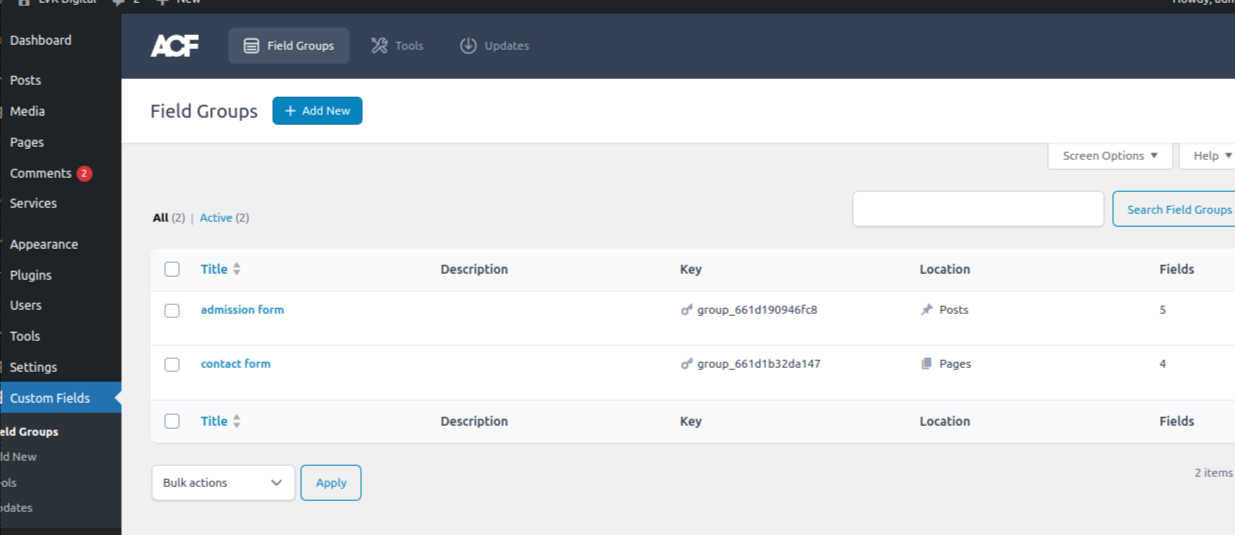
Note: linked peculiar page with the form group. Always use ‘get_field’ instead of ‘the_field’.
Now enter data manually, ex: contact us.
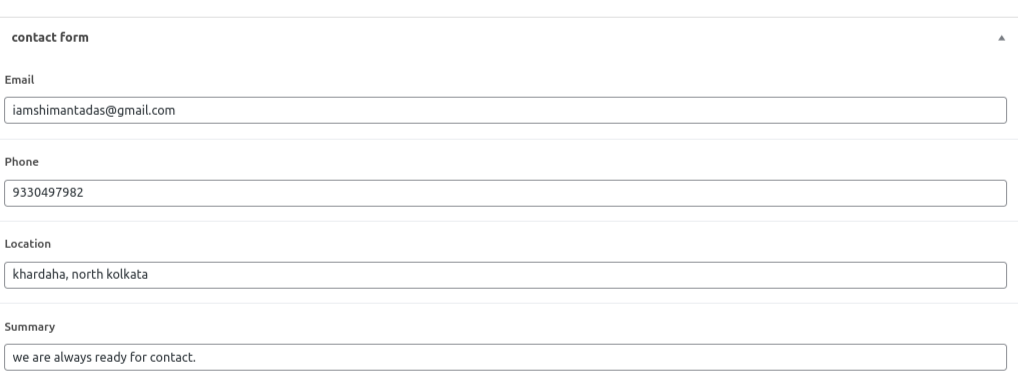
Now in the contact us page i see url looks like: http://localhost/site6/wp-admin/post.php?post=18&action=edit
So, now for adding custom form fields in the template page use,
<p><a href=""> <?php get_field('phone', 18); ?> </a></p>
Here ‘phone’ is the field name, which is mentioned in the form group and post id ‘18’.
But one thing to note, when applying ACF fields into pages, we should use dynamic id.
// make page id dynammic $post_id = get_the_ID(); |
Topic: how to apply repeater in ACF
We can apply an ACF repeater when we need to apply some fields which will be repeated. For example: in courses we have several courses which will be repeated but their data will change.
Step 1: first make a repeater field and mention its name. It will be required when you call the repeater name.

Step 2: now add the custom sub-field under that.

For calling the acf repeater field use the following codeblock…
<?php if( have_rows('repeater_field_name') ): while( have_rows('repeater_field_name') ) : the_row(); $sub_value = get_sub_field('sub_field');
endwhile; else : // Do something... endif; |
Note: we can set ACF fields for custom post type too.
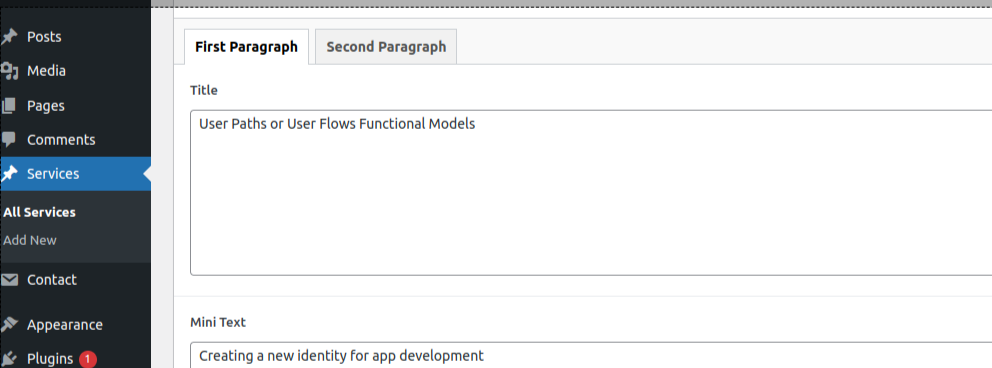
Now you can directly fetch ACF field data against that related post. See below code …
<h2> <?php echo get_field('service_details_title'); ?> </h2> <p class="pink-dash"> <?php echo get_field('service_details_mini_text'); ?> </p> |
One thing to note, we can pass the post ID in the acf repeater field. Let’s see how …
<?php if (have_rows('home_footer_widgets_items',19)): while (have_rows('home_footer_widgets_items',19)): the_row(); $name = get_sub_field('home_footer_widgets_item_name'); |
For more visit docs: https://www.advancedcustomfields.com/resources/have_rows/
Topic: Inner fields in common pages using ACF
Sometimes you have a situation like the same design which overrides front-page/home and some other page. So in that time, we can use two techniques -
ACF with 2 pages options

ACF with Theme Options
Step 1:
// functions.php // option panel enable if (function_exists('acf_add_options_page')) {
// Add the Theme Footer Settings subpage acf_add_options_sub_page( array( 'page_title' => 'Benefits Section', 'menu_title' => 'Sell Beginefits', 'parent_slug' => 'theme-general-settings', 'capability' => 'manage_options' // Make sure it has the same capability as the parent ) );
} |
Step 2: now make a sidebar file, ex: “sidebar-why-chooseus.php”
<?php if (have_rows('benefits_section', 'option')): while (have_rows('benefits_section', 'option')): the_row(); $image = get_sub_field('benefits_section_image'); $text = get_sub_field('benefits_section_title'); $paragraph = get_sub_field('benefits_section_paragraph'); ?> <li> <div class="benefit-box"> <div class="icon-holder"> <img src="<?php echo $image['url']; ?>"> </div> <div class="content-holder"> <h4><?php echo $text; ?></h4> <p> <?php echo $paragraph; ?> </p> </div> </div> </li> <?php endwhile; else: endif; ?> |
Step 3: now includes that sidebar file into any pages, ex: front-page.php, templates/services.php
<!--Banner sction--> <?php echo get_sidebar('why-chooseus'); ?> |
Topic: contact form 7
We can make contact forms using this plugin.
Mail To:shimanta.das@admin.com From:[_site_title] <wordpress@virtus-healthcare.admin.com> Subject: [_site_title] - Website Contact Form Message Body: Hi, [first-name] is trying to contact you. Information are as follows: Name: [first-name] [last-name] Email Id: [email-82] Message: [textarea-475]
Mail 2 To: [email-82] From:[_site_title] <wordpress@virtus-healthcare.admin.com> Subject: [_site_title] - Website Contact Form Additional Headers: Reply-To: [_site_admin_email] Message Body: Hi, [first-name] Thank you for contacting us. We will get back to you shortly. The information that we have are as follows: Name: [first-name] [last-name] Email Id: [email-82] Message: [textarea-475] |
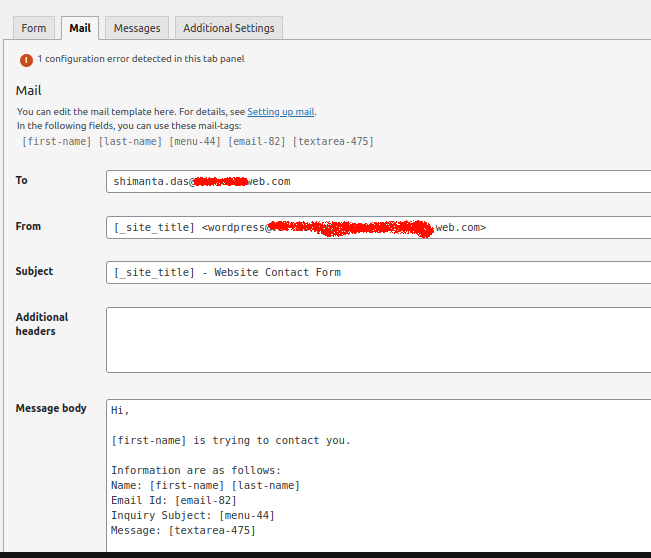
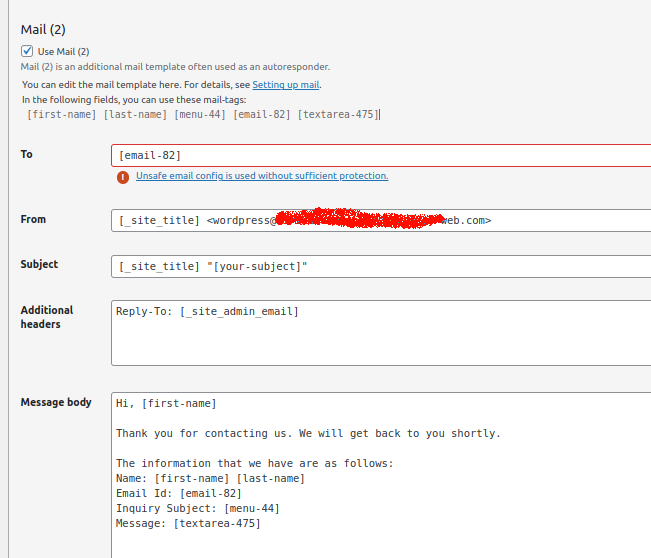
Form modified code looks like…
<div class="row"> <div class="col-lg-6"> <div class="form-group"> <label>First Name*</label> [text* first-name id:first-name class:form-control placeholder "Enter your first name"]
</div> </div> <div class="col-lg-6"> <div class="form-group"> <label>Last Name*</label> [text* last-name id:last-name class:form-control placeholder "Enter your last name"] </div> </div> <div class="col-lg-6"> <div class="form-group"> <label>What best describes your inquiry?*</label> [select* inquiry id:inquiry class:form-control "Choose best inquiry" "Current Traveler/Contractor" "Prospective Candidate" "Employment Verification" "General Inquiry" "Workforce Solutions" "Current"]
</div> </div> <div class="col-lg-6"> <div class="form-group"> <label>Email Address*</label> [email* email-82 id:email class:form-control placeholder "Enter your email address"] </div> </div> <div class="col-lg-12"> <div class="form-group"> <label>Description</label> [textarea textarea-475 id:description class:form-control placeholder "Description"] </div> </div> <div class="col-lg-12"> [submit id:submit class:submit-btn "Submit Request"] </div> </div> |
This is the validation code that you could apply into custom.js file
//**************************// ///////Validation Code /////// //**************************//
// phone number validation jQuery(document).ready(function() { jQuery('input[name="phone"]').on('input', function() { var phoneNumber = jQuery(this).val().replace(/\D/g, ''); if (phoneNumber.length > 15) { phoneNumber = phoneNumber.slice(0, 15); } jQuery(this).val(phoneNumber); }); jQuery('input[name="phone"]').blur(function() { var phoneNumber = jQuery(this).val().replace(/\D/g, ''); if (phoneNumber.length < 6) { alert("Phone Number should be at least 6 digits!"); } }); });
// first name with emoji and others validation jQuery(document).ready(function(){ function containsEmoji(text) { var emojiPattern = /[\u{1F600}-\u{1F64F}\u{1F300}-\u{1F5FF}\u{1F680}-\u{1F6FF}\u{2600}-\u{26FF}\u{2700}-\u{27BF}]/u; return emojiPattern.test(text); } jQuery('input[name="first_name"]').on('input', function(e){ var inputText = jQuery(this).val(); if (containsEmoji(inputText)) { var newText = inputText.replace(/[\u{1F600}-\u{1F64F}\u{1F300}-\u{1F5FF}\u{1F680}-\u{1F6FF}\u{2600}-\u{26FF}\u{2700}-\u{27BF}]/ug, ''); jQuery(this).val(newText); } }); jQuery('input[name="first_name"]').on('paste', function(e){ var input = e.originalEvent.clipboardData.getData('text'); if (containsEmoji(input)) { var newText = input.replace(/[\u{1F600}-\u{1F64F}\u{1F300}-\u{1F5FF}\u{1F680}-\u{1F6FF}\u{2600}-\u{26FF}\u{2700}-\u{27BF}]/ug, ''); jQuery(this).val(newText); } }); });
// last name with emoji and others validation jQuery(document).ready(function(){ function containsEmoji(text) { var emojiPattern = /[\u{1F600}-\u{1F64F}\u{1F300}-\u{1F5FF}\u{1F680}-\u{1F6FF}\u{2600}-\u{26FF}\u{2700}-\u{27BF}]/u; return emojiPattern.test(text); } jQuery('input[name="last_name"]').on('input', function(e){ var inputText = jQuery(this).val(); if (containsEmoji(inputText)) { var newText = inputText.replace(/[\u{1F600}-\u{1F64F}\u{1F300}-\u{1F5FF}\u{1F680}-\u{1F6FF}\u{2600}-\u{26FF}\u{2700}-\u{27BF}]/ug, ''); jQuery(this).val(newText); } }); jQuery('input[name="last_name"]').on('paste', function(e){ var input = e.originalEvent.clipboardData.getData('text'); if (containsEmoji(input)) { var newText = input.replace(/[\u{1F600}-\u{1F64F}\u{1F300}-\u{1F5FF}\u{1F680}-\u{1F6FF}\u{2600}-\u{26FF}\u{2700}-\u{27BF}]/ug, ''); jQuery(this).val(newText); } }); });
//block emoji for email jQuery(document).ready(function(){ function containsEmoji(text) { var emojiPattern = /[\u{1F600}-\u{1F64F}\u{1F300}-\u{1F5FF}\u{1F680}-\u{1F6FF}\u{2600}-\u{26FF}\u{2700}-\u{27BF}]/u; return emojiPattern.test(text); } jQuery('input[name="email-address"]').on('input', function(e){ var inputText = jQuery(this).val(); if (containsEmoji(inputText)) { var newText = inputText.replace(/[\u{1F600}-\u{1F64F}\u{1F300}-\u{1F5FF}\u{1F680}-\u{1F6FF}\u{2600}-\u{26FF}\u{2700}-\u{27BF}]/ug, ''); jQuery(this).val(newText); } }); jQuery('input[name="email-address"]').on('paste', function(e){ var input = e.originalEvent.clipboardData.getData('text'); if (containsEmoji(input)) { var newText = input.replace(/[\u{1F600}-\u{1F64F}\u{1F300}-\u{1F5FF}\u{1F680}-\u{1F6FF}\u{2600}-\u{26FF}\u{2700}-\u{27BF}]/ug, ''); jQuery(this).val(newText); } }); });
jQuery(document).ready(function() { jQuery('input[name="first_name"]').keydown(function(event) { return /[a-z\s]/i.test(event.key); }); });
jQuery(document).ready(function() { jQuery('input[name="last_name"]').keydown(function(event) { return /[a-z\s]/i.test(event.key); }); });
// address with emoji and others validation jQuery(document).ready(function(){ function containsEmoji(text) { var emojiPattern = /[\u{1F600}-\u{1F64F}\u{1F300}-\u{1F5FF}\u{1F680}-\u{1F6FF}\u{2600}-\u{26FF}\u{2700}-\u{27BF}]/u; return emojiPattern.test(text); } jQuery('input[name="address"]').on('input', function(e){ var inputText = jQuery(this).val(); if (containsEmoji(inputText)) { var newText = inputText.replace(/[\u{1F600}-\u{1F64F}\u{1F300}-\u{1F5FF}\u{1F680}-\u{1F6FF}\u{2600}-\u{26FF}\u{2700}-\u{27BF}]/ug, ''); jQuery(this).val(newText); } }); jQuery('input[name="address"]').on('paste', function(e){ var input = e.originalEvent.clipboardData.getData('text'); if (containsEmoji(input)) { var newText = input.replace(/[\u{1F600}-\u{1F64F}\u{1F300}-\u{1F5FF}\u{1F680}-\u{1F6FF}\u{2600}-\u{26FF}\u{2700}-\u{27BF}]/ug, ''); jQuery(this).val(newText); } }); }); jQuery(document).ready(function() { jQuery('input[name="address"]').keydown(function(event) { return /[a-z\s]/i.test(event.key); }); });
//**************************// /////Validation Code End////// //**************************// |
Topic: file in contact form 7
We can send a file as an attachment in the mailbox.
add_action('wpcf7_before_send_mail', 'attach_excel_file_to_email', 10, 3); function attach_excel_file_to_email($contact_form, &$abort, $submission) { // Get the form data $data = $submission->get_posted_data();
// Debug: Log the submitted data error_log('Form data: ' . print_r($data, true));
// Check if the checkbox is checked if (isset($data['checkbox-352']) && in_array('Send me a budget template', $data['checkbox-352'])) { // Get the file path from ACF option $excel_file_url = get_field('budget_file', 'option'); $excel_file_path = str_replace(wp_upload_dir()['baseurl'], wp_upload_dir()['basedir'], $excel_file_url);
// Debug: Log the file path error_log('Excel file path: ' . $excel_file_path);
// Check if the file exists if (file_exists($excel_file_path)) { // Get the Mail 2 property (autoresponder) $mail_2 = $contact_form->prop('mail_2');
// Debug: Log the Mail 2 properties before adding the attachment error_log('Mail 2 before: ' . print_r($mail_2, true));
// Attach the file to Mail 2 $mail_2['attachments'] = $excel_file_path;
// Update the Mail 2 property $contact_form->set_properties(array('mail_2' => $mail_2));
// Debug: Log the Mail 2 properties after adding the attachment error_log('Mail 2 after: ' . print_r($mail_2, true)); } else { error_log('Excel file not found: ' . $excel_file_path); } } } |
In the template page we should apply it like this…
<div class="col-lg-8"> <div class="contact-form"> <?php echo do_shortcode('[contact-form-7 id="0e559dd" title="dummy form"]') ?> </div> </div> |
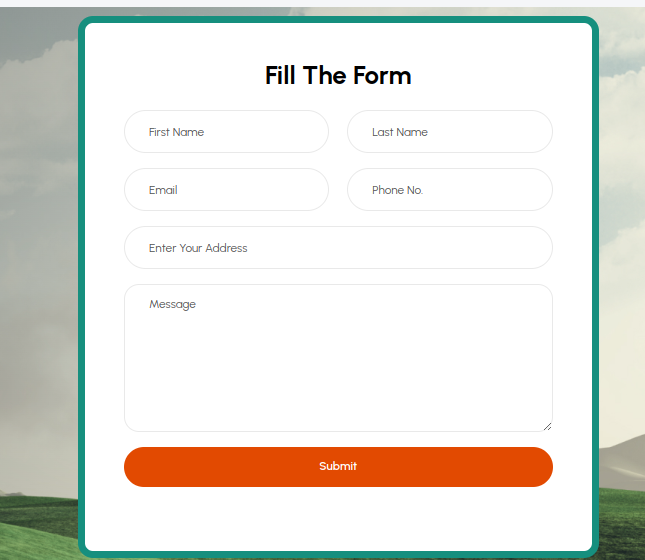
Topic: custom contact form
We can make our own custom contact form.
<script src="https://cdn.jsdelivr.net/npm/sweetalert2@11"></script>
<?php //Template Name: Contact get_header(); ?>
<?php
//user posted variables $name = $_POST['name']; $email = $_POST['email']; $message = $_POST['message'];
if($name && $email && $message){
//php mailer variables $to = get_option('admin_email'); $subject = "Contact Request"; $headers = 'From: '. $email . "\r\n" . 'Reply-To: ' . $email . "\r\n";
//Here put your Validation and send mail $sent = wp_mail($to, $subject, strip_tags($message), $headers); if($sent) { //message sent! echo '<script> Swal.fire({ title: "Thanks For Contacting Us!", text: "Your request has been submitted!", icon: "success" }); </script>'; } else { //message wasn't sent echo '<script> Swal.fire({ title: "Error Occured!", text: "Your request has not been submitted!", icon: "error" }); </script>'; } }else{
} ?> |
Topic: support file meme type(ex: .svg)
// enable support for .cvg image files function cc_mime_types($mimes) { $mimes['svg'] = 'image/svg+xml'; return $mimes; } add_filter('upload_mimes', 'cc_mime_types'); |
Topic: Read more and less concept
If you want to display more and less code in your ACF description.
<?php get_header(); ?>
<!-- service detail --> <main> <section class="fmodel sec_pad"> <div class="col-lg-6"> <div class="mid-text" id="description_text"> <p class="content-short"> <?php echo substr(get_field('service_details_description'),0,500); ?> ... </p> <p class="content-full" style="display: none;"> <?php echo get_field('service_details_description'); ?> </p> <a href="#" class="btn-underline mt-2 read-more-link">Read More</a>
</div> </div> </section>
</main>
<script> document.addEventListener("DOMContentLoaded", function() { const readMoreLinks = document.querySelectorAll(".read-more-link"); readMoreLinks.forEach(link => { link.addEventListener("click", function(event) { event.preventDefault(); const contentShort = this.parentElement.querySelector(".content-short"); const contentFull = this.parentElement.querySelector(".content-full"); if (contentShort.style.display === "none") { // Content is expanded, so show short content and update link text contentShort.style.display = "block"; contentFull.style.display = "none"; this.textContent = "Read More"; } else { // Content is collapsed, so show full content and update link text contentShort.style.display = "none"; contentFull.style.display = "block"; this.textContent = "Read Less"; } }); }); }); </script>
<?php get_footer(); ?> |
Topic: load more
When you applying load more with ajax then we should set some logic into ‘functions.php’ and ‘blogs.php’ or any single-posttype.php
** load more button hide while no posts: if you want to hide load more button while there is no upcoming posts, then you should pass “offset” value. There have a simple login -
Post per page - 3, offset - 6
Post per page - 6, offset - 9
** Note: you don’t need “post per page”. You need to pass “offset” value. If offset value equals to “total post number” OR offset equals to “total post number” then hide this.
single-posttype.php |
<section class="inspired-section inspired-inner-section common-padding"> <div class="container"> <div class="section-title"> <h3>yachts in Croatia</h3> </div> <div class="row new_post_append">
<?php $args = array( 'posts_per_page' => 3, 'order' => 'DESC', 'post_type' => 'inspirations', 'paged' => 1, ); $wq = new WP_Query($args); if ($wq->have_posts()): while ($wq->have_posts()): $wq->the_post(); $thumbnail = wp_get_attachment_image_src(get_post_thumbnail_id(), 'medium'); ?> <div class="col-lg-4 col-md-6 item"> <a href="<?php echo the_permalink(); ?>"> <div class="inspired-box"> <div class="image-box"><img src="<?php echo get_template_directory_uri(); ?>/images/inspired-1.jpg" alt=""></div> <div class="info-box"> <h4> <?php echo get_the_title(); ?> </h4> <p> <?php echo get_the_excerpt(); ?> </p> <span class="info-btn">More info</span> </div> <div class="date-box"><span> <?php echo get_the_date(); ?> </span></div> </div> </a> </div> <?php endwhile; endif; ?> </div> <div class="button-row text-center"> <a href="" id="load_more_btn" class="btn">Load more</a> </div> </div> </section>
<script>
let offSet = 3; let PostPerPage = 3;
jQuery('#document').ready(function () { jQuery('#load_more_btn').click(function (e) { e.preventDefault(); jQuery.ajax({ type: "POST", url: ajaxurl, data: { action: 'ajax_load_more', offset: offSet, postperpage: PostPerPage, }, success: function (response) { console.warn(response); offSet = offSet +PostPerPage; jQuery('.new_post_append').append(response); }, });
}); }); </script> |
functions.php |
add_action('wp_ajax_ajax_load_more', 'load_more1'); add_action('wp_ajax_ajax_load_more', 'load_more1'); function load_more1() { // print_r($_POST); $offset = $_POST['offset']; $post_per_page = $_POST['postperpage']; $paged = (get_query_var('paged')) ? get_query_var('paged') : 1;
$args = array( 'posts_per_page' => $post_per_page, 'order' => 'DESC', 'post_type' => 'inspirations', 'paged' => $paged, 'offset' => $offset, ); $wq = new WP_Query($args); echo $wq->found_posts; if ($wq->have_posts()): while ($wq->have_posts()): $wq->the_post(); ?> <div class="col-lg-4 col-md-6 item"> <a href="<?php echo the_permalink(); ?>"> <div class="inspired-box"> <div class="image-box"><img src="<?php echo get_template_directory_uri(); ?>/images/inspired-1.jpg" alt=""> </div> <div class="info-box"> <h4> <?php echo get_the_title(); ?> </h4> <p> <?php echo get_the_excerpt(); ?> </p> <span class="info-btn">More info</span> </div> <div class="date-box"><span> <?php echo get_the_date(); ?> </span></div> </div> </a> </div>
<?php endwhile; endif;
$args = array( 'posts_per_page' => $post_per_page, 'post_type' => 'inspirations', 'paged' => $paged, 'offset' => $offset + $post_per_page, ); $wq = new WP_Query($args);
if (!$wq->found_posts) { ?> <script> jQuery('#load_more_btn').hide(); </script> <?php }
wp_die(); }
add_action('wp_head', 'hook_javascript'); function hook_javascript() { ?> <script type="text/javascript"> var ajaxurl = "<?php echo admin_url('admin-ajax.php') ?>"; </script> <?php } |
Topic: newsletter form using mailchimp
When we working on wordpress, sometime we need to work with newsletter subscription form. That time we should work with maichip which will automate our newsletter subscription form process. First create your mailchimp account with your email. Now go to, API section: https://us18.admin.mailchimp.com/account/api/
Now, install WP4MC plugin from wordpress admin.
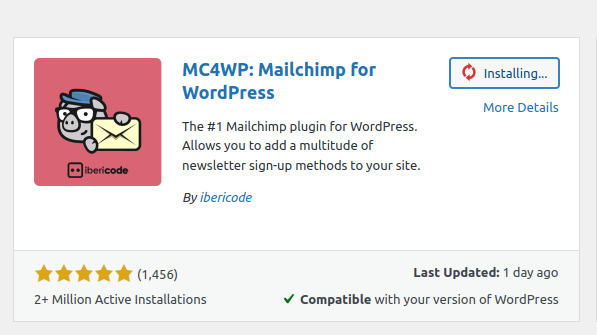
Now modify the form code and then paste the generated short code into template page of wordpress.
Topic: search post
We can make searches in the post. Let’s see how to achieve this …
Ex: blog.php/template-filename.php |
<form role="search" method="get" action="<?php echo esc_url(home_url('/')); ?>"> <div class="form-group"> <div class="input-group mb-3"> <input value="<?php echo get_search_query(); ?>" name="s" class="form-control" placeholder="Search Keyword"> <div class="input-group-append"> <button class="btn" type="submit"><i class="ti-search"></i></button> </div> </div> </div> <button class="button rounded-0 primary-bg text-white w-100" type="submit">Search</button> </form> |
Now , you also need to make a “search.php” file.
search.php |
<h2>Search Results for "<?php echo get_search_query(); ?>"</h2>
<br>
<?php if ( have_posts() ) : ?> <?php while ( have_posts() ) : the_post(); ?>
<?php $thumbnail = wp_get_attachment_image_src(get_post_thumbnail_id(), 'medium'); $day = get_the_time(' j '); $month = get_the_time(' F '); ?> <article class="blog_item"> <div class="blog_item_img"> <img class="card-img rounded-0" src="<?php echo $thumbnail[0]; ?>" alt=""> <a href="#" class="blog_item_date"> <h3> <?php echo $day; ?> </h3> <p><?php echo $month; ?></p> </a> </div>
<div class="blog_details"> <a class="d-inline-block" href="<?php echo the_permalink(); ?>"> <h2> <?php echo get_the_title(); ?> </h2> </a> <p> <?php echo get_the_excerpt(); //echo substr(get_the_content(),0,300)." ... "; ?> </p> <ul class="blog-info-link"> <li><a href="#"><i class="far fa-user"></i> <?php // passing post ID to post categories $categories = wp_get_post_categories($post_id = get_the_ID()); foreach($categories as $category){ $cat = get_category($category); echo $cat->name.","; } ?> </a></li> <li><a href="#"><i class="far fa-comments"></i> <?php echo get_comments_number(); ?> Comments</a></li> </ul> </div> </article>
<?php endwhile; ?> <?php else : ?> <p><?php esc_html_e( 'Sorry, no posts matched your search. Please try again with different keywords.', 'textdomain' ); ?></p> <?php endif; ?> |
Topic: meta key, meta value ~ search user in wordpress
You can search any user meta key and it’s value with.
$phone = $_POST['phone'];
// seach via phone nmber meta field if user exist $args = array( 'meta_key' => 'phone', 'meta_value' => $phone ); $user_query = new WP_User_Query($args); $user = $user_query->get_results(); foreach ($user as $user) { $name = $user->display_name; }
if($name){ // action } |
We can find the user's first name and last name too.
$phone = sanitize_text_field($_POST['phone']); $args = array( 'meta_key' => 'phone', 'meta_value' => $phone );
$user_query = new WP_User_Query($args); print_r($user_query); $user = $user_query->get_results(); foreach ($user as $user) { $name = $user->display_name; $fname = $user->first_name; $lname = $user->last_name; } echo $name." ".$fname." ".$lname;
wp_die(); |
We can find any meta key ex:phone value of current logged in user.
$id = get_current_user_id(); echo get_user_meta( get_current_user_id(), 'phone', true ); |
—----------------------------------------------------------------------------------------------------------------------
Topic: Carbon fields
We can make a custom form field type. For installing this go to, themes/ folder of your custom theme and paste the command:
composer require htmlburger/carbon-fields
In your functions.php
use Carbon_Fields\Container; use Carbon_Fields\Field;
add_action('carbon_fields_register_fields', 'crb_attach_theme_options'); function crb_attach_theme_options() { Container::make('theme_options', __('Theme Options')) ->add_fields( array( Field::make('rich_text', 'crb_footer_copyright', 'Copyright'), ) ); } |
After that you will get an option as “Theme Options” inside wp-admin and inside there your will find a rich text box.
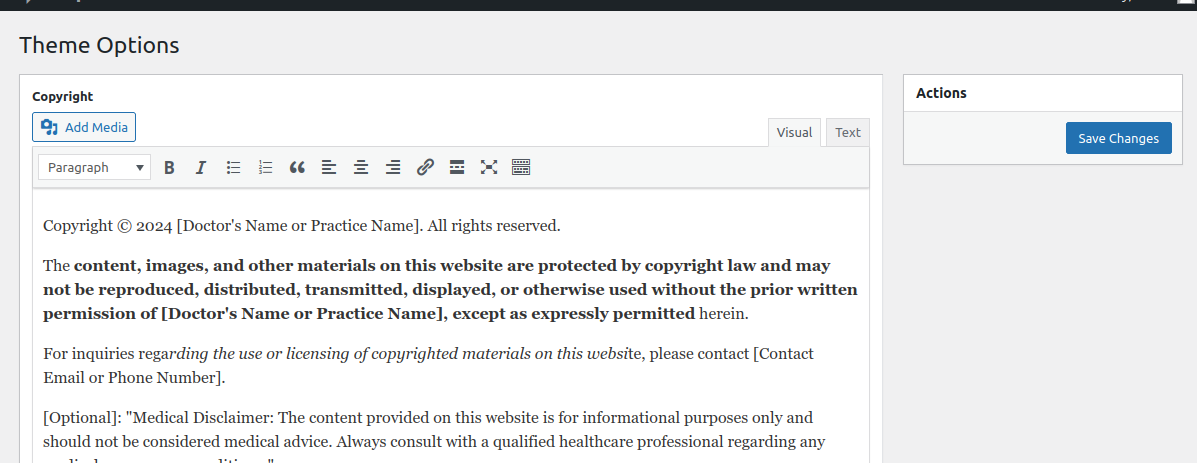
Let’s see how to make some tabs inside “Theme Options”.
use Carbon_Fields\Container; use Carbon_Fields\Field;
add_action('carbon_fields_register_fields', 'crb_attach_theme_options'); function crb_attach_theme_options() { Container::make('theme_options', __('Theme Options')) ->add_tab( 'Footer', array( Field::make('rich_text', 'crb_footer_copyright', 'Copyright'), ) ) ->add_tab( 'Social', array( Field::make('text', 'crb_social_url_facebook', 'Facebook URL') ->set_help_text('Enter your Facebook page url'), Field::make('text', 'crb_social_url_twitter', 'Twitter URL') ->set_help_text('Enter your Twitter profile url'), ) );
} |
Let’s see some react of these…
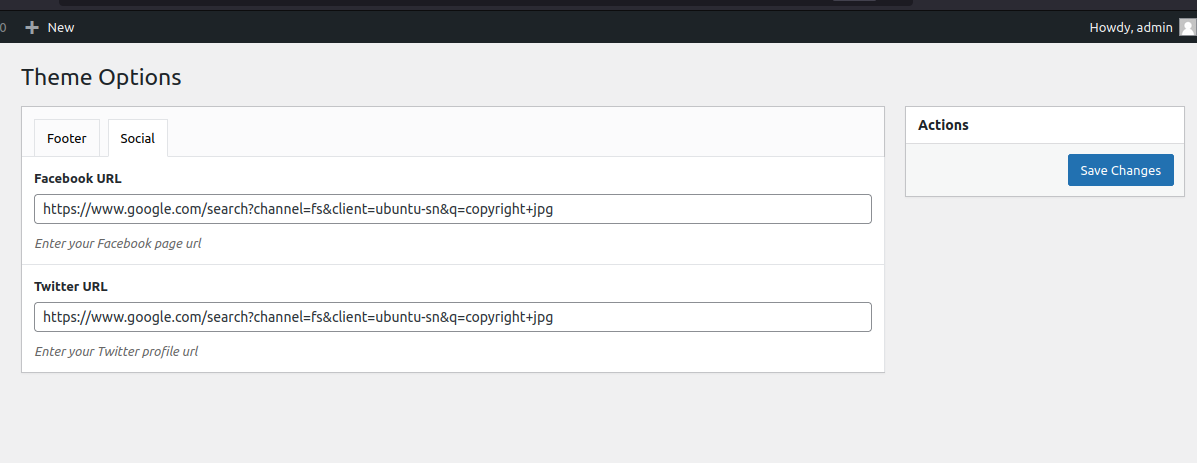
Note: you can wrap up carbon fields with some specific pages.
functions.php |
add_action('carbon_fields_register_fields', 'crb_attach_post_meta'); function crb_attach_post_meta() { // mentioning the post id(page) -- ex: departments $post_id = '355';
Container::make('post_meta', __('Product Custom Fields', 'cpg')) ->where('post_type', '=', 'page') ->where('post_id', '=', $post_id) ->add_tab( 'Banner Area', array( Field::make('text', 'cpg_product_heading', 'Banner Heading'), Field::make('text', 'cpg_product_short_text', 'Banner Short Text'), Field::make('text', 'cpg_product_url', 'Product Page URL')->set_attribute('type', 'url'), ) ) ->add_tab('Products',array( Field::make('complex', 'crb_slides', 'Slides') ->set_layout('tabbed-horizontal') ->add_fields( array( Field::make('image', 'cpg_product_thumbnail', 'Product Thumbnail'), Field::make('text', 'cpg_product_full_name', 'Product Full Name'), Field::make('text', 'cpg_product_price', 'Product Price'), )), ) ); } |
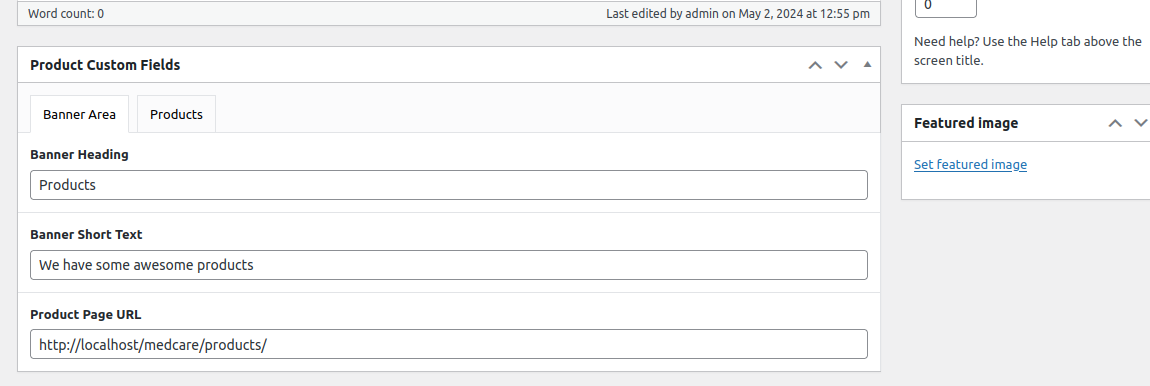
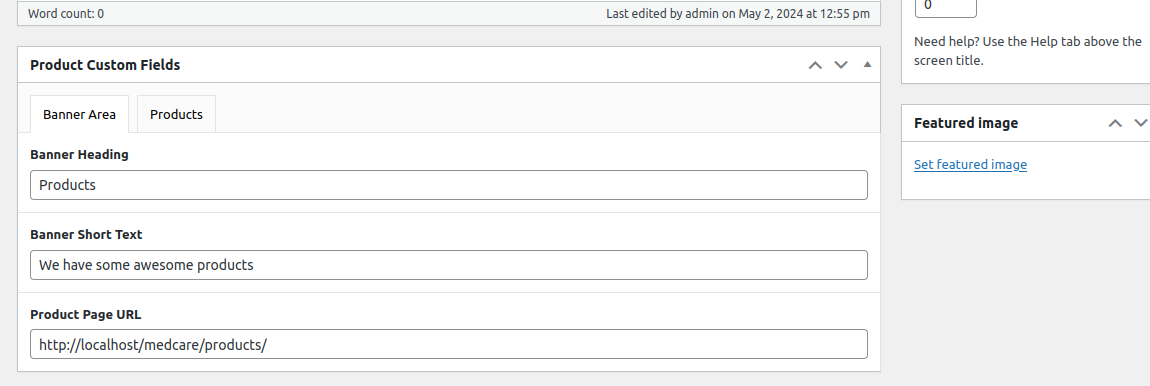
You can associate some common carbon fields with all posts or even specific post too.
Container::make('post_meta', __('Post Custom Fields', 'crb')) ->where('post_type', '=', 'post') |
Note: sometimes we need to add some custom classes to active fields/pages where we stay … how to load that class for that..
add_filter('nav_menu_css_class' , 'special_nav_class' , 10 , 2);
function special_nav_class ($classes, $item) { if (in_array('current-menu-item', $classes) ){ $classes[] = 'active '; } return $classes; } |
Topic: Option Panel enable
We can enable the option panel in wp-admin. After that you will get a “Theme Options” inside the admin panel.
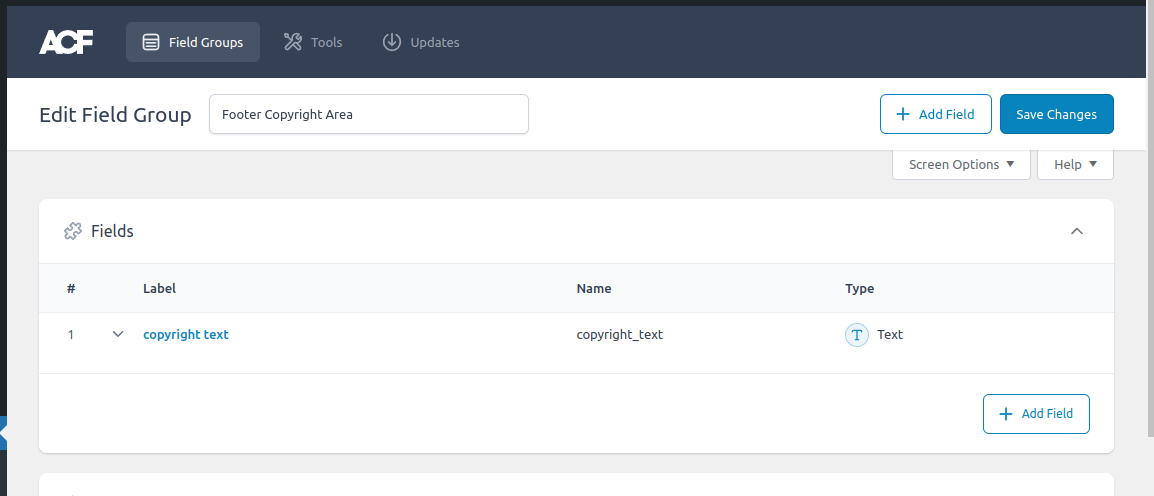
function.php |
// option panel enable if( function_exists('acf_add_options_page') ) { // Add the Theme General Settings page acf_add_options_page(array( 'page_title' => 'Theme General Settings', 'menu_title' => 'Theme Settings', 'menu_slug' => 'theme-general-settings', 'capability' => 'manage_options', // Change capability to manage_options 'redirect' => false ));
// Add the Theme Header Settings subpage acf_add_options_sub_page(array( 'page_title' => 'Theme Header Settings', 'menu_title' => 'Header', 'parent_slug' => 'theme-general-settings', 'capability' => 'manage_options' // Make sure it has the same capability as the parent ));
// Add the Theme Footer Settings subpage acf_add_options_sub_page(array( 'page_title' => 'Theme Footer Settings', 'menu_title' => 'Footer', 'parent_slug' => 'theme-general-settings', 'capability' => 'manage_options' // Make sure it has the same capability as the parent ));
} |
How to get the option value … in themes
// get option page value // syntax: <p><?php the_field('field_name', 'option'); ?></p> <?php echo get_field('copyright_text', 'option'); ?> |
Topic: how to add modal popup box on page-load
We can apply on-page load concepts.
<script> jQuery(document).ready(function ($) { $(document).ready(function () { console.log(“hello console”); }); }); </script> |
Let’s see how to show a modal box on-page load/ready.
<!-- modal box --> <div id="modal1" class="modal modal-dialog modal-dialog-centered" tabindex="-1"> <div class="modal-dialog"> <div class="modal-content"> <div class="modal-header"> <h5 class="modal-title">Modal title</h5> <button type="button" class="btn-close" data-bs-dismiss="modal" aria-label="Close"></button> </div> <div class="modal-body"> <p>Modal body text goes here.</p> </div> <div class="modal-footer"> <button type="button" class="btn btn-secondary" data-bs-dismiss="modal">Close</button> <button type="button" class="btn btn-primary">Save changes</button> </div> </div> </div> </div>
<script> jQuery(document).ready(function ($) { $(document).ready(function () { $("#modal1").modal('show'); }); }); </script> |
Topic: login and registration in wordpress custom
Part: registration
We will first hook the admin-ajax file via hook i wordpress.
function.php |
function hook_javascript() { ?> <script type="text/javascript"> var ajaxurl = "<?php echo admin_url('admin-ajax.php') ?>"; </script> <?php } add_action('wp_head','hook_javascript'); |
We can make custom login and registration forms. Let’s see the first registration part …
Register.php - template |
<div class="row"> <div class="col-2"></div> <div class="col-8">
<form action="#" method="post"> <div class="form-row"> <div class="form-group col-md-12"> <label for="inputEmail4">Email</label> <input type="email" class="form-control" id="inputEmail4" placeholder="Email"> </div> </div> <div class="form-row"> <div class="form-group col-md-12"> <label for="password">Password</label> <input type="password" class="form-control" id="password" placeholder="Enter Password"> </div> </div> <div class="form-row"> <div class="form-group col-md-12"> <label for="username">Username</label> <input type="text" class="form-control" id="username" placeholder="Enter Username"> </div> </div> <button type="button" id="submit_btn" class="btn btn-primary">Register</button> </form>
</div> <div class="col-2"></div> </div>
<script> jQuery(document).ready(function(){ jQuery('#submit_btn').click(function(){ var email = jQuery('#inputEmail4').val(); var username = jQuery('#username').val(); var password = jQuery('#password').val(); // register user via functions.php custom function jQuery.ajax({ type: "POST", url: ajaxurl, data: { action: 'form_register', useremail: email, username: username, password: password, confpassword: password, },
success: function (response) { console.log(response); }, }); }); </script> |
Let’s see the part, code registration logic…
functions.php |
function register_user() { $username = $_POST['username']; $email = $_POST['useremail']; $password = $_POST['password']; $confirm_password = $_POST['confpassword'];
if($password == $confirm_password){ $user_id = wp_create_user($username, $password, $email); if ( is_wp_error( $user_id ) ) { echo 'Error: ' . $user_id->get_error_message(); } return "Account registered successfully!"; wp_die(); }else{ return "Passwords not match!"; wp_die(); } } // this helps to work withdirect function - register_user add_action('wp_ajax_form_register', 'register_user'); // this helps to handeling incoming data add_action('wp_ajax_nopriv_form_register', 'register_user'); |
Part: login
Login login will works same as registration login in wordpress.
We can also works on login part too.
Login.php - template |
<div class="row"> <div class="col-2"></div> <div class="col-8">
<form action="#" method="post"> <!-- <div class="form-row"> <div class="form-group col-md-12"> <label for="inputEmail4">Email</label> <input type="email" class="form-control" id="inputEmail4" placeholder="Email"> </div> </div> --> <div class="form-row"> <div class="form-group col-md-12"> <label for="username">Username</label> <input type="text" class="form-control" id="username" placeholder="Enter Username"> </div> </div>
<div class="form-row"> <div class="form-group col-md-12"> <label for="password">Password</label> <input type="password" class="form-control" id="password" placeholder="Enter Password"> </div> </div> <button type="button" id="submit_btn" class="btn btn-primary">Login</button> </form>
</div> <div class="col-2"></div> </div>
<script> jQuery(document).ready(function(){ jQuery('#submit_btn').click(function(){ // var email = jQuery('#inputEmail4').val(); var username = jQuery('#username').val(); var password = jQuery('#password').val();
console.log(username, password);
jQuery.ajax({ type: "POST", url: ajaxurl, data: { action: 'form_login', // useremail: email, username: username, password: password, // confpassword: password, },
success: function (response) { console.log(response); },
});
}); }); </script> |
functions.php |
add_action('wp_ajax_form_login', 'login_user'); add_action('wp_ajax_nopriv_form_login', 'login_user'); function login_user() { print_r($_POST);
$username = sanitize_text_field($_POST['username']); $password = sanitize_text_field($_POST['password']);
$user = wp_signon( array( 'user_login' => $username, 'user_password' => $password, 'remember' => true // You can enable remember me option if needed ) );
if (is_wp_error($user)) { echo $user->get_error_message(); } else { // Login successful echo 'Login successful!'; }
// Always remember to terminate AJAX handling wp_die(); } |
Part: logged in check
We can check if the user is logged in or not.
if (is_user_logged_in()) { echo "<script> alert('You are logged in.'); </script>"; } else { echo "<script> alert('You not logged yet.'); </script>"; } |
Part: we can update user’s field data in wordpress user’s meta
We can update the user's record in user meta. These all fields will be stored in ‘wp_usermeta’ table.
function some_function() { // print_r($_POST);
$username = $_POST['username']; $email = $_POST['useremail']; $password = $_POST['password']; $confirm_password = $_POST['confpassword'];
$first_address = $_POST['first_address']; $second_address = $_POST['second_address']; $city = $_POST['city']; $state = $_POST['state']; $pincode = $_POST['pincode'];
$user_id = wp_create_user($username, $password, $email); if (is_wp_error($user_id)) { echo 'Error: ' . $user_id->get_error_message(); echo "failed"; } else {
update_user_meta($user_id, 'first_address', $first_address); update_user_meta($user_id, 'second_address', $second_address); update_user_meta($user_id, 'city', $city); update_user_meta($user_id, 'state', $state); update_user_meta($user_id, 'pincode', $pincode); echo "success"; } wp_die(); } |
functions.php |
// forget password - email existence check add_action('wp_ajax_email_existence', 'is_email_exist'); add_action('wp_ajax_nopriv_email_existence', 'is_email_exist'); function is_email_exist() { // print_r($_POST); $email = sanitize_text_field($_POST['email']); if(get_user_by( 'email', $email )){ echo "exist"; }else{ echo "failed"; } wp_die(); } |
cheat-code: custom reset password in wordpress via ajax - register ~ login ~ logout
We can check email existence in wordpress.
Sub Topic: register user
register.php |
<style> .error_msg { color: red; } </style>
<main>
<br> <br>
<div class="row"> <div class="col-2"></div> <div class="col-8">
<form action="#" method="post"> <div class="form-row"> <div class="form-group col-md-12"> <label for="inputEmail4">Email</label> <input type="email" class="form-control" id="inputEmail4" placeholder="Email"> </div> <div id="emailError" class="error_msg"> </div> </div> <div class="form-row"> <div class="form-group col-md-12"> <label for="password">Password</label> <input type="password" class="form-control" id="password" placeholder="Enter Password"> </div> <div id="passwordError" class="error_msg">
</div> </div> <div class="form-row"> <div class="form-group col-md-12"> <label for="username">Username</label> <input type="text" class="form-control" id="username" placeholder="Enter Username"> </div> <div id="userNameError" class="error_msg"> </div> </div> <div class="form-group"> <label for="inputAddress">Address</label> <input type="text" class="form-control" id="inputAddress" placeholder="1234 Main St"> </div> <div id="address1Error" class="error_msg"> </div>
<div class="form-group"> <label for="inputAddress2">Address 2</label> <input type="text" class="form-control" id="inputAddress2" placeholder="Apartment, studio, or floor"> </div> <div id="address2Error" class="error_msg"> </div>
<div class="form-row"> <div class="form-group col-md-6"> <label for="inputCity">City</label> <input type="text" class="form-control" id="inputCity"> </div> <div id="cityError" class="error_msg"> </div>
<div class="form-row"> <div class="form-group col-md-4"> <label for="inputState">State</label> <select id="inputState" class="form-control"> <option></option> <option value="west bengal">west bengal</option> <option value="bihar">bihar</option> <option value="oddisa">oddisa</option> <option value="gujrat">gujrat</option> </select> </div> <div id="StateError" class="error_msg"> </div> </div>
<div class="form-row"> <div class="form-group col-md-2"> <label for="inputZip">Pincode</label> <input type="text" class="form-control" id="inputZip"> </div> <div id="pincodeError" class="error_msg"> </div> </div>
</div> <div class="form-group"> <div class="form-check"> <input class="form-check-input" type="checkbox" id="gridCheck"> <label class="form-check-label" for="gridCheck"> Terms & Conditions </label> </div> <div id="terms_conditions_Error" class="error_msg"> </div> </div>
<button type="button" id="submit_btn" class="btn btn-primary">Register</button> </form>
</div> <div class="col-2"></div> </div>
<script> jQuery(document).ready(function () { jQuery('#submit_btn').click(function () { let sum = 0; var check_box = null; // clear all previous error messages jQuery('.error_msg').html('');
// getting all fields data using jquery var email = jQuery('#inputEmail4').val(); var address1 = jQuery('#inputAddress').val(); var address2 = jQuery('#inputAddress2').val(); var city = jQuery('#inputCity').val(); var state = jQuery('#inputState').val(); var zipcode = jQuery('#inputZip').val(); var username = jQuery('#username').val(); var password = jQuery('#password').val();
if (email) { const emailPattern = /^[a-zA-Z0-9._%+-]+@[a-zA-Z0-9.-]+\.[a-zA-Z]{2,}$/; const isValid = emailPattern.test(email); if (isValid) { sum = sum + 1; } else { jQuery("#emailError").html("Please provide correct email address"); } } else { jQuery("#emailError").html("Enter your email address"); } if (address1) { sum = sum + 1; } else { jQuery("#address1Error").html("Please enter your primary address"); } if (address2) { sum = sum + 1; } else { jQuery("#address2Error").html("Please enter your secodnary address"); } if (city) { sum = sum + 1; } else { jQuery("#cityError").html("Ener your city name"); } if (state) { sum = sum + 1; } else { jQuery("#StateError").html("Enter your state name"); }
if (username) { sum = sum + 1; } else { jQuery("#userNameError").html("Enter your unique username"); }
if (zipcode) { console.warn(zipcode, " ", zipcode.length); if (zipcode.length > 6 || zipcode.length <=5) { jQuery("#pincodeError").html("Your pincode should be within 6 digit only!"); } else { sum = sum + 1; } } else { jQuery("#pincodeError").html("Please provide your pincode"); } if (password.length >= 8) { const regex = /^(?=.*\d)(?=.*[a-z])(?=.*[A-Z])(?=.*[!@#$%^&*()\-+.]).{8,20}$/; if (regex.test(password)) { sum = sum + 1; } else { jQuery("#passwordError").html("Your password should mix of numbers, small & capital alphabets and special characters!"); } console.warn(regex.test(password)); } else { jQuery("#passwordError").html("Your password should be of 8 chars!"); }
if (sum == 8) { if (jQuery('#gridCheck').is(":checked")) { check_box = true;
//console.warn(email, zipcode, address1, address2, city, state, username, password); jQuery.ajax({ type: "POST", url: ajaxurl, data: { action: 'form_register', useremail: email, username: username, password: password, first_address: address1, second_address: address2, city: city, state: state, pincode: zipcode, }, success: function (response) { console.warn(response); if (response == "success") { alert("account registered successfully!"); // redirecting to login url window.location.href = "login/"; } else if (response == "failed") { alert("account registry failed! Try again! "); } }, }); } else { alert("Please check our terms and conditions!"); } } }); }); </script> </main> |
functions.php |
add_action('wp_ajax_form_register', 'register_user'); add_action('wp_ajax_nopriv_form_register', 'register_user');
function register_user() { // print_r($_POST);
$username = $_POST['username']; $email = $_POST['useremail']; $password = $_POST['password'];
$first_address = $_POST['first_address']; $second_address = $_POST['second_address']; $city = $_POST['city']; $state = $_POST['state']; $pincode = $_POST['pincode'];
$user_id = wp_create_user($username, $password, $email); if (is_wp_error($user_id)) { echo 'Error: ' . $user_id->get_error_message(); echo "failed"; } else {
update_user_meta($user_id, 'first_address', $first_address); update_user_meta($user_id, 'second_address', $second_address); update_user_meta($user_id, 'city', $city); update_user_meta($user_id, 'state', $state); update_user_meta($user_id, 'pincode', $pincode);
echo "success"; }
wp_die(); } |
Sub topic: login user
login.php |
<?php if (is_user_logged_in()) { echo "<script> alert('You are logged in.'); </script>"; } else { echo "<script> alert('You are not logged yet!'); </script>"; } ?>
<main> <div class="row"> <div class="col-2"></div> <div class="col-8"> <form action="#" method="post"> <div class="form-row"> <div class="form-group col-md-12"> <label for="username">Username/Email</label> <input type="text" class="form-control" id="username" placeholder="Enter Username"> </div> </div> <div class="form-row"> <div class="form-group col-md-12"> <label for="password">Password</label> <input type="password" class="form-control" id="password" placeholder="Enter Password"> </div> </div> <button type="button" id="submit_btn" class="btn btn-primary">Login</button> </form> <br> <a href="<?php echo get_site_url(); ?>/forget-password">forget password</a> </div> <div class="col-2"></div> </div>
<script> jQuery(document).ready(function(){ jQuery('#submit_btn').click(function(){ var username = jQuery('#username').val(); var password = jQuery('#password').val();
jQuery.ajax({ type: "POST", url: ajaxurl, data: { action: 'form_login', username: username, password: password, }, success: function (response) { if(response == "success"){ alert("Login Successful!"); window.location = "<?php echo get_site_url(); ?>"; }else{ alert("Login Failed! Please provide correct credentials!"); } }, }); }); }); </script> </main> |
functions.php |
add_action('wp_ajax_form_login', 'login_user'); add_action('wp_ajax_nopriv_form_login', 'login_user'); function login_user() { // print_r($_POST);
$username = sanitize_text_field($_POST['username']); $password = sanitize_text_field($_POST['password']);
$user = wp_signon( array( 'user_login' => $username, 'user_password' => $password, 'remember' => true // You can enable remember me option if needed ) );
if (is_wp_error($user)) { echo $user->get_error_message();
echo "error"; } else { // Login successful echo "success"; }
// Always remember to terminate AJAX handling wp_die(); } |
Sub Topic: logout
We can make a logout concept.
logout.php |
<?php //Template Name: Template Name get_header();
// checked if user logged in if (!is_user_logged_in()) { ?> <script> window.location = "<?php echo get_site_url(); ?>"; </script> <?php } ?>
<main> <a href="<?php echo wp_logout_url(get_home_url()); ?>"> <button class="btn-danger">logout</button> </a>
</main>
<?php get_footer(); ?> |
Topic: Reset Password
Basically reset password done by 2 stages - email & send OTP and new password.
Sub Topic: Email & Send OTP
reset-password-email.php |
<div class="row"> <div class="col-2"></div> <div class="col-8">
<form action="#" method="POST"> <div class="mb-3"> <label for="exampleInputEmail1" class="form-label">Email address</label> <input type="email" class="form-control" id="email" aria-describedby="emailHelp" required> <div id="emailHelp" class="form-text">Enter email to reset password</div> </div> <button type="button" id="submit_btn" class="btn btn-primary">Submit</button> </form>
</div> <div class="col-2"></div> </div>
<script> jQuery(document).ready(function(){ jQuery('#submit_btn').click(function(){ var email = jQuery('#email').val();
jQuery.ajax({ type: "POST", url: ajaxurl, data: { action: 'email_existence', email: email, }, success: function (response) { if(response == "exist"){ window.location.href = "reset-password/?email="+email; }else{ alert("Email Id Not Exist!"); } }, });
}); });
</script>
</main> |
functions.php |
// forget password - email existence check add_action('wp_ajax_email_existence', 'is_email_exist'); add_action('wp_ajax_nopriv_email_existence', 'is_email_exist'); function is_email_exist() { // print_r($_POST); $email = sanitize_text_field($_POST['email']); if(get_user_by( 'email', $email )){ echo "exist"; }else{ echo "failed"; } wp_die(); } |
Sub Topic: New Password Set
reset-password-new.php |
<main> <div class="row"> <div class="col-2"></div> <div class="col-8"> <form action="#" method="POST"> <div class="mb-3"> <label for="new_password" class="form-label">Enter New Password</label> <input type="password" class="form-control" id="new_password"> </div> <div class="mb-3"> <label for="confirm_password" class="form-label">Confirm Password</label> <input type="password" class="form-control" id="confirm_password"> </div> <button type="button" id="submit_btn" class="btn btn-primary">Submit</button> </form> </div> <div class="col-2"></div> </div> </main>
<script>
jQuery(document).ready(function () { const searchParams = new URLSearchParams(window.location.search);
jQuery('#submit_btn').click(function () { let pass1 = jQuery('#new_password').val(); let pass2 = jQuery('#confirm_password').val();
if (pass1 === pass2) { if (pass1.length >= 8) { const regex = /^(?=.*\d)(?=.*[a-z])(?=.*[A-Z])(?=.*[!@#$%^&*()\-+.]).{8,20}$/; if (regex.test(pass1)) {
jQuery.ajax({ type: "POST", url: ajaxurl, data: { action: 'reset_password', email: searchParams.get('email'), new_password: pass1, }, success: function (response) { if (response == "success") { alert("Password reset successfully!"); window.location = "<?php echo get_site_url(); ?>"; } else if (response == "failed") { alert("New password not set properly!"); } }, });
} else { alert("Your password should mix of numbers, small & capital alphabets and special characters!"); }
} else { alert("Your password should be of 8 chars!"); }
} else { alert("Passwords not match!"); }
}); });
</script> |
functions.php |
// reset password add_action('wp_ajax_reset_password', 'reset_new_password'); add_action('wp_ajax_nopriv_reset_password', 'reset_new_password'); function reset_new_password() { // print_r($_POST); $email = sanitize_text_field($_POST['email']); $password = sanitize_text_field($_POST['new_password']); if(get_user_by( 'email', $email )){ $user = get_user_by( 'email', $email ); wp_set_password( $password, $user->ID); echo "success"; }else{ echo "failed"; } wp_die(); } |
Topic: add role for user’s in wordpress admin
We can add user’s role listed into wordpress admin panel.
add_role( 'customer', // System name of the role. __('Customer'), // Display name of the role. array( 'read' => true, 'delete_posts' => true, 'delete_published_posts' => true, 'edit_posts' => true, 'publish_posts' => true, 'edit_published_posts' => true, 'upload_files' => true, 'moderate_comments'=> true, // This user will be able to moderate the comments. ) ); |
Topic: extract firstname and lastname in js and php
somethings.js |
let name = "Ayan Kumar Giri" let parts = name.split(' ') let firstName = parts.shift(); // Paul let lastName = parts.join(' '); // Steve Panakkal
console.log({ firstName, lastName }) // output => { firstName: 'Ayan', lastName: 'Kumar Giri' } // output => { firstName: 'Shimanta', lastName: 'Das' } |
functions.php |
add_action('wp_ajax_search_person', 'find_names'); add_action('wp_ajax_nopriv_search_person', 'find_names'); function find_names() { $phone = sanitize_text_field($_POST['phone']); $args = array( 'meta_key' => 'phone', 'meta_value' => $phone );
$user_query = new WP_User_Query($args); $user = $user_query->get_results(); foreach ($user as $user) { $fname = $user->first_name; $lname = $user->last_name; }
return $fname." ".$lname;
wp_die(); } |
Topic: file extension check using js/jquery
We can check a particular file extension support format in jquery.
HTML
<div class="mb-3"> <label for="formFile" class="form-label">Select Prescription (supports only PDF, JPG, JPEG, PNG)</label> <input class="form-control" type="file" name="formFile" id="formFile"> </div>
SCRIPT jQuery("#formFile").change(function () { var fileExtension = ['pdf', 'jpeg', 'jpg', 'png']; if (jQuery.inArray($(this).val().split('.').pop().toLowerCase(), fileExtension) == -1) { alert("Only formats are allowed : "+fileExtension.join(', ')); jQuery("#formFile").val(""); } }); |
Topic: how to display custom post type category in contact form 7
We can display custom post type categories dynamically in contact form 7. For that in function.php anywhere paste this sample code.
// referrals contact form - position field dynamic function ses_add_plugin_list_to_contact_form($tag, $unused) {
if ($tag['name'] != 'referral-position') return $tag;
$args = array( 'post_type' => 'jobs', 'taxonomy' => 'profession', 'orderby' => 'name', 'order' => 'ASC' );
$plugins = get_categories($args);
if (!$plugins) return $tag;
foreach ($plugins as $plugin) { $tag['values'][] = $plugin->name; $tag['labels'][] = $plugin->name; }
return $tag; } add_filter('wpcf7_form_tag', 'ses_add_plugin_list_to_contact_form', 10, 2); |
Topic: how to set role for custom menu page in wordpress
We can set roles for custom menu page in wordpress.
// add menu to admin panel page function myprefix_register_options_page() { add_menu_page( 'Manage Your Vaccines At One Place', // Page title 'Vaccines', // Menu title 'manage_options', // Capability 'my_vaccines', // Menu slug 'my_options_page_html', // Function to display the content of the page ); add_submenu_page( 'my_vaccines', 'My Bookings', 'My Bookings', 'patient_access', 'my_bookings', 'my_bookings_function' );
} add_action('admin_menu', 'myprefix_register_options_page');
function patient_capabilities() { $role = get_role('patient'); if ($role) { $role->add_cap('patient_access'); } } add_action('admin_init', 'patient_capabilities'); |
Topic: how to redirect to page section from any pages
We can redirect into another page section. Ex: say i click on the menu option and it redirects into the page section.
templates/service.php |
<div id=’sec1’></div> |
If footer, <a href=”url/#sec1”>click here</a>
Topic: generate privacy policy and terms and conditions page
When we developing wordpress websites, we need to generate privacy policy and terms & conditions page.
https://www.privacypolicygenerator.info/
https://www.termsandconditionsgenerator.com/
Topic: show related posts/articles
We can show related post/articles in wordpress blogs. Example, we want to show only those related posts which will vary from the same category.
// Get the current post's ID $current_post_id = get_the_ID();
// Get the terms of the custom taxonomy associated with this post $terms = wp_get_post_terms($current_post_id, 'our_cases_type');
if ($terms) { $term_ids = wp_list_pluck($terms, 'term_id'); }
$wq = new WP_Query(array( 'post_type' => 'our_cases', 'tax_query' => array( array( 'taxonomy' => 'our_cases_type', 'field' => 'term_id', 'terms' => $term_ids, ), ), 'post__not_in' => array($current_post_id), // Exclude the current post 'posts_per_page' => 3, // Number of related posts to show ));
if ($wq->have_posts()): while ($wq->have_posts()): $wq->the_post(); $thumbnail = wp_get_attachment_image_src(get_post_thumbnail_id(), 'large'); |
Topic: show most viewed posts
We can list down all the most viewed posts in wordpress.
// post views function wpb_set_post_views($postID) { $count_key = 'wpb_post_views_count'; $count = get_post_meta($postID, $count_key, true); if($count==''){ $count = 0; delete_post_meta($postID, $count_key); add_post_meta($postID, $count_key, '0'); }else{ $count++; update_post_meta($postID, $count_key, $count); } } //To keep the count accurate, lets get rid of prefetching remove_action( 'wp_head', 'adjacent_posts_rel_link_wp_head', 10, 0);
function wpb_track_post_views ($post_id) { if ( !is_single() ) return; if ( empty ( $post_id) ) { global $post; $post_id = $post->ID; } wpb_set_post_views($post_id); } add_action( 'wp_head', 'wpb_track_post_views'); |
$popularpost = new WP_Query(array('posts_per_page' => 5, 'meta_key' => 'wpb_post_views_count', 'orderby' => 'wpb_post_views_count meta_value_num', 'order' => 'ASC')); if ($popularpost->have_posts()): while ($popularpost->have_posts()): $popularpost->the_post(); |
Topic: show popular posts in wordpress
single.php
$postID = get_the_id(); $count_key = 'post_views_count'; $count = get_post_meta($postID, $count_key, true); if ($count == '') { $count = 0; delete_post_meta($postID, $count_key); add_post_meta($postID, $count_key, '0'); } else { $count++; update_post_meta($postID, $count_key, $count); } |
display-page.php |
$args = array( "post_type" => "post", "post_status" => "publish", "posts_per_page" => 5, "meta_key" => "post_views_count", "orderby" => "meta_value_num", "order" => "DESC" ); $posts = get_posts($args); foreach ($posts as $post) {
$thumbnail = wp_get_attachment_image_src(get_post_thumbnail_id(), 'medium'); $echo $post->name; |
Topic: share post in social media platforms
We can share posts on social media platforms.
<li> <a href="https://www.facebook.com/sharer/sharer.php?u=<?php echo get_permalink(); ?>" target="_blank"><i class="fab fa-facebook-f"></i></a> </li> <li> <a href="https://twitter.com/intent/tweet?text=YOUR_TEXT&url=<?php echo get_permalink(); ?>" target="_blank"><i class="fa-brands fa-x-twitter"></i></a> </li> <li> <a href="https://www.linkedin.com/shareArticle?mini=true&url=<?php echo get_permalink(); ?>&title=<?php echo get_the_title(); ?>" target="_blank" > <i class="fa-brands fa-linkedin"></i></a> </li>
cheatsheet: https://www.codewithfaraz.com/article/73/add-social-media-sharing-button-to-your-php-website |
Topic: mailchimp email sending using core PHP & CURL
We can make a subscription to the email address using mailchimp api. For that you should make an mailchimp account and also need to generate an api key for that.
<?php
$email = "wegeyay528@apn7.com"; $api_key = '0ff83ce94d0-us13'; $data_center = substr($api_key, strpos($api_key, '-') + 1); $url = 'https://' . $data_center . '.api.mailchimp.com/3.0/lists/';
try { $ch = curl_init($url); curl_setopt($ch, CURLOPT_USERPWD, 'user:' . $api_key); curl_setopt($ch, CURLOPT_HTTPHEADER, ['Content-Type: application/json']); curl_setopt($ch, CURLOPT_RETURNTRANSFER, true); curl_setopt($ch, CURLOPT_TIMEOUT, 10); curl_setopt($ch, CURLOPT_SSL_VERIFYPEER, false); $result = curl_exec($ch); $status_code = curl_getinfo($ch, CURLINFO_HTTP_CODE); curl_close($ch);
// fetch the list id from the response if ($status_code === 200) { $response = json_decode($result, true); if (!empty($response['lists'])) { $list_id = $response['lists'][0]['id']; } }
try { /** * pending -> means a confirmation mail will goes to email address for confirmation * subscribed -> means no need for confirmation and it will automatically saved audiences/lists/contacts in mailchimp */ $json = json_encode([ 'email_address' => $email, 'status' => 'pending', ]); $url = 'https://' . $data_center . '.api.mailchimp.com/3.0/lists/' . $list_id . '/members'; $ch = curl_init($url); curl_setopt($ch, CURLOPT_USERPWD, 'user:' . $api_key); curl_setopt($ch, CURLOPT_HTTPHEADER, ['Content-Type: application/json']); curl_setopt($ch, CURLOPT_RETURNTRANSFER, true); curl_setopt($ch, CURLOPT_TIMEOUT, 10); curl_setopt($ch, CURLOPT_POST, 1); curl_setopt($ch, CURLOPT_SSL_VERIFYPEER, false); curl_setopt($ch, CURLOPT_POSTFIELDS, $json); $result = curl_exec($ch); $status_code = curl_getinfo($ch, CURLINFO_HTTP_CODE); curl_close($ch);
$arr = json_decode($result, true); if ($arr['title']) { echo $arr['title']."! You may check your mail's inbox of $email "; } else if (200 == $status_code) { echo "An confirmation email has been sent to $email "; } } catch (Exception $e) { echo $e->getMessage(); }
} catch (Exception $e) { echo $e->getMessage(); } ?> |
Ref docs: https://artisansweb.net/mailchimp-integration-website-using-mailchimp-api-php/
Mailchimp user subscription using core php
For mail subscription we basically use MC4WP ~ mailchimp api for compatibility with wordpress html theme.
form-template.php |
<form id="form1"> <div class="mb-3"> <label for="exampleInputEmail1" class="form-label">Email address</label> <input type="email" class="form-control" name="email" id="email" aria-describedby="emailHelp"> <br>
<div id="emailHelp" class="form-text" style="font-size:20px;">We'll never share your email with anyone else.</div> </div> <button type="submit" class="btn btn-primary">Submit</button> </form>
<script> var ajaxurl = "<?php echo admin_url('admin-ajax.php') ?>";
jQuery('#document').ready(function () { jQuery('#emailHelp').hide(); jQuery('#form1').submit(function (e) { e.preventDefault(); jQuery('#emailHelp').hide();
let formdata = new FormData(this); if(formdata.get("email")){ jQuery.ajax({ type: "POST", url: ajaxurl, data: { action: 'newsletter_subscription', email:formdata.get('email'), }, success: function (response) { jQuery('#emailHelp').show(); if(response == "success"){ jQuery('#emailHelp').text(response); }else{ jQuery('#emailHelp').text(response); } }, error:function(response){ jQuery('#emailHelp').show(); jQuery('#emailHelp').text("Please enter your valid email id."); } }); }else if(formdata.get("email") == null || formdata.get("email") == ""){ jQuery('#emailHelp').show(); jQuery('#emailHelp').text("Please enter your valid email id."); }
}); }); </script> |
functions.php |
add_action('wp_ajax_newsletter_subscription', 'mailchimp_user'); add_action('wp_ajax_nopriv_newsletter_subscription', 'mailchimp_user');
function mailchimp_user() { // print_r($_POST);
$email = $_POST['email']; $api_key = '0ff84d0-us13'; $data_center = substr($api_key, strpos($api_key, '-') + 1); $url = 'https://' . $data_center . '.api.mailchimp.com/3.0/lists/'; try { $ch = curl_init($url); curl_setopt($ch, CURLOPT_USERPWD, 'user:' . $api_key); curl_setopt($ch, CURLOPT_HTTPHEADER, ['Content-Type: application/json']); curl_setopt($ch, CURLOPT_RETURNTRANSFER, true); curl_setopt($ch, CURLOPT_TIMEOUT, 10); curl_setopt($ch, CURLOPT_SSL_VERIFYPEER, false); $result = curl_exec($ch); $status_code = curl_getinfo($ch, CURLINFO_HTTP_CODE); curl_close($ch); // fetch the list id from the response if ($status_code === 200) { $response = json_decode($result, true); if (!empty($response['lists'])) { $list_id = $response['lists'][0]['id']; } } try { /** * pending -> means a confirmation mail will goes to email address for confirmation * subscribed -> means no need for confirmation and it will automatically saved audiences/lists/contacts in mailchimp */ $json = json_encode([ 'email_address' => $email, 'status' => 'pending', ]); $url = 'https://' . $data_center . '.api.mailchimp.com/3.0/lists/' . $list_id . '/members'; $ch = curl_init($url); curl_setopt($ch, CURLOPT_USERPWD, 'user:' . $api_key); curl_setopt($ch, CURLOPT_HTTPHEADER, ['Content-Type: application/json']); curl_setopt($ch, CURLOPT_RETURNTRANSFER, true); curl_setopt($ch, CURLOPT_TIMEOUT, 10); curl_setopt($ch, CURLOPT_POST, 1); curl_setopt($ch, CURLOPT_SSL_VERIFYPEER, false); curl_setopt($ch, CURLOPT_POSTFIELDS, $json); $result = curl_exec($ch); $status_code = curl_getinfo($ch, CURLINFO_HTTP_CODE); curl_close($ch); $arr = json_decode($result, true); if ($arr['title'] == "Member Exists") { echo "This email id already exist! You may check your mail's inbox of $email "; } else if (200 == $status_code) { echo "An confirmation email has been sent to $email "; } } catch (Exception $e) { echo $e->getMessage(); } } catch (Exception $e) { echo $e->getMessage(); }
wp_die(); } |
Topic: how to add shortcode in wordpress pages.
Paste this code inside functions.php
function insurance_comparison_form() { ob_start(); // Start output buffering ?> <form action="/get-a-quote/" method="GET" class="flex flex-col"> </form>
<!-- form field validation --> <script> // write the logic here... </script>
<?php return ob_get_clean(); // Return the buffered content }
add_shortcode('medicare_advantage_plan_shortcode', 'insurance_comparison_form'); |
Topic: set image or text fields to category in wordpress
Sometimes we need to set some ACF fields to category like image.

<?php get_header(); $categories = get_the_category(); $category_id = $categories[0]->cat_ID; $image = get_field('category_image', 'category_' . $category_id); ?> |
Topic: load more category related posts using ajax
Sometimes we need to load posts related to category using ajax. Let’s see ….
category.php
<?php $posts_per_page = get_option('posts_per_page'); $total_posts = $wp_query->found_posts; $posts_displayed = $wp_query->post_count; ?> <div class="container"> <br> <div class="row" id="blogpostcard"> <?php if (have_posts()): while (have_posts()): the_post(); $thumbnail = wp_get_attachment_image_src(get_post_thumbnail_id(), 'large'); ?> <div class="col-lg-4"> <div class="blog-card"> <div class="blog-card-holder"> <h6 class="dateofpost"> <?php echo get_the_date(); ?> </h6> <h3><a href="<?php the_permalink(); ?>"><?php the_title(); ?></a></h3> <p><?php echo wp_trim_words(get_the_excerpt(), 20, '...'); ?></p> </div> </div> </div> <?php endwhile; endif; ?> </div> <button id="load-more">Load More</button> </div>
// script tags for js logic <script type="text/javascript"> var ajaxurl = '<?php echo admin_url('admin-ajax.php'); ?>'; var posts_per_page = <?php echo $posts_per_page; ?>; var total_posts = <?php echo $total_posts; ?>; var posts_displayed = <?php echo $posts_displayed; ?>;
jQuery(document).ready(function ($) { var page = 1; var category = '<?php echo single_cat_title("", false); ?>';
$('#load-more').on('click', function () { var button = $(this); var data = { 'action': 'load_more', 'page': page, 'category': category };
$.ajax({ url: ajaxurl, data: data, type: 'POST', beforeSend: function (xhr) { button.text('Loading...'); }, success: function (data) { if ($.trim(data)) { $('#blogpostcard').append(data); button.text('Load More'); page++; posts_displayed += posts_per_page;
if (posts_displayed >= total_posts) { button.prop('disabled', true).hide(); // Hide the button when all posts are loaded } } else { button.text('No more posts to load'); button.prop('disabled', true).hide(); // Hide the button if no posts are returned } }, error: function () { button.text('Load More'); alert('An error occurred. Please try again.'); } }); }); }); </script> |
Let’s see functions.php page logic
function load_more_posts() { $paged = $_POST['page'] + 1; $category = $_POST['category'];
$args = array( 'post_type' => 'post', 'paged' => $paged, 'category_name' => $category, 'posts_per_page' => get_option('posts_per_page') );
$query = new WP_Query($args);
if ($query->have_posts()): while ($query->have_posts()): $query->the_post(); ?> <div class="col-lg-4"> <div class="blog-card"> <div class="blog-card-holder"> <h6 class="dateofpost"> <?php echo get_the_date(); ?> </h6> <h3><a href="<?php the_permalink(); ?>"><?php the_title(); ?></a></h3> <p><?php echo wp_trim_words(get_the_excerpt(), 20, '...'); ?></p> </div> </div> </div> <?php endwhile; else: echo ''; // Return empty response to indicate no more posts endif;
wp_reset_postdata(); die(); }
add_action('wp_ajax_load_more', 'load_more_posts'); add_action('wp_ajax_nopriv_load_more', 'load_more_posts'); |
Topic: get the previous url in wordpress
We can get the previous visited page url in wordpress. Function: <?php wp_get_referer() ?>
Topic: export CSV file wordpress/plugin
Let’s see how we can export csv file from php.
functions.php
header('Content-Type: text/csv; charset=utf-8'); header('Content-Disposition: attachment; filename=data.csv'); $output = fopen('php://output', 'w');
// Output column headers fputcsv($output, array('id', 'question', 'answer')); $table = $wpdb->prefix."chats"; $rows = $wpdb->get_results("SELECT id, question, answer FROM $table", ARRAY_A); foreach ($rows as $row) { fputcsv($output, $row); } fclose($output); |
page where hook calls.
jQuery(document).ready(function () { jQuery('#export-csv-btn').click(function () { jQuery.ajax({ url: ajaxurl, method: 'POST', data: { action: 'export_csv' }, success: function (res) { // Create a download link and trigger it automatically let blob = new Blob([res], { type: 'text/csv;charset=utf-8;' }); let link = document.createElement("a"); let url = URL.createObjectURL(blob); link.setAttribute("href", url); link.setAttribute("download", "data.csv"); link.style.visibility = 'hidden'; document.body.appendChild(link); link.click(); document.body.removeChild(link); }, error: function (res) { console.error(res); } }); }); }); |
Topic: Import CSV file in wordpress table.
We can import csv and migrate in the wordpress table.
Functions.php
add_action('wp_ajax_import_csv', 'importCSV'); add_action('wp_ajax_nopriv_import_csv', 'importCSV'); function importCSV() { global $wpdb; $table = $wpdb->prefix."chats";
// Check if a file was uploaded if (isset($_FILES['file'])) { $file = $_FILES['file']['tmp_name']; // Open the uploaded CSV file if (($handle = fopen($file, 'r')) !== false) { global $wpdb;
// Skip the first line (header row) fgetcsv($handle);
// Loop through the file and insert data into the wp_chats table while (($data = fgetcsv($handle, 1000, ',')) !== false) { $wpdb->insert( $table, array( 'question' => $data[1], // Assuming 'question' is in the 2nd column 'answer' => $data[2], // Assuming 'answer' is in the 3rd column ), array('%s', '%s') ); }
// Close the file handle fclose($handle);
// Return success response wp_send_json_success('CSV imported successfully!'); } else { wp_send_json_error('Failed to open the file.'); } } else { wp_send_json_error('No file uploaded.'); }
exit(); } |
Page where hook will call.
// import csv jQuery(document).ready(function () { jQuery('#import-csv-btn').click(function () { jQuery('#csv-file-input').click(); // Trigger the hidden file input click });
jQuery('#csv-file-input').change(function (e) { let file = e.target.files[0];
if (file) { let formData = new FormData(); formData.append('file', file); formData.append('action', 'import_csv'); // Action name for AJAX
jQuery.ajax({ url: ajaxurl, method: 'POST', data: formData, processData: false, // Prevent jQuery from processing the data contentType: false, // Prevent jQuery from setting content type success: function (res) { alert('CSV imported successfully!'); window.location.reload(); }, error: function (res) { console.error(res); alert('Failed to import CSV.'); } }); } }); }); |
Topic: event sorting - date wise post type show.
Say you want to show a custom post type, on the basics of datetime. Here is the dummy code you can get help from …
template/tpl-page_name.php |
<?php
$today = date('Y-m-d H:i:s'); // Define today's date and time $i = 1; $paged = (get_query_var('paged')) ? get_query_var('paged') : 1; $args = array( 'post_type' => 'events', 'meta_key' => 'event_date_time', // Sort by the event date field 'meta_value' => $today, 'meta_compare' => '>=', // Show only future dates 'orderby' => 'meta_value', 'order' => 'ASC', // Show latest past events first 'posts_per_page' => 7, // Show all matching posts 'paged' => $paged, );
$query = new WP_Query($args); if ($query->have_posts()) { while ($query->have_posts()) { $query->the_post();
$imgepath = wp_get_attachment_image_src( get_post_thumbnail_id(), 'large' );
$datetime = get_field('event_date_time', $query->ID); $date = new DateTime($datetime);
// Format the date $formatted_date = $date->format('M j, Y'); // Nov 2, 2024 $formatted_time = $date->format('g:iA'); // 12:00pm ?> <?php $i++; } wp_reset_postdata(); // Restore original post data } else { // No events found } ?> // pagination section .... <div class="pagination-wrap"> <?php echo paginate_links(array( 'base' => str_replace(999999999, '%#%', esc_url(get_pagenum_link(999999999))), 'format' => 'page/%#%/', 'total' => $query->max_num_pages, 'current' => max(1, $paged), 'show_all' => false, 'end_size' => 1, 'mid_size' => 2, 'prev_next' => true, 'prev_text' => '<img src="' . get_template_directory_uri() . '/assets/images/arrow-left.svg">', 'next_text' => '<img src="' . get_template_directory_uri() . '/assets/images/arrow-right.svg">', 'type' => 'list', )); ?> </div> |
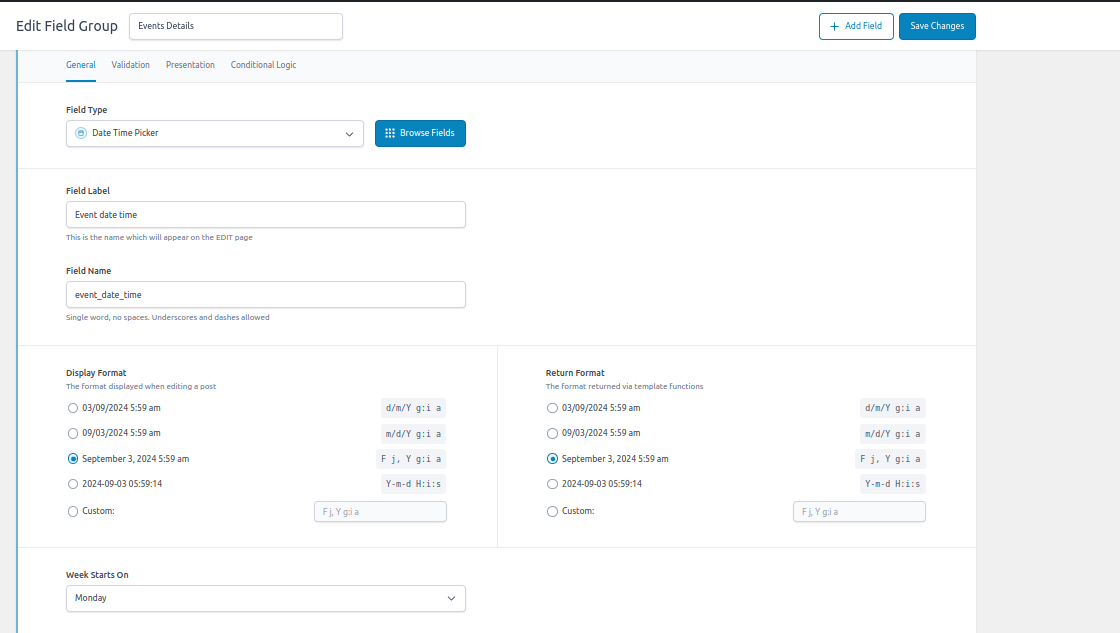
—-----------------------------------------------------
Topic: <br> tag pass inside modal from wordpress content editor
Sometime you passes the wordpress page editor content to modal or somewhere, but that time html tags like <br/> not working perfectly, while using .html() as export content. So for achieving this we need to use, wpautop()
Let’s look at the code,
wp_send_json_success([ 'title' => $post->post_title, 'content' => wpautop($post->post_content), ]); jQuery('#teamModal #member-details').html(response.data.content); <div class="modal-body"> <h6 id="member-designation"></h6> <div id="member-details"></div> </div> |
Topic: how to configure “ReCaptcha v2 for Contact Form 7”
We can add google recaptcha in contact form 7.

After installing this you will get a captcha option under contact form 7. Now select “reCaptha version 2” from the page dropdown.

Now, go to “Integration” tab inside, contact form 7 plugin and click on recaptcha integration option. And now paste the secret key of recapta from the google account. Link: https://developers.google.com/recaptcha/intro

Topic: google sheet data into php / sheet to php integration
Let’s see the code …
<?php
try{ require __DIR__ . '/vendor/autoload.php';
$client = new \Google_Client(); $client->setApplicationName('My PHP App'); $client->setScopes([\Google_Service_Sheets::SPREADSHEETS]); $client->setAccessType('offline'); // $jsonAuth = getenv('JSON_AUTH'); // $client->setAuthConfig(json_decode($jsonAuth, true));
$client->setAuthConfig(__DIR__ . '/auth.json');
$sheets = new \Google_Service_Sheets($client); $data = []; $currentRow = 2; $spreadsheetId = "1I9ypsvUFFcrEJAo1zz8"; $range = 'A2:H'; $rows = $sheets->spreadsheets_values->get($spreadsheetId, $range, ['majorDimension' => 'ROWS']); if (isset($rows['values'])) { foreach ($rows['values'] as $row) { if (empty($row[0])) { break; } $data[] = [ 'col-a' => $row[0], 'col-b' => $row[1], 'col-c' => $row[2], 'col-d' => $row[3], 'col-e' => $row[4], 'col-f' => $row[5], 'col-g' => $row[6], 'col-h' => $row[7], ]; /* * Now for each row we've seen, lets update the I column with the current date */ $updateRange = 'I'.$currentRow; $updateBody = new \Google_Service_Sheets_ValueRange([ 'range' => $updateRange, 'majorDimension' => 'ROWS', 'values' => ['values' => date('c')], ]); $sheets->spreadsheets_values->update( $spreadsheetId, $updateRange, $updateBody, ['valueInputOption' => 'USER_ENTERED'] );
$currentRow++; } } // print_r($data); // echo $encoded = json_encode($data, true);
// title foreach($data as $data){ echo $data["col-a"]; echo "<br/>"; }
// content foreach($data as $data){ echo $data["col-b"]; echo "<br/>"; }
// category foreach($data as $data){ echo $data["col-c"]; echo "<br/>"; }
}catch(Exception $e){ echo $e->getMessage(); }
?> |
Source: https://www.fillup.io/post/read-and-write-google-sheets-from-php/
Step 1: enable google sheet enable to google project.

Now, go to api service -> credentials -> select ‘service accounts’ -> ‘keys’ tab.
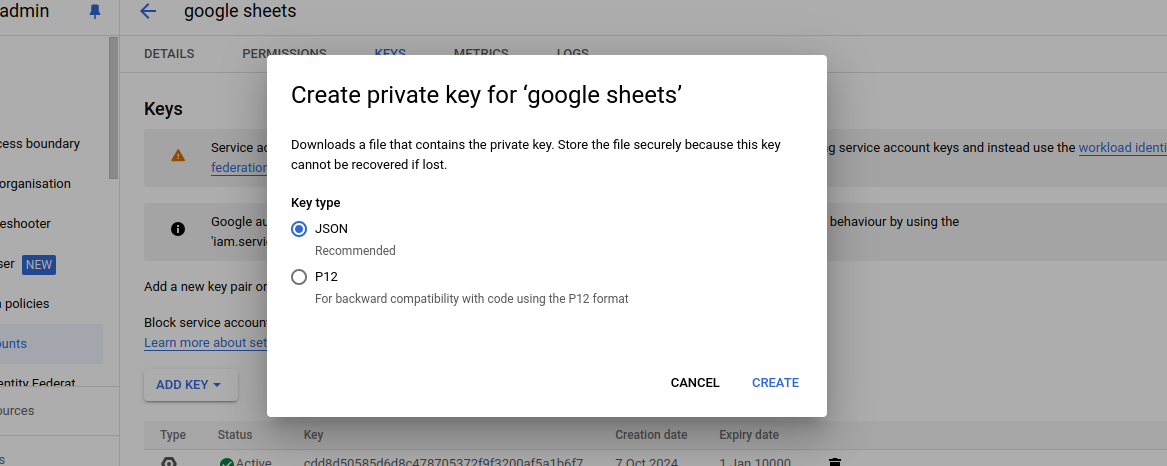
Make sure to manage it.
Post delete in wordpress
It will delete all the posts which are in TRASH state.
// delete trash posts $posts = new WP_Query(array( 'post_type' => 'post', 'post_status' => array('trash'), 'posts_per_page' => -1 // Get all posts )); // Get the number of posts $total_posts = $posts->found_posts; $i = 0; while ($i < $total_posts) { if ($posts->have_posts()) { while ($posts->have_posts()) { $posts->the_post(); $post_id = get_the_ID(); try{ wp_delete_post($post_id); echo "POST DELETED"; }catch(Exception $e){ echo $e->getMessage(); } } } $i++; } |
Topic: list all the ACF fields in wordpress via coding
Follow the below code …
// Get all post types $post_types = get_post_types(array('public' => true), 'objects');
foreach ($post_types as $post_type) { $post_type->label $post_type->name
// Get ACF field groups for the current post type $field_groups = acf_get_field_groups(array('post_type' => $post_type->name));
if ($field_groups) { foreach ($field_groups as $field_group) { // Get fields in the current field group , ex: post custom fields, home page etc. $fields = acf_get_fields($field_group['ID']);
if ($fields) { foreach ($fields as $field) { /** LABEL - Address, Name - cust_address, Type - textarea $field['label'] $field['name'] $field['type'] **/ } } } } } |
Off topic: how to made a project overview
Here is a sample topic about that ….
Project Overview: This CMS-based portal will contain essential sections and pages, including a Home Page, Legal Stuff, Blog Details, and Contact Us.
Pages to Create:
1. Home Page - Includes specific sections as per design 2. Legal Stuff Page - Content to cover client-provided policies 3. Blog Details Page - For blog posts and related content 4. Contact Us Page - For inquiries and contact information 5. Team Details Page - Show team with brief profile
Project Queries and Requirements:
1. Video Hosting: Are the videos hosted on a platform like YouTube or Vimeo, or do we need the raw video files? We require the video files if a custom player is to be designed. 2. High-Quality Screenshots: Screenshots must be provided in high resolution to ensure quality. 3. Policies Document: Client to provide policy documents for the Legal Stuff page. 5. App Links: We need links to the apps on both Google Play Store and iOS App Store. 6. Newsletter Section: Will we use Mailchimp for the newsletter integration? 7. Social Media Links: Need to provide links to relevant social media accounts. 8. Google Analytics: Need to Provide the Google Analytics code for tracking. 9. Correct Web App URL: Is bssnew.dikonia.in the correct link for the web app? |
Topic: PDF download after contact form 7 form submission
We can download PDF after CF7 form submission. For that first enqueue this code inside functions.php of your theme folder.
function cf7_pdf_download_script() { ?> <script> // Your Form document.addEventListener('wpcf7mailsent', function(event) { // Check if the specific form ID is 123 if (event.detail.contactFormId == '705') { // Replace with the URL of your PDF file window.location.href = 'your_url/.pdf'; } }, false); </script> <?php } add_action('wp_footer', 'cf7_pdf_download_script'); |
Let’s follow contact form 7, browser URL:
https://josephm513.sg-host.com/wp-admin/admin.php?page=wpcf7&post=705&action=edit
Topic: location detect using php and changed url(amazon)
Here i have showed how to detect country origin according to location using php ?
function fetchAmazonPage($url) { $ch = curl_init(); // Set the URL and other options curl_setopt($ch, CURLOPT_URL, $url); curl_setopt($ch, CURLOPT_RETURNTRANSFER, true); curl_setopt($ch, CURLOPT_USERAGENT, 'Mozilla/5.0 (Windows NT 10.0; Win64; x64) AppleWebKit/537.36 (KHTML, like Gecko) Chrome/58.0.3029.110 Safari/537.3'); // Execute the request $html = curl_exec($ch); curl_close($ch); return $html; } // getting amazon product title via web scrapping function validateAmazonProductTitle($htmlContent) { $dom = new DOMDocument();
// Suppress warnings due to HTML5 tags @$dom->loadHTML($htmlContent);
// Use DOMXPath to find the title element by its ID $xpath = new DOMXPath($dom); $titleElement = $xpath->query('//span[@id="productTitle"]')->item(0);
if ($titleElement) { $productTitle = trim($titleElement->nodeValue); return !empty($productTitle) ? $productTitle : false; } return false; } function getUserIpAddr() { if (!empty($_SERVER['HTTP_CLIENT_IP'])) { //ip from share internet $ip = $_SERVER['HTTP_CLIENT_IP']; } elseif (!empty($_SERVER['HTTP_X_FORWARDED_FOR'])) { //ip pass from proxy $ip = $_SERVER['HTTP_X_FORWARDED_FOR']; } else { $ip = $_SERVER['REMOTE_ADDR']; } return $ip; }
function get_amazon_link() { $amazon_domains = [ 'ae' => 'amazon.ae', 'be' => 'amazon.be', 'bh' => 'amazon.bh', 'ca' => 'amazon.ca', 'cl' => 'amazon.cl', 'cn' => 'amazon.cn', 'co' => 'amazon.co', 'il' => 'amazon.co.il', 'jp' => 'amazon.co.jp', 'kr' => 'amazon.co.kr', 'nz' => 'amazon.co.nz', 'th' => 'amazon.co.th', 'uk' => 'amazon.co.uk', 'uy' => 'amazon.co.uy', 'za' => 'amazon.co.za', 'us' => 'amazon.com', 'au' => 'amazon.com.au', 'br' => 'amazon.com.br', 'ec' => 'amazon.com.ec', 'mx' => 'amazon.com.mx', 'pe' => 'amazon.com.pe', 'sg' => 'amazon.com.sg', 'tr' => 'amazon.com.tr', 'de' => 'amazon.de', 'eg' => 'amazon.eg', 'es' => 'amazon.es', 'fr' => 'amazon.fr', 'gr' => 'amazon.gr', 'hk' => 'amazon.hk', 'in' => 'amazon.in', 'it' => 'amazon.it', 'kuwait' => 'amazon.kuwait', 'lk' => 'amazon.lk', 'my' => 'amazon.my', 'nl' => 'amazon.nl', 'om' => 'amazon.om', 'ph' => 'amazon.ph', 'pl' => 'amazon.pl', 'pt' => 'amazon.pt', 'ro' => 'amazon.ro', 'sa' => 'amazon.sa', 'se' => 'amazon.se' ];
try {
$IP_DETAILS = @json_decode(file_get_contents( "http://www.geoplugin.net/json.gp?ip=" . getUserIpAddr() ));
$AMAZON_URL = 'https://www.amazon.co.uk/Meditation-Work-Formula-Reversing-Mindset/dp/1956154043'; // Example product URL $country_code = strtolower($IP_DETAILS->geoplugin_countryCode);
// check is deceted country code available inside domains array if ($amazon_domains[$country_code]) { $CHANGED_AMAZON_URL = str_replace("amazon.co.uk", $amazon_domains[$country_code], $AMAZON_URL); $htmlContent = fetchAmazonPage($CHANGED_AMAZON_URL);
// check product details exist! ~ web scrapping if (!empty(validateAmazonProductTitle($htmlContent))) { echo $CHANGED_AMAZON_URL; } else { echo $AMAZON_URL; }
} else { echo "$AMAZON_URL; } } catch (Exception $e) { echo $e->getMessage(); } } |
Topic: GET CURRENT SAVE POST ID
function updated_send_post($new_status, $old_status, $post) { // Only trigger when the post transitions to "publish" if ($new_status === 'publish' && $old_status !== 'publish' && $post->post_type === 'post') { $post->ID; } } add_action('transition_post_status', 'updated_send_post', 10, 3); |
Topic: woocommerce download tab hide from my account - woocommerce
We can hide download tab from woocommerce my account section.
// hide downloads tab from my account page function remove_download_tab_account_page( $items ) { unset($items['downloads']); return $items; } add_filter( 'woocommerce_account_menu_items', 'remove_download_tab_account_page' ); |
Topic: max quantity show pop up modal woocommerce.
We can show pop up modal box, if it reaches more than 5 or N number of quantity. For that we need to trigger add_action( 'woocommerce_before_cart', 'woocommerce_output_all_notices', 10 );
functions.php |
// product details page cart quantiy adding validation add_filter('woocommerce_add_to_cart_validation', 'validate_product_quantity', 10, 3); function validate_product_quantity($passed, $product_id, $quantity) { if (get_field('max_quantity', $product_id) && $quantity > get_field('max_quantity', $product_id)) { // Enqueue a script to show the modal add_action('wp_footer', function () use ($product_id, $quantity) { ?> <script> jQuery(document).ready(function ($) { // Pass product data to the modal $('#quantityLimitModal #product-id').val('<?php echo esc_js($product_id); ?>'); $('#quantityLimitModal #product-name').val('<?php echo esc_js(get_the_title($product_id)); ?>'); $('#quantityLimitModal #product-link').val('<?php echo esc_url(get_permalink($product_id)); ?>');
// Show the modal var modal = new bootstrap.Modal(document.getElementById('quantityLimitModal')); modal.show(); }); </script> <?php }); return false; // Prevent the product from being added to the cart } return $passed; }
// volume disocunt mail trigger add_action('wp_ajax_process_volume_discount_form', 'process_volume_discount_form'); add_action('wp_ajax_nopriv_process_volume_discount_form', 'process_volume_discount_form'); function process_volume_discount_form() { if (isset($_POST['data'])) { parse_str($_POST['data'], $form_data);
// Sanitize and process the data $first_name = sanitize_text_field($form_data['first_name']); $last_name = sanitize_text_field($form_data['last_name']); $email = sanitize_email($form_data['email']); $phone = sanitize_text_field($form_data['phone']); $address = sanitize_textarea_field($form_data['address']); $product_id = sanitize_text_field($form_data['product-id']); $product_name = sanitize_text_field($form_data['product-name']); $product_link = sanitize_text_field($form_data['product-link']);
$headers = array('From: '.get_bloginfo('name').' <'.get_bloginfo('admin_email').'>');
try{ $subject = "Volume Discount's Contact Request"; $message = "Someone wants to buy 'larger volume' \n\n Name: $first_name $last_name\nEmail: $email\nPhone: $phone\nAddress: $address"."\n\n Order product details. \n Product ID: ".$product_id." \nProduct Name: ".$product_name." \nProduct URL: ".$product_link; wp_mail(get_field('admin_email_large_volume_contact_form', 'option'), $subject, $message, $headers);
$subject = "Contact Request Confirmation For Volume Discount"; $message = "Your contact information as follows.\n Name: $first_name $last_name\nEmail: $email\nPhone: $phone\nAddress: $address"."\n\n Order product details. \nProduct ID: ".$product_id." \nProduct Name: ".$product_name." \nProduct URL: ".$product_link."\n\nYour order request has been received to us!"; wp_mail($email, $subject, $message, $headers); }catch(Exception $e){ echo $e->getMessage(); } wp_send_json_success('Form submitted successfully!'); } wp_send_json_error('Invalid request.'); } |
Inside woocommerce/add-to-cart/simple.php and variable.php
Topic: select states in cf7
We can set all the states in contact form 7.
<label>State</label> [select* selectedState "Alabama|AL" "Alaska|AK" "Arizona|AZ" "Arkansas|AR" "California|CA" "Colorado|CO" "Connecticut|CT" "Delaware|DE" "Washington DC|DC" "Florida|FL" "Georgia|GA" "Hawaii|HI" "Idaho|ID" "Illinois|IL" "Indiana|IN" "Iowa|IA" "Kansas|KS" "Kentucky|KY" "Louisiana|LA" "Maine|ME" "Maryland|MD" "Massachusetts|MA" "Michigan|MI" "Minnesota|MN" "Mississippi|MS" "Missouri|MO" "Montana|MT" "Nebraska|NE" "Nevada|NV" "New Hampshire|NH" "New Jersey|NJ" "New Mexico|NM" "New York|NY" "North Carolina|NC" "North Dakota|ND" "Ohio|OH" "Oklahoma|OK" "Oregon|OR" "Pennslyvania|PA" "Rhode Island|RI" "South Carolina|SC" "South Dakota|SD" "Tennessee|TN" "Texas|TX" "Utah|UT" "Vermont|VT" "Virginia|VA" "Washington|WA" "West Virginia|WV" "Wisconsin|WI" "Wyoming|WY" "Alabama" "Alaska" "Arizona" "Arkansas" "California" "Colorado" "Connecticut" "Delaware" "Florida" "Georgia" "Hawaii" "Idaho" "Illinois" "Indiana" "Iowa" "Kansas" "Kentucky" "Louisiana" "Maine" "Maryland" "Massachusetts" "Michigan" "Minnesota" "Mississippi" "Missouri" "Montana" "Nebraska" "Nevada" "New Hampshire" "New Jersey" "New Mexico" "New York" "North Carolina" "North Dakota" "Ohio" "Oklahoma" "Oregon" "Pennsylvania" "Puerto Rico" "Rhode Island" "South Carolina" "South Dakota" "Tennessee" "Texas" "Utah" "Vermont" "Virginia" "Washington" "West Virginia" "Wisconsin" "Wyoming" ] |
Topic: category wise post show + post search
We can show posts using category selection. We can also makes search as well.

<div class="row"> <!-- search section --> <?php $search_word = isset($_GET['search-term']) ? sanitize_text_field($_GET['search-term']) : 'Search a topic'; ?> <div class="col-lg-6"> <form method="GET" action="/case-studies"> <div class="search-wrap"> <input class="form-control" placeholder="<?php echo $search_word; ?>" name="search-term" id="srch-term" type="text"> </div> </form> </div> <!-- search section end --> <div class="col-lg-6"> <form method="get" id="categoryForm"> <div class="top-select"> <select name="category" id="categorySelect" class="form-select"> <?php // Check if a category has been selected $selected_category = isset($_GET['category']) ? sanitize_text_field($_GET['category']) : 'NULL';
$categories = get_categories(array( 'taxonomy' => 'our_cases_type', 'orderby' => 'name', 'parent' => 0, 'hide_empty' => 0, )); ?> <option value="" selected>All</option> <?php foreach ($categories as $category) { ?> <option value="<?php echo $category->name; ?>" <?php selected($selected_category, $category->name); ?>> <?php echo $category->name; ?> </option> <?php } ?> </select> </div> </form> </div> </div> <!-- end of category --> <!-- post listing --> <?php if (isset($_GET['category'])) { $category = sanitize_text_field($_GET['category']); $category_slug = esc_html($category); }
// Prepare arguments for the query $paged = (get_query_var('paged')) ? get_query_var('paged') : 1; $search_string = isset($_GET['search-term']) ? sanitize_text_field($_GET['search-term']) : ''; $args = array( 'post_type' => 'our_cases', 'posts_per_page' => 6, 'paged' => $paged, 's' => $search_string, );
// If a category slug is provided, add a tax_query to filter by category if (!empty($category_slug)) { $args['tax_query'] = array( array( 'taxonomy' => 'our_cases_type', 'field' => 'slug', 'terms' => $category_slug, ), ); }
$wq = new WP_Query($args); if ($wq->have_posts()): while ($wq->have_posts()): $wq->the_post(); $thumbnail = wp_get_attachment_image_src(get_post_thumbnail_id(), 'large'); ?> |
Topic: FAQ section ~ accordion in wordpress/php/laravel
When we working on accordions means FAQs we need to follow unique IDs according to each.
You can use a unique identifier like uniqid() in PHP. $unique_id = uniqid('accordion_'); Update the ID generation like this: data-bs-target="#<?php echo $unique_id; ?>" aria-controls="<?php echo $unique_id; ?>" id="<?php echo $unique_id; ?>" |
Topic: target=”_blank” add for links means <a> in wordpress menus
Let’s see how to add target=”_blank” in wordpress manus.
/** add target='_blank' to social-menu */ function add_target_blank_to_menu($item_output, $item, $depth, $args) { if (isset($args->menu) && $args->menu == 'Social-Menu') { $item_output = str_replace('<a ', '<a target="_blank" ', $item_output); } return $item_output; } add_filter('walker_nav_menu_start_el', 'add_target_blank_to_menu', 10, 4); |
Topic: gap about div tags
// gap about divs jQuery(document).ready(function($){ if(window.location.hash) { var hash = window.location.hash; var hideheight = $('#about-me').outerHeight() + 115; jQuery('html, body').animate({ scrollTop: $(hash).offset().top - hideheight }, 1500, 'swing'); } }); |
Topic: remove content box for post types
We can hide the content box for custom post types.
/* disable CONTENT BOX for post types */ add_action('init', 'remove_content_post_type_services'); function remove_content_post_type_services() { remove_post_type_support('services', 'editor' ); } |
Topic: backup in wordpress
We can make backups in wordpress.

Now make a first backup and it will generate a backup binary file.
Now in
Topic: stop/pause videos at one click
Case: i want to stop all videos except current videos playing on the page.
<video width="auto" height="auto" controls id="<?php echo "video-".$vid_id; ?>" onplay="VideoFunc(<?php echo $vid_id; ?>)"> <source src="<?php echo $video; ?>" type="video/mp4"> Your browser does not support the video tag. </video>
// pausing other videos except this... function FeaturedVideoFunc(){ let i=1; while(i < 100){ document.getElementById(`video-${i}`).pause(); i++; } }
// pausing others videos except this.... function VideoFunc(id){ let i=1; document.getElementById('featured-video').pause(); while(i < 100){ if(i == id){ // skip } else{ document.getElementById(`video-${i}`).pause(); } i++; } } |
Topic: Instagram posts show in wordpress.
Show all the instagram post in wordpress in any page!
Step 1: First download this plugin …
https://wordpress.org/plugins/instagram-feed/
Step 2: Now connect your account with this plugin and set the shortcode too.
Step 3: Now fix the CSS ….
/** Hide Instragram Feed Start */ .sb_instagram_header{ display: none; } #sbi_load{ display: none; } /*Hide Instagram Feed End */ |
Now, see the result….

Topic: Elementor ‘style.css’ in Elementor Child
We can enable ‘style.css’ in elementor child.
function hello_elementor_child_enqueue_scripts() { wp_enqueue_style( 'hello-elementor-child-style', get_stylesheet_directory_uri() . '/style.css', [ 'hello-elementor-theme-style', ], '1.0.0' ); } add_action( 'wp_enqueue_scripts', 'hello_elementor_child_enqueue_scripts', 20 ); |
Reference: https://stackoverflow.com/questions/74775738/create-child-theme-with-hello-elementor-for-wordpress
=====================================================================
Topic: WooCommerce
Woocommerce is a plugin which is basically used to create ecommerce stores at rapid speed. Let’s see how we can make awesome websites using it.
Topic: how to create a woocommerce project’s structure…
We can create a new woocommerce project from scratch, for that first of all create all the necessary files in the project’s directory.
Project’s structure -
Front-page.php =>
Index.php
Page.php
Single.php
Category.php
Header.php
Footer.php => mentioned all the content present inside footer and require wp_footer()
/assets => contains all the required css, js , images , fonts files into here.
/woocommerce => contains all the woocommerce template’s folder’s files only.
Before starting, first make your wordpress project structure and set the permalink and homepage.
Note: shop page “add to cart” button linked to home page products “add to cart” button most of the time.
Plugins required: class editor, woocommerce, yith add to wishlist etc.
When setting up a project, make sure all the scripts are enqueued inside functions.php.
But first of all create the custom theme and integrate functions.php file with css and js files.
<?php function enqueue_js_css_scripts() { wp_enqueue_style('bootstrap-css', get_template_directory_uri() . '/assets/css/bootstrap.min.css', array(), '5.3.0'); wp_enqueue_style('site-css', get_template_directory_uri() . '/assets/css/style.css', array(), '1.0.0'); wp_enqueue_style('responsive-css', get_template_directory_uri() . '/assets/css/responsive.css', array(), '1.0.0'); wp_enqueue_style('custom-css', get_template_directory_uri() . '/assets/css/custom.css', array(), '1.0.0');
// Enqueue wordpress default jquery wp_enqueue_script('jquery');
wp_enqueue_script('jquery', get_template_directory_uri() . '/assets/js/jquery-3.2.1.min.js', array(), '3.2.1', true); wp_enqueue_script('contact-form-script-js', get_template_directory_uri() . '/assets/js/contact-form-script.js', array('jquery'), '1.0.0', true); wp_enqueue_script('custom-js', get_template_directory_uri() . '/assets/js/custom.js', array('jquery'), '1.0.0', true); } add_action('wp_enqueue_scripts', 'enqueue_js_css_scripts');
?> |
** Note to add woocommerce support inside wordpress custom template.
function mytheme_add_woocommerce_support() { add_theme_support('woocommerce'); add_theme_support( 'wc-product-gallery-zoom' ); add_theme_support( 'wc-product-gallery-lightbox' ); add_theme_support( 'wc-product-gallery-slider' ); } add_action('after_setup_theme', 'mytheme_add_woocommerce_support'); |
** setup cart and checkout pages by shortcode
Before this make sure you have installed “classic editor”.
=> Enable checkout page by shortcode: [woocommerce_checkout]
=> Enable cart page by shortcode: [woocommerce_cart]
** Note: woocommerce functions cheat sheet: https://www.businessbloomer.com/woocommerce-easily-get-product-info-title-sku-desc-product-object/
Topic: custom add to cart URL
We can make custom add to cart url.
<a class="btn" href="<?php echo $product->add_to_cart_url(); ?>">Add to Cart</a> |
Topic: increment and decrement button with add to cart
When we working on the part “Add To Cart” in woocommerce, we should work with “woocommerce/global/quantity-input.php”
<div class="quantity"> <?php do_action( 'woocommerce_before_quantity_input_field' ); ?> <label class="screen-reader-text" for="<?php echo esc_attr( $input_id ); ?>"><?php echo esc_attr( $label ); ?></label> <button class="minus" aria-label="Decrease" disabled="" type="button">−</button> <input type="<?php echo esc_attr( $type ); ?>" <?php echo $readonly ? 'readonly="readonly"' : ''; ?> id="<?php echo esc_attr( $input_id ); ?>" class="<?php echo esc_attr( join( ' ', (array) $classes ) ); ?>" name="<?php echo esc_attr( $input_name ); ?>" value="<?php echo esc_attr( $input_value ); ?>" aria-label="<?php esc_attr_e( 'Product quantity', 'woocommerce' ); ?>" size="4" min="<?php echo esc_attr( $min_value ); ?>" max="<?php echo esc_attr( 0 < $max_value ? $max_value : '' ); ?>" <?php if ( ! $readonly ) : ?> step="<?php echo esc_attr( $step ); ?>" placeholder="<?php echo esc_attr( $placeholder ); ?>" inputmode="<?php echo esc_attr( $inputmode ); ?>" autocomplete="<?php echo esc_attr( isset( $autocomplete ) ? $autocomplete : 'on' ); ?>" <?php endif; ?> /> <button class="plus" aria-label="Increase" type="button">+</button>
<?php do_action( 'woocommerce_after_quantity_input_field' ); ?> </div> |
custom.js in your theme
function enable_update_cart() { $('[name="update_cart"]').removeAttr('disabled'); }
function quantity_step_btn() { var timeoutPlus; $('.quantity .plus').one().on('click', function() { $input = $(this).prev('input.qty'); var val = parseInt($input.val()); var step = $input.attr('step'); step = 'undefined' !== typeof(step) ? parseInt(step) : 1; $input.val( val + step ).change();
if( timeoutPlus != undefined ) { clearTimeout(timeoutPlus) } timeoutPlus = setTimeout(function(){ $('[name="update_cart"]').trigger('click'); }, 1000); });
var timeoutMinus; $('.quantity .minus').one().on('click', function() { $input = $(this).next('input.qty'); var val = parseInt($input.val()); var step = $input.attr('step'); step = 'undefined' !== typeof(step) ? parseInt(step) : 1; if (val > 1) { $input.val( val - step ).change(); }
if( timeoutMinus != undefined ) { clearTimeout(timeoutMinus) } timeoutMinus = setTimeout(function(){ $('[name="update_cart"]').trigger('click'); }, 1000); });
var timeoutInput; jQuery('div.woocommerce').on('change', '.qty', function(){ if( timeoutInput != undefined ) { clearTimeout(timeoutInput) } timeoutInput = setTimeout(function(){ $('[name="update_cart"]').trigger('click'); }, 1000); }); }
$(document).ready(function() { enable_update_cart(); quantity_step_btn(); });
jQuery( document ).on( 'updated_cart_totals', function() { enable_update_cart(); quantity_step_btn(); }); |
Topic: woocommerce sample csv data
We can upload sample csv data of products of woocommerce.
divi sample data
github sample data
Topic: how to show categories of woocommerce
See how to display all categories in wordpress woo project.
$taxonomy = 'product_cat'; $orderby = 'name'; $show_count = 0; // 1 for yes, 0 for no $pad_counts = 0; // 1 for yes, 0 for no $hierarchical = 1; // 1 for yes, 0 for no $title = ''; $empty = 0;
$args = array( 'taxonomy' => $taxonomy, 'orderby' => $orderby, 'show_count' => $show_count, 'pad_counts' => $pad_counts, 'hierarchical' => $hierarchical, 'title_li' => $title, 'hide_empty' => $empty ); $all_categories = get_categories($args); foreach ($all_categories as $cat) { // if you only want to show parent category if ($cat->category_parent == 0) { // you can show this below code for all categories $name = $cat->name; $category_id = $cat->term_id; $link = get_term_link($cat->slug, 'product_cat'); $thumbnail_id = get_term_meta( $cat->term_id, 'thumbnail_id', true ); $image = wp_get_attachment_url($thumbnail_id); } } |
Topic: how to get featured products in woocommerce
We can list all the featured products in woocommerce.
// The tax query $tax_query[] = array( 'taxonomy' => 'product_visibility', 'field' => 'name', 'terms' => 'featured', 'operator' => 'IN', // or 'NOT IN' to exclude feature products );
// The query $query = new WP_Query( array( 'post_type' => 'product', 'post_status' => 'publish', 'ignore_sticky_posts' => 1, 'posts_per_page' => $products, 'orderby' => $orderby, 'order' => $order == 'asc' ? 'asc' : 'desc', 'tax_query' => $tax_query // <=== ) );
if ($query->have_posts()) { while ($query->have_posts()) { $query->the_post(); // Set up post data $product_title = get_the_title(); // Get the product title $thumbnail = get_the_post_thumbnail_url(get_the_ID(), 'thumbnail'); $regular_price = $product->get_regular_price(); $sale_price = $product->get_sale_price(); } } |
Top: latest product show/newest arrival product display in woocommerce.
Let’s see how to apply the latest product, and display it inside the woocommerce home page.
<ul> <?php $args = array( 'post_type' => 'product', 'posts_per_page' => 10, 'orderby' => 'date', 'orderby' => 'DESC', );
$loop = new WP_Query($args);
while ($loop->have_posts()): $loop->the_post(); global $product; ?> <li> <div class="product-box"> <div class="image-holder"> <a href=""> <img src="<?php echo woocommerce_get_product_thumbnail(); ?>" alt="product"> </a> <div class="wish-list"> <a href="#"> <?php echo do_shortcode('[yith_wcwl_add_to_wishlist]'); ?> </a> </div> </div> <div class="product-info"> <div class="cart-btn"> <a href="#"><img src="<?php echo get_template_directory_uri(); ?>/assets/images/cart-icon.svg"> <?php woocommerce_template_loop_add_to_cart($query->post); ?> </a> </div> <a href="#"><?php echo get_the_title(); ?></a> <h4><?php echo $product->get_price_html(); ?></h4> </div> </div> </li> <?php endwhile; wp_reset_postdata(); ?>
</ul> |
Topic: setup cart and checkout pages by shortcode
Before this make sure you have installed “classic editor”.
Enable checkout page by shortcode: [woocommerce_checkout]
Enable cart page by shortcode: [woocommerce_cart]
Topic: add_price_html() working functionality
We can show the product's html price of a woocommerce product.
$product = wc_get_product(get_the_ID()); <?php echo $product->get_price_html(); ?> |
** sometime price_html design break, that time make sure to call woocommerce_ any function.
Topic: add to wishlist - yith add to wishlist.
See the screenshots for setup.
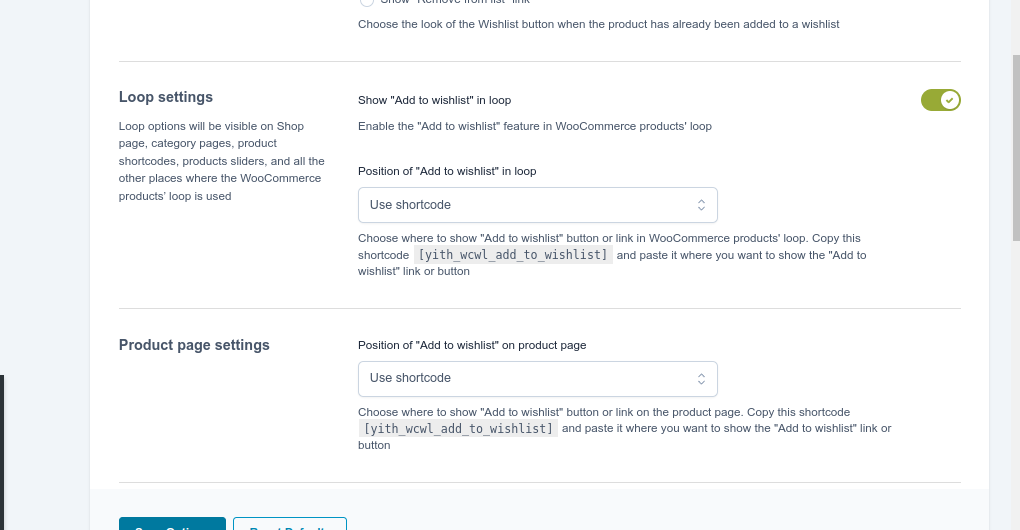
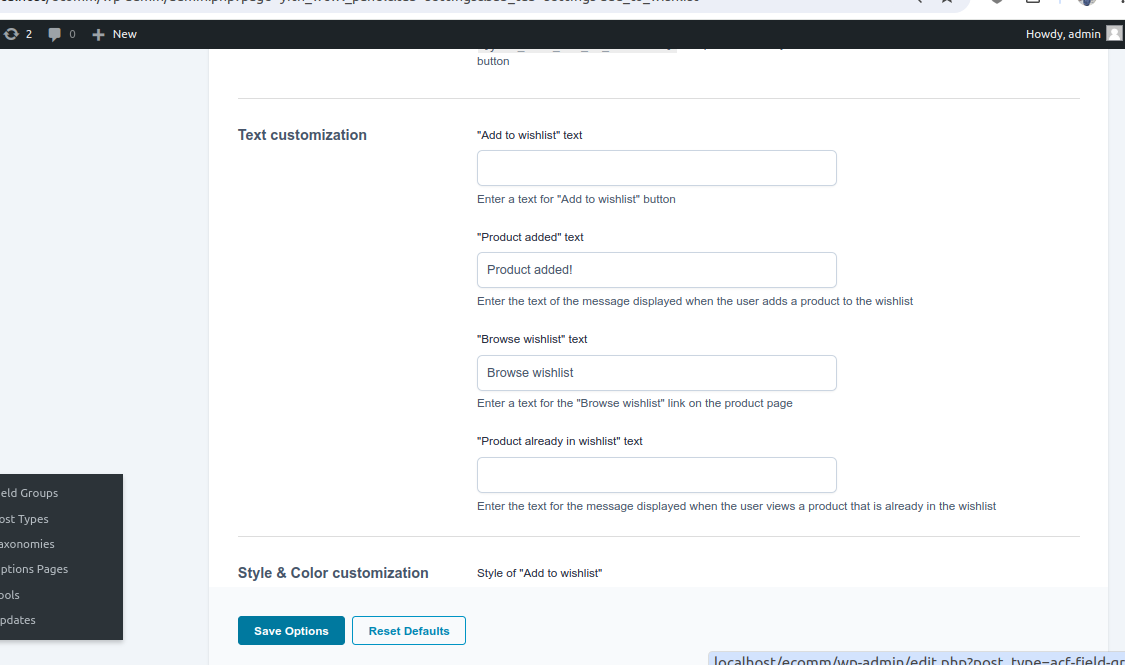
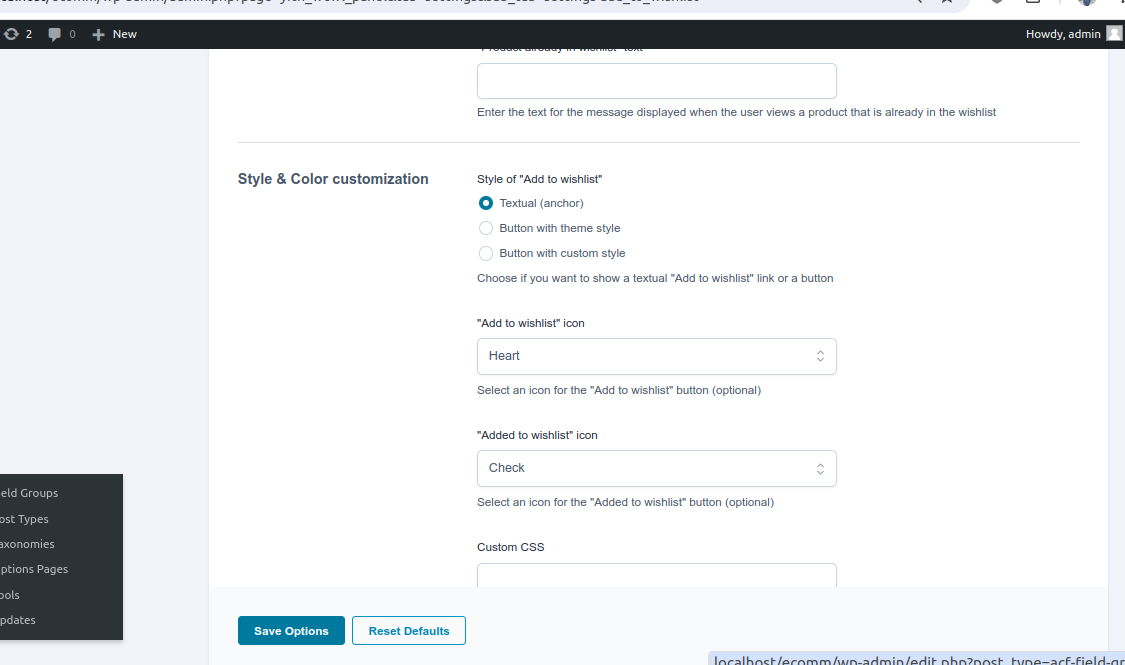
After that add inside your theme: <a href="#"> <?php echo do_shortcode('[yith_wcwl_add_to_wishlist]'); ?></a>
Now, see how to show add to wishlist number dynamically.
/*** header.php **/ <li><a href="/wishlist"><img src="<?php echo get_template_directory_uri(); ?>/assets/images/wishlist-icon.svg"> <span class="wishlist-count"><?php echo yith_wcwl_count_products(); ?></span> </a></li>
/**** functions.php , enqueue script ****/ wp_enqueue_script('custom-js', get_template_directory_uri() . '/assets/js/custom.js', array('jquery'), time(), true);
// Pass AJAX URL to JavaScript wp_localize_script('custom-js', 'wishlist_ajax_obj', array( 'ajax_url' => admin_url('admin-ajax.php') )); /*** inside custom.js **/ // help to fetch add to wishlist number via ajax. jQuery(document).ready(function($) { $(document).on('added_to_wishlist removed_from_wishlist', function() { $.ajax({ url: wishlist_ajax_obj.ajax_url, type: 'POST', data: { action: 'update_wishlist_count' }, success: function(response) { $('.wishlist-count').text(response); } }); }); }); |
Topic: hooks workflow
Woocommerce has many hooks to work with.
<?php do_action( 'woocommerce_before_shop_loop' ); ?> => it basically helps to render the below section before the shop loop.
Topic: how to add widgets and call it in wordpress
Now we can add a widget and call it on specific pages.
Functions.php
function wpb_widgets_init() { register_sidebar(array( 'name' => __('Filter Sidebar', 'wpb'), 'id' => 'sidebar-filter', 'description' => __('Shop page filteration', 'wpb'), 'before_widget' => '<aside id="%1$s" class="widget %2$s">', 'after_widget' => '</aside>', 'before_title' => '<h3 class="widget-title">', 'after_title' => '</h3>', )); }
add_action('widgets_init', 'wpb_widgets_init'); |
Inside page.
<?php if ( is_active_sidebar( 'sidebar-filter' ) ) : //check the sidebar if used. dynamic_sidebar( 'sidebar-filter' ); // show the sidebar. endif; ?> |
—-----------------------------------------------------------------------------------------------------------------------
Topic: FRONT page
We can set the front page according to our needs.
Topic: AJAX based “add to cart” in home page.
This will hide the add to cart button and show view cart button automatically using ajax after add. [without hook]
We can apply ajax based add to cart in home page: font-page.php
We can apply an add to cart method using ajax in woocommerce.
<a href="<?php echo esc_url($product->add_to_cart_url()); ?>" class="ajax_add_to_cart add_to_cart_button" data-product_id="<?php echo get_the_ID(); ?>">Add</a> |
** To display ajax cart quantity in header …
// shortcode start function home_quantity_show() { ob_start(); $items_count = WC()->cart->get_cart_contents_count(); global $woocommerce; $cart_page_url = function_exists('wc_get_cart_url') ? wc_get_cart_url() : $woocommerce->cart->get_cart_url(); echo "<a href='$cart_page_url' id='cart-number-show' >" . $items_count . "</a>"; return ob_get_clean(); } add_shortcode('home_quantity_show', 'home_quantity_show'); // shortcode end
add_action('wp_ajax_update_cart_quantity', 'update_cart_quantity'); add_action('wp_ajax_nopriv_update_cart_quantity', 'update_cart_quantity'); function update_cart_quantity() { $items_count = WC()->cart->get_cart_contents_count(); echo $items_count; wp_die(); }
add_action('wp_footer', 'enqueue_cart_update_script'); function enqueue_cart_update_script() { ?> <script type="text/javascript"> jQuery(function($){ // Trigger on product added to cart event $('body').on('added_to_cart', function(){ // Make AJAX request to update cart count $.ajax({ url: '<?php echo admin_url('admin-ajax.php'); ?>', method: 'GET', data: { action: 'update_cart_quantity', }, success: function(response) { // Update the cart count in the DOM $('#cart-number-show').text(response); } }); }); }); </script> <?php } |
Edit style.css
.ajax_add_to_cart.added { display: none !important; } a.added_to_cart { background: #dbcc8f !important; color: #fff !important; width: 100%; text-decoration: none; text-align: center !important; padding-bottom: 0.5rem !important; padding-top: 0.5rem !important; margin-right: 0.25rem !important; font-size: 13px; text-transform: uppercase; font-weight: 300; } |
** Note: make sure to adjust view cart button design.
For more follow: https://stackoverflow.com/questions/25892871/woocommerce-product-page-how-to-create-ajax-on-add-to-cart-button
Topic: Add to cart functionality with hook
front-page.php
<p class="bottom-area d-flex px-3"> <?php woocommerce_template_loop_add_to_cart($query->post); ?> </p> |
/loop/add-to-cart.php
sprintf( '<a href="%s" aria-describedby="woocommerce_loop_add_to_cart_link_describedby_%s" data-quantity="%s" class="%s add-to-cart-custom" %s><span> %s <i class="ion-ios-add ml-1"></i></span></a> ', |
Note: I have added add-to-cart-custom class and fix the css code.
Here is the sample css..
.add-to-cart-custom:hover{ background: #dbcc8f !important; color: #fff !important; }
.add-to-cart-custom{ background: black !important; color: white !important; width: 100%; text-decoration: none; text-align: center !important; padding-bottom: 0.5rem !important; padding-top: 0.5rem !important; margin-right: 0.25rem !important; font-size: 13px; text-transform: uppercase; font-weight: 300; } |
Topic: set ‘add to cart’ and ‘view cart’ button in front page, which is linked to SHOP page ‘add to cart’ button.
/woocommerce/loop/add-to-cart.php
echo apply_filters( 'woocommerce_loop_add_to_cart_link', // WPCS: XSS ok. sprintf( '<a href="%s" class="add-to-cart text-center py-2 mr-1 %s" data-quantity="%s" aria-describedby="woocommerce_loop_add_to_cart_link_describedby_%s" %s><span>%s <i class="ion-ios-add ml-1"></i></span></a>', esc_url( $product->add_to_cart_url() ), esc_attr( isset( $args['class'] ) ? $args['class'] : '' ), esc_attr( isset( $args['quantity'] ) ? $args['quantity'] : 1 ), esc_attr( $product->get_id() ), isset( $args['attributes'] ) ? wc_implode_html_attributes( $args['attributes'] ) : '', esc_html( $product->add_to_cart_text() ) ), $product, $args ); |
** one thing to note: by default it provides “'<a href="%s" aria-describedby="woocommerce_loop_add_to_cart_link_describedby_%s" data-quantity="%s" class="%s" %s>%s</a>',” so modify with your own custom html code and disable below “<span id="woocommerce_loop_add_to_cart_link_describedby_”
Now, inside style.css or your theme custom.css add the code below …
.ajax_add_to_cart.added { display: none !important; }
a.added_to_cart { background: #dbcc8f !important; color: #fff !important; width: 100%; text-decoration: none; text-align: center !important; padding-bottom: 0.5rem !important; padding-top: 0.5rem !important; margin-right: 0.25rem !important; font-size: 13px; text-transform: uppercase; font-weight: 300; } |
** note: adjust the class “a.added_to_cart” according to your add to cart button needs.
—------------------------------------------------------------------------------------------------------------------------
Topic: SHOP page in woocommerce
Let’s see how to build a shop page step by step. Note: you should work with ‘archive-product.php’ and ‘content-product.php’. ‘Product-content’ linked to /loop folder files.
STEP 1: setup <main> tag - archive-product.php
When making a woocommerce project, first set the main tag.
<?php get_header('shop'); ?> <main>
// rest content and sections
</main> <?php get_footer('shop'); ?> |
STEP 2: set the sorting section, filter sidebar and product listing.
Now let’s see the basic skeleton of the shop page. Follow below structure –
<?php get_header('shop'); ?> <main>
=== banner area === <section> // show breadcamps <h4><?php do_action( 'woocommerce_before_main_content' ); ?></h4> // page title <h1><?php echo woocommerce_page_title(false); ?></h1> </section> <section> <row> <col> <col-6> Text.. </col> // show product sorting - low-to-high, high-to-low, newest etc. <col-6> <?php do_action('woocommerce_before_shop_loop'); ?> </col> </col> </row> <row> <col-3> <?php do_shortcode('product-filter-plugin'); ?> </col> <col-9> // disable archive header // shop loop start & end </col> </row> </section> hook => _after_main_content // disable sidebar hook. </main> <?php get_footer('shop'); ?> |
STEP 3: set each product of shop page inside ‘product-content.php’
We can fix the design of each product inside this file. But before fixing this file first fix the loop-start and loop-end file inside /loop folder. Change <ul> tags structure of them.
Now for settings each product, visit ‘product-content.php’
<?php defined('ABSPATH') || exit; global $product; // Ensure visibility. if (empty($product) || !$product->is_visible()) { return; } ?>
<li> // product content <div> hook => shop_loop_item <div class='image-wrap'> <?php hook => product thumbnail ?> </div> <div class='info-wrap'> <?php hook => product tiel, price, add to cart ?> </div> hook end => shop_loop_item_title </div> <li> |
—------------------------------------------------------------------------------------------------------------------------
Topic: Product Details page - Woocommerce
When you click on a product by click on it’s permalink , for editing woocommerce style, first “single-product.php”. One plugin you should install for product image’s slides: Product Gallery Slider, Additional Variation Images for WooCommerce By Codeixer
STEP 1: Now , first the main tags inside the header and footer of this page.
<?php get_header( 'shop' ); ?> <main> // linked to single-product-content.php </main> <?php get_footer( 'shop' ); ?> |
STEP 2: Now, go inside “content-single-product.php”. Now follow the skeleton.
Note: if you want to edit the content of a single product, go inside /single-product folder. Inside related products,you don’t need to change them; it will get all from the SHOP page and it’s designs.
hook => woocommerce_before_single_product // product banner section - images + [name,add to cart, price html, wishlist, category type] <section class='product-banner-sction'> // product images + sale ?! <div class='col-6'> hook => woocommerce_before_single_product_summary </div> //product description <div class='col-6'> hook => woocommerce_single_product_summary </div> </section>
// tabs section - product description, reviews tab, shipping summary, additional information ** for editing with tabs you need to work with functions.php file.
// for showing related products + tabs(description, reviews). hook => woocommerce_after_single_product_summary
hook => woocommerce_after_single_product |
STEP 3: now, you can set the tabs design fix.
Now, go to /single-product/tabs/tabs.php. Follow the skeleton.
<div class='conainer'> <div class='row'> <div class='col-lg-12'> hook => // woocommerce tabs <ul class='wc-tabs nav nav-tabs'> <li class='nav-link'> // woocommerce code for tabs render. </li> </ul>
hook => woocommerce_product_after_tabs
</div> </div> </div> |
—------------------------------------------------------------------------------------------------------------------------
Topic: Cart page - Woocommerce
STEP 1: add woocommerce cart shortcut to cart page
When you build a cart page in your child theme, make sure first delete all the content from the cart page from wp-admin/pages. Now paste the shortcode, [woocommerce_cart]
STEP 2: visit /cart folder and “cart.php” for edit cart page
First set the cart banner if present.
<section> // banner area </section> Hook => woocommerce_before_cart |
STEP 3: For edit all the cart table , coupon code follow the structure …
<section> // banner area </section> Hook => woocommerce_before_cart <section> <col-6> <table> // woocommerce cart table </table> </col> <col-6> // apply coupon section, checkout section. </col> </section> Hook => woocommerce_after_cart |
—-----------------------------------------------------------------------------------------------------------------------
Topic: Wishlist page design in woocommerce
First of all we make wishlist page using “yith wishlist plugin”. So we will copy plugin/yith/templates/wishlist-view.php and paste inside /woocommerce folder.
You can paste your custom html design inside this page. Let’s see some of the functions and hook workflow.
Function: yith_wcwl_count_all_products() = its count all the products which added into woocommerce wishlist.
For getting all the wishlist items data see below code reference …
<?php if ($wishlist && $wishlist->has_items()) { ?> <?php foreach ($wishlist_items as $item) { global $product; $product = $item->get_product(); if ($product && $product->exists()) { $item = wc_get_product($product->get_id()); $image_id = $product->get_image_id(); $image_url = wp_get_attachment_image_url($image_id, 'full'); $remove_url = YITH_WCWL()->get_remove_url($item->get_id()); $stock = $product->get_stock_quantity(); } if($stock == null){ } ?> |
Topic: List woocommerce categories at once.
For listing all woocommerce categories see below code reference ….
$product_categories = get_terms( array( 'taxonomy' => 'product_cat', 'orderby' => 'name', 'order' => 'ASC', 'hide_empty' => true, // Set to false to show empty categories ) ); // Check if any categories were returned if ( ! empty( $product_categories ) && ! is_wp_error( $product_categories ) ) { foreach ( $product_categories as $category ) { echo $category->name; echo get_field('product_background_colour','product_cat_'.$category->term_id); echo "<br/>"; } echo '</ul>'; } else { echo '<p>No categories found.</p>'; }
|
Topic: list category related post at once
We can list all the posts/products related to category.
$category_slug = 'mobiles';
// Query the posts in the specific category $args = array( 'post_type' => 'product', 'posts_per_page' => 4, 'order_by' => 'date', 'tax_query' => array( array( 'taxonomy' => 'product_cat', // Change to 'category' for regular blog posts 'field' => 'slug', 'terms' => $category_slug, ), ), );
$query = new WP_Query($args); if ($query->have_posts()) { while ($query->have_posts()) { $query->the_post(); $thumbnail = wp_get_attachment_image_src(get_post_thumbnail_id(), 'large');
$categories = get_the_terms(get_the_ID(), 'product_cat'); if ($categories && !is_wp_error($categories)) { foreach ($categories as $category) { $product_category = $category->name; } } |
—------------------------------------------------------------------------------------------------------------------------
Topic: product search using plugin
For finding product in homepage or something else position, we can use a plugin in woocommerce .

Settings 1: Now fix the plugin settings and paste the short as per your custom theme or something page.

Settings 2: now change layout under “layout options”

Settings 3: now go to “Frontend Filters“ and drag the estimated things ….


Settings 4: disable autocomplete suggestions under general tabs.

Settings 5: change the behaviour redirection settings.


Topic: change text of related products - single product page
Apply this code below …
// change product details page - related products text change hook. add_filter('woocommerce_product_related_products_heading',function(){ return 'you may also like'; }); |

Topic: cart page to checkout page auto redirect
We can automatically redirect from /shop to /checkout page in woocommerce automatically.
/** redirect user from cart -> checkout directly */ function cart_page_redirect() { global $post; if (is_cart()): wp_redirect(wc_get_checkout_url()); endif; } add_action('wp', 'cart_page_redirect'); |
Topic: DISABLE SHOP PAGE - SHOW 404
We can disable /shop page to 404.
function woocommerce_disable_shop_page() { global $post; if (is_shop()): global $wp_query; $wp_query->set_404(); status_header(404); endif; } add_action('wp', 'woocommerce_disable_shop_page'); |
Topic: Single variation, Add one single variation of a product at a time to cart
We can make a logic, where user can add one variation of product at a time.
add_filter('woocommerce_add_to_cart_validation', 'restrict_single_variation_in_cart', 10, 3); function restrict_single_variation_in_cart($passed, $product_id, $quantity) { // Check if the product is variable if ($product_id) { // Loop through cart items foreach (WC()->cart->get_cart() as $cart_item_key => $cart_item) { // If a different variation of the same product is already in the cart if ($cart_item['product_id'] == $product_id && $cart_item['variation_id'] != $product_id) { // Remove existing item from cart WC()->cart->remove_cart_item($cart_item_key); } } } return $passed; } |
Topic: Add to cart -> checkout page auto-redirect
We can redirect user to “checkout” page when click on “add to cart” button.
/** ADD TO CART TRIGGER HOOK -> checkout page redirect */ add_filter ('woocommerce_add_to_cart_redirect', function( $url, $adding_to_cart ) { return wc_get_checkout_url(); }, 10, 2 ); |
Topic: REMOVING COMPANY NAME FROM CHECKOUT PAGE.
We can remove ‘company name‘ from the checkout page.
/** REMOVING COMPANY NAME FROM CHECKOUT PAGE. */ add_filter( 'woocommerce_checkout_fields', 'remove_company_name' ); function remove_company_name( $fields ) { unset($fields['billing']['billing_company']); // This line removes the field return $fields; } |
Topic: stripe payment gateway integration in woocommerce.
We can integrate stripe payment gateway in woocomm.
Step 1:
Topic: additional information tab - woocommerce
How to display additional information in woocommerce. For this you should add attributes and also can add values to it.



For that, we need to create Attributes under products. Also we need to add all variations and generate variations and also need to add price to it.
Topic: text before price - variation and simple product
We can add custom text before price in both cases.

function bd_rrp_price_html( $price, $product ) { $return_string = 'RRP: ' . $price; return $return_string; } add_filter( 'woocommerce_get_price_html', 'bd_rrp_price_html', 100, 2 ); |
Topic: breadcamp’s text change - single product page in woocommerce

add_filter( 'woocommerce_breadcrumb_defaults', 'product_details_change_breadcrumb_home_text',20); function product_details_change_breadcrumb_home_text( $defaults ) { // applicable for single product page if(is_product()){ $defaults['home'] = 'Products'; return $defaults; } } |
Topic: remove breadcamps from product details page - woocommerce
// Remove breadcrumbs from shop & categories add_filter( 'woocommerce_before_main_content', 'remove_breadcrumbs'); function remove_breadcrumbs() { if(is_product()) { remove_action( 'woocommerce_before_main_content','woocommerce_breadcrumb', 20, 0); } } |
Topic: fancy product designer ~ FPD
When you work on customized products in woocommerce, you can use fancy product designer.
Like other plugin it stores all the data inside post meta.
DISABLE ADD TO CART BUTTON IF CUSTOMIZE ENABLED FOR THE PRODUCT.
$product = wc_get_product(get_the_ID()); $product_data = $product->get_meta('fpd_products'); <?php if(! $product_data){ ?> <button type="submit" name="add-to-cart" value="<?php echo esc_attr( $product->get_id() ); ?>" class="single_add_to_cart_button button alt<?php echo esc_attr( wc_wp_theme_get_element_class_name( 'button' ) ? ' ' . wc_wp_theme_get_element_class_name( 'button' ) : '' ); ?>"><?php echo esc_html( $product->single_add_to_cart_text() ); ?></button> <?php } ?> |
Topic: load more button - custom - woocommerce
We can make custom load more buttons for the woocommerce shop page.
/** SHOP PAGE PRODUCTS LOOP */ function display_all_woocommerce_products($atts) { $PostPerPage = 9; $search_query = isset($_GET['find']) ? sanitize_text_field($_GET['find']) : ''; // Sanitize search input
$query_args = array( 'post_type' => 'product', 'posts_per_page' => $PostPerPage, 'paged' => 1, );
// Add search functionality if `find` parameter is present if (!empty($search_query)) { $query_args['s'] = $search_query; } $query = new WP_Query(apply_filters('woocommerce_shortcode_products_query', $query_args));
ob_start();
if ($query->have_posts()) { ?>
<div class="row" id="product-list"> <?php while ($query->have_posts()) { $query->the_post();
$product = wc_get_product(get_the_ID()); $image = wp_get_attachment_image_src(get_post_thumbnail_id($product->get_id()), 'full')[0]; $category_names = wc_get_product_category_list($product->get_id(), ', '); $stock_quantity = $product->get_stock_quantity(); $time = strtotime($product->get_date_created()) > strtotime('-30 days'); $stock_status = $product->get_stock_status();
// for single product in stock selected by default, for variation product we atleast need to set variations if ($stock_status == "instock") { if ($time) { $label = "new"; } else { $label = "in stock"; } } else { $label = "out of stock"; }
// setting color if ($stock_status == "instock") { if ($time) { $color = "#333"; $background_color = "#FFCA7B"; } else { $color = "#fff"; $background_color = "#FF4033"; } } else { $color = "#333"; $background_color = "#FFCA7B"; } ?>
<div class="col-lg-4 col-md-6 product-list-pannel"> <div class="product-card"> <div class="card-span" style="background: <?php echo $background_color; ?>;"> <h5 style="color: <?php echo $color; ?>;"> <?php echo $label; ?> </h5> </div> <a href="<?php echo $product->get_permalink(); ?>"> <div class="product-img"> <img src="<?php echo esc_url($image); ?>" alt="<?php echo esc_attr(get_the_title()); ?>"> </div> </a> <div class="product-cnt"> <p><?php echo wp_kses_post($category_names); ?></p> <a href="<?php echo esc_url($product->get_permalink()); ?>"> <h4><?php echo esc_html(get_the_title()); ?></h4> </a> <div class="price"> <h4><?php echo wp_kses_post($product->get_price_html()); ?></h4> <?php if ($stock_status == "instock") { ?> <a href="<?php echo esc_url($product->add_to_cart_url()); ?>" class="prd-btn ajax_add_to_cart add_to_cart_button" data-product_id="<?php echo get_the_ID(); ?>"> <img src="<?php echo esc_url(get_stylesheet_directory_uri() . '/assets/images/cart-icon.svg'); ?>" alt="cart">Add </a> <?php } ?> </div> </div> </div> </div>
<?php } ?> </div>
<br> <div class="load-more-shop-btn"> <button class="brxe-button hdr-btn bricks-button load-more-btn" data-page="1" style="display: none;">load more</button> </div>
<script> var ajaxurl = "<?php echo admin_url('admin-ajax.php') ?>";
jQuery(document).ready(function ($) {
// Hide Load More button if filters are applied var currentUrl = new URL(window.location.href); var searchParams = currentUrl.searchParams;
// Check if any filter parameter exists var hasFilters = Array.from(searchParams.keys()).some(function (key) { return key.startsWith('wpf_fbv'); // Adjust this prefix based on your plugin's filter query keys });
if (hasFilters) { $('.load-more-btn').hide(); // Hide the button return; // Stop further processing of Load More logic } else { $('.load-more-btn').show();
$('.load-more-btn').on('click', function () { var button = $(this); var currentPage = parseInt(button.data('page')) + 1; var queryParams = new URLSearchParams(window.location.search); var orderby = queryParams.get('orderby') || 'date';
$.ajax({ url: ajax_obj.ajax_url, // WordPress AJAX URL type: 'POST', data: { action: 'load_more_products', page: currentPage, security: ajax_obj.nonce, // Include the nonce filters: Object.fromEntries(queryParams), // Pass all query parameters as an object orderby: orderby, // Pass the sort orde }, beforeSend: function () { button.text('Loading...'); }, success: function (response) { if (response.success) { $('#product-list').append(response.data.html);
if (!response.data.has_more) { button.remove(); // Remove the button if no more products } else { button.data('page', currentPage).text('Load More'); } } else { button.text('No More Products').prop('disabled', true); } }, error: function () { button.text('Error').prop('disabled', true); } }); });
} // end of ajax
}); </script>
<?php } else { ?> <p>No products found.</p> <?php }
wp_reset_postdata(); return ob_get_clean(); } add_shortcode('woocomm_all_products', 'display_all_woocommerce_products');
function load_more_products() { check_ajax_referer('ajax_nonce', 'security'); // Validate nonce
$paged = isset($_POST['page']) ? intval($_POST['page']) : 1; $filters = isset($_POST['filters']) ? $_POST['filters'] : array(); // Get filters from AJAX $orderby = isset($_POST['orderby']) ? sanitize_text_field($_POST['orderby']) : 'date'; // Default to sorting by date
$query_args = array( 'post_type' => 'product', 'posts_per_page' => 9, 'paged' => $paged, 'orderby' => $orderby, // Apply the sort order );
// Handle WooCommerce ordering parameters switch ($orderby) { case 'price': $query_args['meta_key'] = '_price'; $query_args['orderby'] = 'meta_value_num'; $query_args['order'] = 'ASC'; break; case 'price-desc': $query_args['meta_key'] = '_price'; $query_args['orderby'] = 'meta_value_num'; $query_args['order'] = 'DESC'; break; case 'rating': $query_args['meta_key'] = '_wc_average_rating'; $query_args['orderby'] = 'meta_value_num'; $query_args['order'] = 'DESC'; break; case 'popularity': $query_args['meta_key'] = 'total_sales'; $query_args['orderby'] = 'meta_value_num'; $query_args['order'] = 'DESC'; break; case 'date': default: $query_args['orderby'] = 'date'; $query_args['order'] = 'DESC'; break; }
// Add filter parameters dynamically foreach ($filters as $key => $value) { if (strpos($key, 'wpf_filter_') === 0) { // Adjust based on your filter plugin's query key $query_args[$key] = sanitize_text_field($value); } }
$query = new WP_Query(apply_filters('woocommerce_shortcode_products_query', $query_args));
if ($query->have_posts()) { ob_start();
while ($query->have_posts()) { $query->the_post();
$product = wc_get_product(get_the_ID()); $image = wp_get_attachment_image_src(get_post_thumbnail_id($product->get_id()), 'full')[0]; $category_names = wc_get_product_category_list($product->get_id(), ', '); $stock_quantity = $product->get_stock_quantity(); $time = strtotime($product->get_date_created()) > strtotime('-30 days'); $stock_status = $product->get_stock_status();
// for single product in stock selected by default, for variation product we atleast need to set variations if ($stock_status == "instock") { if ($time) { $label = "new"; } else { $label = "in stock"; } } else { $label = "out of stock"; }
// setting color if ($stock_status == "instock") { if ($time) { $color = "#333"; $background_color = "#FFCA7B"; } else { $color = "#fff"; $background_color = "#FF4033"; } } else { $color = "#333"; $background_color = "#FFCA7B"; } ?> <div class="col-lg-4 col-md-6 product-list-pannel"> <div class="product-card"> <div class="card-span" style="background: <?php echo $background_color; ?>;"> <h5 style="color: <?php echo $color; ?>;"> <?php echo $label; ?> </h5> </div> <div class="product-img"> <img src="<?php echo esc_url($image); ?>" alt="<?php echo esc_attr(get_the_title()); ?>"> </div> <div class="product-cnt"> <p><?php echo wp_kses_post($category_names); ?></p> <a href="<?php echo esc_url($product->get_permalink()); ?>"> <h4><?php echo esc_html(get_the_title()); ?></h4> </a> <div class="price"> <h4><?php echo wp_kses_post($product->get_price_html()); ?></h4> <?php if ($stock_status == "instock") { ?> <a href="<?php echo esc_url($product->add_to_cart_url()); ?>" class="prd-btn ajax_add_to_cart add_to_cart_button" data-product_id="<?php echo get_the_ID(); ?>"> <img src="<?php echo esc_url(get_stylesheet_directory_uri() . '/assets/images/cart-icon.svg'); ?>" alt="cart">Add </a> <?php } ?> </div> </div> </div> </div> <?php }
$output = ob_get_clean(); $more_products = $query->max_num_pages > $paged; // Check if there are more products.
wp_send_json_success(array( 'html' => $output, 'has_more' => $more_products, // Send a flag to indicate if more products are available. )); } else { wp_send_json_error(array( 'message' => 'No more products.', )); }
wp_reset_postdata(); wp_die(); } add_action('wp_ajax_load_more_products', 'load_more_products'); add_action('wp_ajax_nopriv_load_more_products', 'load_more_products');
/** END OF SHOP PAGE PRODUCT'S LOOP */ |
Topic: sorting dropdown - woocommerce - shop page
We can make custom woocommerce dropdown for shop page.
// Shortcode to display the WooCommerce sorting dropdown function woocommerce_sorting_dropdown_shortcode() { // Get the current sorting options $current_orderby = isset($_GET['orderby']) ? sanitize_text_field($_GET['orderby']) : 'menu_order';
// Get available sorting options $orderby_options = array( 'menu_order' => __('Sort by', 'woocommerce'), 'popularity' => __('Sort by popularity', 'woocommerce'), 'rating' => __('Sort by average rating', 'woocommerce'), 'date' => __('Sort by newness', 'woocommerce'), 'price' => __('Sort by price: low to high', 'woocommerce'), 'price-desc' => __('Sort by price: high to low', 'woocommerce'), );
// Begin the sorting dropdown ob_start(); ?> <div class="custom-shop-shorting"> <form class="woocommerce-ordering" method="get"> <select name="orderby" class="orderby" aria-label="Shop order" onchange="this.form.submit()"> <?php foreach ($orderby_options as $value => $label) { echo '<option value="' . esc_attr($value) . '" ' . selected($value, $current_orderby, false) . '>' . esc_html($label) . '</option>'; } ?> </select> <input type="hidden" name="paged" value="1" /> </form> </div> <?php return ob_get_clean(); } add_shortcode('woocommerce_sorting_dropdown', 'woocommerce_sorting_dropdown_shortcode'); |
Topic: hide customize button - product fancy designer - FPD
Let’s hide the add to car button in the product details page when using plugin - fancy product designer.
Plugin url: https://codecanyon.net/item/fancy-product-designer-woocommercewordpress/6318393?irgwc=1&clickid=VdXTbXWeJxyKWsB3AWwmhXdXUkCVa%3A2gZStowE0&iradid=275988&irpid=33349&iradtype=ONLINE_TRACKING_LINK&irmptype=mediapartner&mp_value1=&utm_campaign=af_impact_radius_33349&utm_medium=affiliate&utm_source=impact_radius
<?php if($product_data && $product->is_type('simple')){ ?> <button style="display: none;" type="submit" name="add-to-cart" value="<?php echo esc_attr( $product->get_id() ); ?>" >add to cart</button> <?php }else{ ?> <button type="submit" name="add-to-cart" value="<?php echo esc_attr( $product->get_id() ); ?>" class="single_add_to_cart_button button alt<?php echo esc_attr( wc_wp_theme_get_element_class_name( 'button' ) ? ' ' . wc_wp_theme_get_element_class_name( 'button' ) : '' ); ?>"><?php echo esc_html( $product->single_add_to_cart_text() ); ?></button> <?php } ?> <?php do_action( 'woocommerce_after_add_to_cart_button' );?> </form> |
Topic: product price - get woocommerce product price
We can get product prices with the default woocomm currency symbol.
// get product price - sale/regular function get_product_price() { global $product; if ($product->is_type('simple')) { if ($product->is_on_sale()) { return get_woocommerce_currency_symbol() . $product->get_sale_price(); } return get_woocommerce_currency_symbol() . $product->get_regular_price(); } elseif ($product->is_type('variable')) { // For variable products, we want to show the price range (from-to). $min_price = $product->get_variation_price('min', true); // Min price of the variable product $max_price = $product->get_variation_price('max', true); // Max price of the variable product if ($min_price !== $max_price) { return get_woocommerce_currency_symbol() . $min_price . ' - ' . get_woocommerce_currency_symbol() . $max_price; } else { return get_woocommerce_currency_symbol() . $min_price; // Return only one price if min and max are the same } } else { // For other product types, return the price HTML as a fallback return esc_html($product->price_html()); } } |
Topic: variation product details using ID
We can get variation product details using it’s id.
function get_variation_product_details($variation_id) { // Get the variation product object $variation = wc_get_product($variation_id);
if (!$variation || !$variation->is_type('variation')) { return 'Invalid variation ID'; }
// Get the parent product $parent_id = $variation->get_parent_id(); $parent_product = wc_get_product($parent_id);
// Get details $variation_name = $parent_product->get_name(); // Parent product name $variation_url = get_permalink($parent_id); // Parent product URL $attributes = $variation->get_attributes(); // Selected attributes
// Prepare the result $result = [ 'name' => $variation_name, 'url' => $variation_url, 'attributes' => [] ];
foreach ($attributes as $attribute_name => $attribute_value) { $taxonomy = wc_attribute_taxonomy_name($attribute_name); // Proper attribute name $term = get_term_by('slug', $attribute_value, $taxonomy);
$result['attributes'][] = [ 'name' => wc_attribute_label($attribute_name, $parent_product), 'value' => $term ? $term->name : $attribute_value, // Display name or value ]; }
return $result; } |
Topic: order again/ reorder in woocommerce my account page
We can make re-orer to any product for user in my account page.
Note: Those orders which are COMPLETED by admin, only can be re-order. Means those order which are approved by admin as completed can added into user’s cart again!

/** re-order capability ~ order again */ add_filter( 'woocommerce_my_account_my_orders_actions', 'custom_order_again_action', 9999, 2 ); function custom_order_again_action( $actions, $order ) { if ( $order->has_status(array('completed', 'processing', 'on-hold')) ) { $actions['order-again'] = array( 'url' => wp_nonce_url( add_query_arg( 'order_again', $order->get_id(), wc_get_cart_url() ), 'woocommerce-order_again' ), 'name' => __( 'Order again', 'woocommerce' ), ); } return $actions; } |
Topic: hide review/stars from product category/archive product page
We can hide review stars from archive product page.

// hide reviews/starts from archive product page add_action( 'woocommerce_after_shop_loop_item_title', 'conditionally_remove_loop_rating', 4 ); function conditionally_remove_loop_rating(){ if (is_product_category()) { remove_action( 'woocommerce_after_shop_loop_item_title', 'woocommerce_template_loop_rating', 5 ); } } |
Topic: customize login error message in login page - woocommerce /my-account page
Let’s see how to customize

add_filter('login_errors','login_error_message'); function login_error_message($error){ if (strpos($error, 'username or password you entered is incorrect') !== false) { return __('username or password you entered is incorrect. <a href="'.get_site_url().'/my-account/lost-password/" title="Password Lost and Found">Lost your password</a> ', 'your-text-domain'); } return $error; } |
Topic: product images show in coocommerce
We can show a product thumbnail image and also can get all the gallery images of the product.
<!-- product custom gallery start --> <div class="swiper" id="prod-dtls-gal"> <div class="swiper-wrapper"> <?php $thumbnail = wp_get_attachment_image_src(get_post_thumbnail_id($product_id), 'single-post-thumbnail'); $no_image = get_template_directory_uri() . "/assets/images/no_image.jpg"; if ($thumbnail[0]) { ?> <!-- thumbnail image --> <div class="swiper-slide"> <div class="gal-main-img"> <img src="<?php echo $thumbnail[0] ? $thumbnail[0] : $no_image; ?>" /> </div> </div> <?php } ?>
<?php $product_id = get_the_ID(); $product = new WC_product($product_id); $attachment_ids = $product->get_gallery_image_ids();
foreach ($attachment_ids as $attachment_id) { $image_url = wp_get_attachment_url($attachment_id); ?> <!-- gallery images --> <div class="swiper-slide"> <div class="gal-main-img"><img src="<?php echo $image_url ? $image_url : $no_image; ?>" /></div> </div> <?php } ?>
</div> </div> |

Topic:
======================================================================
Topic: Custom Plugin Development
Plugin structure
When we build a plugin we need to follow a common structure for it. Let’s see below ,,,
assets/ css/ js/ img/ admin/ Page1.php Page2.php dir2/ Page1.php page2.php plugin-directory-name.php Readme.txt Lisence.txt |
Topic: let’s bulls a simple scroll to top plugin.
First let’s create a plugin folder and create some files there. I’m creating a plugin named as “Awesome Scroll To Top”. So i created a folder inside /wp-content/plugins/master_vaccine
Now let’s create some files there ….
awesome-scroll-to-top.php => this file should be the same as the plugin folder name. Index.php assets/ css/ js/ |
awesome-scroll-to-top.php |
<?php /* * Plugin Name: Awesome Scroll To Top * Plugin URI: https://example.com/plugins/the-basics/ * Description: Handle the basics with this plugin. * Version: 1.0 * Requires at least: 5.2 * Requires PHP: 7.2 * Author: Shimanta Das * Author URI: https://author.example.com/ * License: GPL v2 or later * License URI: https://www.gnu.org/licenses/gpl-2.0.html * Update URI: https://example.com/my-plugin/ * Text Domain: awesome-scroll-to-top */
if (!defined('ABSPATH')) { die("You are restricted to access this page!"); }
function enque_styles() { wp_enqueue_style("style-css", plugins_url("assets/css/style.css", __FILE__)); wp_enqueue_style("normalize-min", plugins_url("assets/css/normalize.min.css", __FILE__)); } add_action("wp_enqueue_scripts", "enque_styles"); function enque_scripts() { wp_enqueue_script("custom-js", plugins_url("assets/js/custom.js", __FILE__), array(), "1.0", "true"); } add_action("wp_enqueue_scripts", "enque_scripts"); ?>
<!-- html code which will rendered into all pages --> <a href='#' class="stt" title="scroll to top"></a> |
Note: what is the usage of defined(‘ABSPATH’) in wordpress ?
Ans - it basically prevents external users from accessing project’s .php files directly. It helps to prevent attacks from hackers as well.
When you develop a custom plugin for your wordpress project, you first mention all the plugin details.
Note: when you build a plugin you need to first define a plugin description and ‘readme.txt’ ~ for file instruction and ‘lisence.txt’ for sharing licence for that file.
Topic: Plugin Description
When we want develop plugin, we need to mention desc. Write this inside plugin-dirname.php file.
/* * Plugin Name: Vaccine * Plugin URI: https://example.com/plugins/the-basics/ * Description: vaccine management plugin * Version: 1.10.3 * Requires at least: 5.2 * Requires PHP: 7.2 * Author: Shimanta Das * Author URI: https://author.example.com/ * License: GPL v2 or later * License URI: https://www.gnu.org/licenses/gpl-2.0.html * Update URI: https://example.com/my-plugin/ * Text Domain: vaccine-management */ |
When you start building a plugin you first need to start an activation hook. Generally plugin has 2 hooks for 2 cases - activation hook and deactivation hook. As the name suggests, depending on plugin usage these hooks start their execution.
For our cases we need to perform database operations on wordpress, so we will start with an activation hook.
Topic: create tables on plugin activation
Generally in have 2 basic types of hooks in wordpress - activation and deactivation hook. Our intention is to create tables while the client/user activates their plugin. Write this inside plugin-dirname.php file.
// Activation hook function my_custom_plugin_activate() { require_once (ABSPATH . 'wp-admin/includes/upgrade.php');
// getting database auth details $path = $_SERVER['DOCUMENT_ROOT']; include_once $path . '/wp-config.php';
global $wpdb; $host = $wpdb->dbhost; $user = $wpdb->dbuser; $pass = $wpdb->dbpassword; $db = $wpdb->dbname;
$conn = mysqli_connect($host, $user, $pass, $db); // Code to execute on plugin activation global $wpdb; $table_name = $wpdb->prefix . 'vaccinations';
$sql = "CREATE TABLE $table_name ( `id` bigint NOT NULL, `phone` bigint NOT NULL, `firstname` varchar(100) NOT NULL, `lastname` varchar(100) NOT NULL, `vaccine` varchar(100) NOT NULL, `price` int NOT NULL, `doctor` varchar(100) NOT NULL, `vaccination_date` varchar(100) NOT NULL, `last_vaccination_date` varchar(100) DEFAULT NULL, `notes` varchar(200) DEFAULT NULL, `file` varchar(250) DEFAULT NULL, `userid` bigint NOT NULL ); "; // dbDelta($sql); mysqli_query($conn, $sql);
$sql = "ALTER TABLE $table_name ADD PRIMARY KEY (`id`);"; // dbDelta($sql); mysqli_query($conn, $sql);
$sql = "ALTER TABLE $table_name MODIFY `id` bigint NOT NULL AUTO_INCREMENT;"; // dbDelta($sql);
mysqli_query($conn, $sql);
} register_activation_hook(__FILE__, 'my_custom_plugin_activate'); |
Topic: how to enqueue custom css and js files with your plugin.
We can enqueue custom css and js files for our plugin. Write this inside plugin-dirname.php file.
// enqueue css files function enqueue_styles() { $plugin_url = plugin_dir_url(__FILE__); wp_enqueue_style('bootstrap-css', $plugin_url . "assets/bootstrap.css"); wp_enqueue_style('custom-css', $plugin_url . "assets/custom.css"); } add_action('admin_print_styles', 'enqueue_styles'); // eneueue js files function enqueue_scripts() { $plugin_url = plugin_dir_url(__FILE__); wp_enqueue_script('bootstrap-js', $plugin_url . "assets/bootstrap.js", array('jquery'), null, true); wp_enqueue_script('custom-js', $plugin_url . "assets/custom.js", array('jquery'), null, true);
// Enqueue jQuery & custom js wp_enqueue_script('jquery'); wp_enqueue_script('vaccine-custom-js', $plugin_url . 'assets/js/custom.js', array('jquery'), null, true);
// Localize the script with new data wp_localize_script( 'vaccine-custom-js', 'vaccine_ajax_object', array( 'ajax_url' => admin_url('admin-ajax.php') ) ); } add_action('admin_enqueue_scripts', 'enqueue_scripts'); |
Topic: create user with role in wordpress
We can create a user with its role in wordpress during plugin activation. Write this inside plugin-dirname.php file.
// adding role into wordpress project add_role( 'agent', __('Agent'), array( 'read' => true, 'edit_posts' => false, 'delete_posts' => false, 'agent_access' => true, // Custom capability ) ); // adding role into wordpress project add_role( 'patient', __('Patient'), array( 'read' => true, ) ); |
Topic: Add menu page for super admin
We can create a menu page for super admin. Write this inside plugin-dirname.php file.
Note: when you managing access for the admin, you should mention “manage_options“ for mentioning the admin control over a particular page.
// add menu to admin panel page function myprefix_register_options_page() { add_menu_page( 'Manage Your Vaccines At One Place', // Page title 'Vaccines', // Menu title 'manage_options', // Capability 'my_vaccines', // Menu slug 'my_options_page_html', // Function to display the content of the page plugins_url('icon.png', __FILE__), ); } add_action('admin_menu', 'myprefix_register_options_page'); |
** note: we can set the plugin icon using “plugins_url('icon.png', __FILE__),”
** now we can render custom html output for this menu page…
// default page calling on plugin function my_options_page_html() { if (!current_user_can('manage_options')) { return; } ?> <div class="wrap"> <h1 class="text-center">Instructions</h1> </div> <?php } |
** Note: if you want to manage any particular page on admin access then,
function myprefix_register_options_page() { add_menu_page( 'Chatbot Dashboard', // Page title 'Vaccines', // Menu title // note: admin_access to manage_options: This is a common capability that administrators have, ensuring the menu appears for admins. 'manage_options', // Capability 'my_vaccines', // Menu slug 'index_page', // Function to display the content of the page ); } add_action('admin_menu', 'myprefix_register_options_page');
function index_page(){ require (plugin_dir_path(__FILE__) . 'index.php'); } |
Topic: we can create submenu page
We can create submenu pages in plugin. We can submenu page for super admin and role based user too. Write this inside plugin-dirname.php file.
// add menu to admin panel page function myprefix_register_options_page() { add_menu_page( 'Manage Your Vaccines At One Place', // Page title 'Vaccines', // Menu title 'manage_options', // Capability 'my_vaccines', // Menu slug 'my_options_page_html', // Function to display the content of the page );
add_submenu_page( 'my_vaccines', 'All Patients', 'All Patients', 'manage_options', 'show_all_patients', 'show_all_patients_function' );
add_submenu_page( 'my_vaccines', 'All Agents', 'All Agents', 'manage_options', 'show_all_agents', 'show_all_agents_function' ); } add_action('admin_menu', 'myprefix_register_options_page'); |
** now we can link any specific page for the functions - 'show_all_patients_function' and 'show_all_agents_function'
function show_all_patients_function(){ require (plugin_dir_path(__FILE__) . 'admin/patients.php'); }
function show_all_agents_function(){ require (plugin_dir_path(__FILE__) . 'admin/agents.php'); } |
Topic: allow specific pages for specific role of user
We can create users with different roles in wordpress. Write this inside plugin-dirname.php file.
add_role( 'agent', __('Agent'), array( 'read' => true, 'edit_posts' => false, 'delete_posts' => false, 'agent_access' => true, // Custom capability ) ); // adding role into wordpress project add_role( 'patient', __('Patient'), array( 'read' => true, ) ); |
Now we create submenu pages inside the plugin and provide a special permission access.
add_submenu_page( 'my_vaccines', 'All Patient Vaccines List', 'All Patient Vaccines List', 'agent_access', 'my_all_patient_vaccines_list', 'my_all_patient_vaccines_list_function' );
add_submenu_page( 'my_vaccines', 'My Bookings', 'My Bookings', 'patient_access', 'my_bookings', 'my_bookings_function' ); |
Now we have linked the pages which linked with that specific user.
function my_all_patient_vaccines_list_function() { require (plugin_dir_path(__FILE__) . 'agent/all_vaccines_list.php'); } function my_bookings_function() { require (plugin_dir_path(__FILE__) . 'patient/bookings.php'); } |
Topic: restrict pages with user roles.
We can restrict users from page access.
if (!defined('ABSPATH')) { exit; // Exit if accessed directly } |
Topic: perform ajax operations with plugin’s pages
When we work with plugin pages, we need to make sure that our plugin pages will used AJAX operations which make this more suitable for our plugin and improve user experiences.
For making such operations, we need to first build SQL connection with the table.
// getting database auth details $path = $_SERVER['DOCUMENT_ROOT']; include_once $path . '/wp-config.php';
global $wpdb; $host = $wpdb->dbhost; $user = $wpdb->dbuser; $pass = $wpdb->dbpassword; $db = $wpdb->dbname;
$conn = mysqli_connect($host, $user, $pass, $db); |
For example we need to perform a ajax operation on the phone number field, which will fetch first name and last name of user on behalf on his/her phone number. Let;s see how we can perform ajax operations for this.
** note: in this case, we basically perform text data ajax operations, we can send a data object to the server side.
plugin/folder1/form.php |
jQuery("#input-field").blur(function () { let phone = jQuery('#input-field').val(); if (phone.length == 0) { alert("Please enter phone no.") } else { jQuery.ajax({ type: "POST", url: ajaxurl, data: { action: 'search_person', phone: phone }, success: function (response) { if (response == "failed") { jQuery("#email_sec").show(); } else { // your next operations } }, error: function(response){ alert("Error Occured! Try again!"); }, }); }
}); |
plugin-dirname.php |
// Search for person by phone number - vaccine registration form add_action('wp_ajax_search_person', 'find_names'); add_action('wp_ajax_nopriv_search_person', 'find_names'); function find_names() { $phone = sanitize_text_field($_POST['phone']);
$args = array( 'meta_key' => 'phone', 'meta_value' => $phone );
$user_query = new WP_User_Query($args); $users = $user_query->get_results(); error_log("Number of users found: " . count($users));
if (!empty($users)) { $user = $users[0]; // Assuming phone numbers are unique $fname = $user->first_name; $lname = $user->last_name; $fullname = $fname . " " . $lname; echo $fullname; } else { echo "failed"; }
wp_die(); } |
Sub-topic: how to send blob data of form
While we are sending data to the server, when it comes to sending text data along with a file it is a little bit complex. Let’s see how we can send it.
plugin/folder1/form2.php
<form id="form1"> <!-- your input fields --> <button type="submit" id="submit_btn" class="btn btn-primary">Submit</button> </form>
jQuery('#submit_btn').click(function (e) { e.preventDefault();
var formData = new FormData(document.getElementById('form1')); formData.append('action', 'book_vaccine'); jQuery.ajax({ type: "POST", url: ajaxurl, data: formData, processData: false, contentType: false, success: function (response) { console.warn(response); if (response == "success") { alert("booking successful!"); window.location = "<?php echo get_site_url(); ?>/dashboard"; } else if (response == "failed") { alert("booking failed"); } }, error: function (response) { alert("booking failed!"); } });
}); |
/ register new patient's vaccine add_action('wp_ajax_book_vaccine', 'register_vaccine'); add_action('wp_ajax_nopriv_book_vaccine', 'register_vaccine'); function register_vaccine() { $path = $_SERVER['DOCUMENT_ROOT']; include_once $path . '/wp-config.php';
global $wpdb; $host = $wpdb->dbhost; $user = $wpdb->dbuser; $pass = $wpdb->dbpassword; $db = $wpdb->dbname;
$phone = sanitize_text_field($_POST['phone']); $email = sanitize_text_field($_POST['email']); // other fields
// seach via phone number meta field if user exist $args = array( 'meta_key' => 'phone', 'meta_value' => $phone ); $user_query = new WP_User_Query($args); $user = $user_query->get_results(); foreach ($user as $user) { $name = $user->display_name; }
if ($name) { // if user exist then book the vaccine
// uploading the file if ($_FILES["formFile"]["tmp_name"]) { // Ensure the uploads directory exists $target_dir = "../uploads/"; if (!is_dir($target_dir)) { mkdir($target_dir, 0777, true); }
// Generate a unique hash for the file $file_temp = $_FILES["formFile"]["tmp_name"]; $file_name = basename($_FILES["formFile"]["name"]); $unique_id = uniqid(); $file_hash = hash('md5', file_get_contents($file_temp) . $unique_id); $file_ext = strtolower(pathinfo($file_name, PATHINFO_EXTENSION)); $hashfile_name = $file_hash . '.' . $file_ext; $target_file = $target_dir . $file_hash . '.' . $file_ext; $uploadOk = 1;
// Check if file already exists if (file_exists($target_file)) { $uploadOk = 0; } if ($uploadOk == 0) { // echo "Sorry, your file was not uploaded."; } else { if (move_uploaded_file($_FILES["formFile"]["tmp_name"], $target_file)) { $file_store_path = "uploads/" . $hashfile_name; } else { // echo "Sorry, there was an error uploading your file."; } } }
if ($year || $month || $day) { $date = new DateTime($current_date); $str = "P" . $year . "Y" . $month . "M" . $day . "D"; $interval = new DateInterval($str); $date->add($interval); $new_date = $date->format('Y-m-d'); }
$id = get_current_user_id(); $table = $wpdb->prefix . "vaccinations"; $res = $wpdb->insert( $table, array( "phone" => $phone, "firstname" => $fname, "lastname" => $lname, // your fields ) );
if ($res === false) { error_log("Database update error: " . $wpdb->last_error); echo "failed"; } else { echo "success"; }
} else { // if user not exist
// user's registration $username = $fname . $lname; $password = $phone; $user_id = wp_create_user($username, $password, $email); if (is_wp_error($user_id)) { echo 'Error: ' . $user_id->get_error_message();
echo "failed"; } else {
// setting user's role $user_id_role = new WP_User($user_id); $user_id_role->set_role('patient');
update_user_meta($user_id, 'first_name', $fname); update_user_meta($user_id, 'last_name', $lname); update_user_meta($user_id, 'age', $age); update_user_meta($user_id, 'phone', $phone);
// uploading the file if ($_FILES["formFile"]["tmp_name"]) { // Ensure the uploads directory exists $target_dir = "../uploads/"; if (!is_dir($target_dir)) { mkdir($target_dir, 0777, true); }
// Generate a unique hash for the file $file_temp = $_FILES["formFile"]["tmp_name"]; $file_name = basename($_FILES["formFile"]["name"]); $unique_id = uniqid(); $file_hash = hash('md5', file_get_contents($file_temp) . $unique_id); $file_ext = strtolower(pathinfo($file_name, PATHINFO_EXTENSION)); $hashfile_name = $file_hash . '.' . $file_ext; $target_file = $target_dir . $file_hash . '.' . $file_ext; $uploadOk = 1;
// Check if file already exists if (file_exists($target_file)) { $uploadOk = 0; } if ($uploadOk == 0) { // echo "Sorry, your file was not uploaded."; } else { if (move_uploaded_file($_FILES["formFile"]["tmp_name"], $target_file)) { $file_store_path = "uploads/" . $hashfile_name; } else { // echo "Sorry, there was an error uploading your file."; } } }
if ($year || $month || $day) { $date = new DateTime($current_date); $str = "P" . $year . "Y" . $month . "M" . $day . "D"; $interval = new DateInterval($str); $date->add($interval); $new_date = $date->format('Y-m-d'); }
$id = get_current_user_id(); $table = $wpdb->prefix . "vaccinations"; $res = $wpdb->insert( $table, array( "phone" => $phone, "firstname" => $fname, "lastname" => $lname, ) );
if ($res === false) { error_log("Database update error: " . $wpdb->last_error); echo "failed"; } else { echo "success"; }
} // end of user registration
}
wp_die(); } |
And lastly I would we can perform easy sql operations on formfile of pages in plugin.
======================================================================
Topic: CURL & PHP REST API
You can develop rest api using core php. When developing apis using core php, you have several methods -
GET - using this you can fetch records from the database to the frontend.
POST - using this you can save user’s data into a database table.
PUT - usually it uses for update record all at once
PATCH - used for updating a single field of a user's record.
DELETE - used for removing existing records into the database.
While working with API you basically work with JSON(javascript object notation.)
json_encode() - helps to convert php associative array into json object
json_deocode() - helps to convert json objects to php object.
Let’ make a simple GET api code which will return a JSON object.
$arr = array(array('name'=>'shimanta','tech'=>'php','email'=>'meshimanta@yahoo.com'),array('name'=>'ayan','tech'=>'php, shopify','email'=>'ayan@gmail.com'),); echo json_encode($arr); |
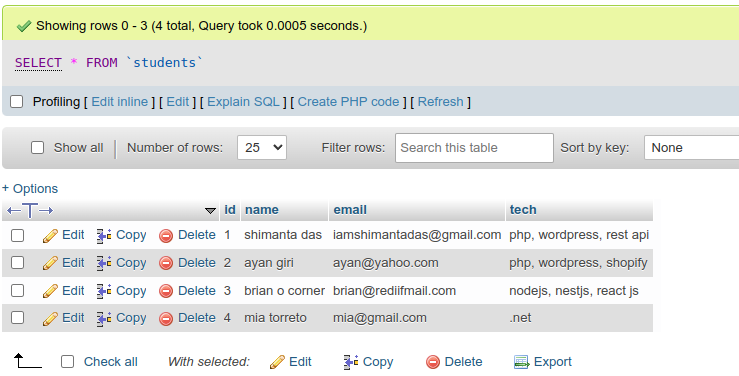
Let’s make a simple GET api which will fetch all the students records from the database
<?php include('../config.php');
// specifying json object returns header('Content-Type: application/json'); // allowing all origins/IP to access this page. you can specify any particular domain header('Access-Control-Allow-Origin: *');
$sql = "SELECT * FROM students"; $result = mysqli_query($conn, $sql); $record = mysqli_fetch_all($result);
echo json_encode($record); ?> |
======================================================================
Topic: CURL & PHP ~ WordPress
Hello guys, so we can make api requests from anywhere. So we can use curl as an intermediary for handling api requests.
Let’s build a simple GET request using CURL and PHP.
$ch = curl_init(); curl_setopt($ch, CURLOPT_URL, "https://dummyjson.com/users"); curl_setopt($ch, CURLOPT_RETURNTRANSFER, true); $result = curl_exec($ch); curl_close($ch); |
As an example, we basically get the json encoded string as an output here. So now we will decode this using the json_decode() function to convert that string into an array.
$ch = curl_init(); curl_setopt($ch, CURLOPT_URL, "https://dummyjson.com/users"); curl_setopt($ch, CURLOPT_RETURNTRANSFER, true); $result = curl_exec($ch); // converting json into array $result = json_decode($result, true); $data = $result['users'];
foreach($data as $user){ echo "<br/>".$user['email']; }
curl_close($ch); |
Make sure when you complete a request, you should close the connection from that endpoint.
** Note: when you working with php application, sometime you need to handle error message, so you can use try-catch block.
Try{ // your code to test }catch(Exception $e){ Echo $e->getMessage(); } |
Topic: gemini api integration with core PHP, curl
We can integrate google gemini api in core php!
Let’s see my code … in behind it basically done using php and curl.
<?php try {
$apiKey = 'AIzaSyCHaAF83_3T7rcKu1VntbeeO9uW46KOtQQ'; $apiUrl = 'https://generativelanguage.googleapis.com/v1beta/models/gemini-pro:generateContent';
$common = "you should reply as for shimanta mega store"; $message = "best belts for balck pants";
$data = json_encode([ 'contents' => [ [ 'parts' => [ [ 'text' => "$message, $common" ] ] ] ] ]);
$ch = curl_init($apiUrl . '?key=' . $apiKey); curl_setopt($ch, CURLOPT_RETURNTRANSFER, true); curl_setopt($ch, CURLOPT_HTTPHEADER, [ 'Content-Type: application/json' ]); curl_setopt($ch, CURLOPT_POST, true); curl_setopt($ch, CURLOPT_POSTFIELDS, $data);
$response = curl_exec($ch);
// print_r($response); $responseArray = json_decode($response, true);
if (isset($responseArray['candidates'][0]['content']['parts'][0]['text'])) { $text = $responseArray['candidates'][0]['content']['parts'][0]['text']; echo $text; } else { echo "error"; }
curl_close($ch);
} catch (Exception $e) { echo $e->getMessage(); } ?> |
Topic: stability ai image generate using PHP
We can generate image using stability ai for free. But there have 3 models for this: ULTRA, CORE, DIFFUSION 3.0.
Topic: create PDF using php - fpdf
We can create pdf in php in multiple ways. But one of the easy process is fpdf.
Download: http://www.fpdf.org/
<?php
// Clear output buffer to prevent any unwanted output ob_end_clean(); require('fpdf/fpdf.php');
// Instantiate and use the FPDF class $pdf = new FPDF();
// Add a new page $pdf->AddPage();
// Set the font for the text $pdf->SetFont('Arial', '', 12);
// Prints a cell with given text $text = " ndustry. Lorem Ipsum has been the industry's standard dummy text ever since the 1500s, when an unknown printer took a galley of type and scrambled it to make a type specimen book. It has survived not only five centuries, but also the leap into electronic typesetting, remaining essentially unchanged. It was popularised in the 1960s with the release of Letraset sheets containing Lorem Ipsum passages, and more recently with desktop publishing software like Aldus PageMaker including versions of Lorem Ipsum. Why do we use it? Ithe like). ";
/** we should use multicell for proper line spacing */ // $pdf->Cell(60, 20, $text); $pdf->MultiCell(190, 10, $text);
// Set the headers to force download header('Content-Type: application/pdf'); header('Content-Disposition: attachment; filename="example.pdf"'); header('Content-Length: ' . strlen($pdf->Output('S')));
// Return the generated output and force download echo $pdf->Output('S'); ?> |
======================================================================
Topic: Custom Plugin Dev.
We can develop custom plugin in wordpress. Let’s see how to apply that,
Inside plugin-name.php
/* * Plugin Name: REGEX Bot * Description: This is a bot assistant, which is also powered by Google Gemini API. It can reply against queries 24x7 to website visitors. * Version: 1.1.1 * Requires at least: 5.2 * Requires PHP: 7.2 * Author: Shimanta Das * Author URI: https://microcodes.in/ * License: GPL v2 or later * License URI: https://www.gnu.org/licenses/old-licenses/gpl-2.0.en.html * Text Domain: bot, regex bot, */ |
Now , let’s restrict plugin dir/file access and also enqueue css, js files.
if (!defined('ABSPATH')) { die("You are restricted to access this page!"); }
// enqueue css and js scripts function superbot_enqueue_assets() { // Enqueue Google Fonts wp_enqueue_style('superbot-material-icons-outlined', 'https://fonts.googleapis.com/css2?family=Material+Symbols+Outlined:opsz,wght,FILL,GRAD@48,400,0,0', [], null); wp_enqueue_style('superbot-material-icons-rounded', 'https://fonts.googleapis.com/css2?family=Material+Symbols+Rounded:opsz,wght,FILL,GRAD@48,400,1,0', [], null);
// Enqueue plugin styles and scripts wp_enqueue_style('superbot-style', plugins_url('assets/css/style.css', __FILE__), [], '1.0.0'); wp_enqueue_script('superbot-jquery', plugins_url('assets/js/jquery.js', __FILE__), ['jquery'], '1.0.0', true); wp_enqueue_script('superbot-script', plugins_url('assets/js/script.js', __FILE__), ['jquery'], '1.0.0', true);
// Pass the AJAX URL to the script wp_localize_script( 'superbot-script', 'superbot_ajax', array( 'ajax_url' => admin_url('admin-ajax.php') ) ); } add_action('wp_enqueue_scripts', 'superbot_enqueue_assets'); |
Now, we will register some menu pages in that ….
// add menu to admin panel page function register_options_page() { $plugin_slug = "chat_admin";
add_menu_page( 'REGEX Bot', 'REGEX Bot', 'edit', $plugin_slug, null, plugins_url('icon.png', __FILE__), '58',);
add_submenu_page( $plugin_slug, 'Dashboard', 'Dashboard', 'manage_options', 'chatbot_dashboard', 'dashboard_function' );
add_submenu_page( $plugin_slug, 'Add/Edit Replies', 'Add/Edit Replies', 'manage_options', 'reply_edit_remove', 'reply_function' ); } add_action('admin_menu', 'register_options_page');
function dashboard_function() { require (plugin_dir_path(__FILE__) . 'admin/dashboard.php'); } function reply_function() { require (plugin_dir_path(__FILE__) . 'admin/replies.php'); } |
We can send ajax requests from menu pages to plugin-name.php/functions.php. So here we have invoked “functions.php” file with plugin-name.php
var ajaxurl = "<?php echo admin_url('admin-ajax.php'); ?>";
jQuery('#save_query_btn').click(function () { let query = jQuery('#query').val(); let editor = jQuery('#editor1').val();
jQuery.ajax({ url: ajaxurl, method: 'POST', data: { action: 'save_query', query: query, editor: editor }, success: function (res) { console.warn(res); }, error: function (res) { console.error(res); } }); }); |
add_action('wp_ajax_save_query', 'saveQuery'); add_action('wp_ajax_nopriv_save_query', 'saveQuery'); function saveQuery(){ exit; } |
Topic: uninstall hook
When we working with plugin there have basically 3 types of hook - activation hook, deactivation hook, uninstall hook.
If you want to perform some operations when delete that plugin …. Then follow below code …
function superbot_uninstall() { global $wpdb;
// List of tables created by the plugin $tables = [ $wpdb->prefix . 'chats', $wpdb->prefix . 'chat_terms', $wpdb->prefix . 'chat_history', $wpdb->prefix . 'chat_global_settings', ];
// Delete each table foreach ($tables as $table) { $wpdb->query("DROP TABLE IF EXISTS $table"); } } register_uninstall_hook(__FILE__, 'superbot_uninstall'); |
—--------------------------------------------------------------------------------------------------------------
Topic: Error Log file generate in wordpress plugin.
Step 1: first define WP_DEBUG mode to true.
define( 'WP_DEBUG', true ); define( 'WP_DEBUG_LOG', true ); |
Step 2: now define log file generate code inside plugin-main-name.php file inside.
define('PLUGIN_LOG_FILE', plugin_dir_path(__FILE__) . 'migration_log.txt');
Step 3: Now whenever you generate errors inside mention text file use this below code …
error_log(" post id $POST_ID " , 3, PLUGIN_LOG_FILE);
—---------------------------------------------------------------------------------------------------------------
======================================================================
Topic: JS Cheats
I will describe to you a js cheat sheet here.
When we working on JS , we generally works on HTML page. For that, we can link JS in footer section or on top of </body> tag of the HTML page.
Topic: get <input> box value using js
Let’s see, HTML button and js script embed.
<input type="email" name="" id="email"> <br> <button onclick="func1()">click</button>
<script> function func1(){ let emailid = document.getElementById('email').value; console.log("email is: ", emailid); } </script> |
Topic: variable concepts
We can declare variable in 2 ways in js …. Using ‘var’ and ‘let’.
/* in JS, we generally has 2 types of variables ... let => only one time declare and assign value infy times. var => re-declare variables and it's values multiple times. */
var a = 10; console.log(a); var a = "10"; // possible console.log(a);
// let b = 10; // let b = 20; // not possible
// BUT let c; // declare once! c = 20; // assign value multiple times! console.log(c); c = "rrer"; console.warn(c); |
Topic: show datetime using js. We can store it into mysql db too.
let date = new Date(); let utcTime = date.getTime() + (date.getTimezoneOffset() * 60000); let istOffset = 5.5 * 60 * 60000; let istTime = new Date(utcTime + istOffset); let localTime = istTime.toISOString().slice(0, 19).replace('T', ' '); // datetime examples: 2024-07-26 05:56:30, 2024-07-26 05:56:32 |
We can show 24 hours times too.
// Create a new Date object with the current date and time let date = new Date();
// Calculate the IST offset (5 hours and 30 minutes ahead of UTC) let istOffset = 5 * 60 * 60 * 1000 + 30 * 60 * 1000;
// Get the UTC time in milliseconds since January 1, 1970 00:00:00 UTC let utcTime = date.getTime() + (date.getTimezoneOffset() * 60000);
// Create a new Date object for IST let istTime = new Date(utcTime + istOffset);
// Format the IST date and time as 'YYYY-MM-DD HH:MM:SS' in 24-hour format let year = istTime.getFullYear(); let month = String(istTime.getMonth() + 1).padStart(2, '0'); let day = String(istTime.getDate()).padStart(2, '0'); let hours = String(istTime.getHours()).padStart(2, '0'); let minutes = String(istTime.getMinutes()).padStart(2, '0'); let seconds = String(istTime.getSeconds()).padStart(2, '0');
let formattedDate = `${year}-${month}-${day} ${hours}:${minutes}:${seconds}`; console.warn("insert time ", formattedDate); |
These examples: 2024-07-26 13:19:30
We can compare by N seconds too.
// Create Date objects from the date-time strings let dateTime1 = new Date(date1); let dateTime2 = new Date(date2);
// Calculate the difference in milliseconds let timeDifference = Math.abs(dateTime2 - dateTime1);
// Convert the difference from milliseconds to minutes // let differenceInMinutes = timeDifference / (1000 * 60); let differenceInMinutes = timeDifference/1000;
// Check if the difference is greater than 5 seconds if (differenceInMinutes > 5) { console.log("offline"); } else { console.log("online"); } |
Topic: clear params using js
We can clear params from the current url using js.
Old ⇒ https://ppearl-devnew.weavers-web.com/case-studies/?category=Strategy
New ⇒ https://ppearl-devnew.weavers-web.com/case-studies/
function removeParam(key, sourceURL) { var rtn = sourceURL.split("?")[0], param, params_arr = [], queryString = (sourceURL.indexOf("?") !== -1) ? sourceURL.split("?")[1] : ""; if (queryString !== "") { params_arr = queryString.split("&"); for (var i = params_arr.length - 1; i >= 0; i -= 1) { param = params_arr[i].split("=")[0]; if (param === key) { params_arr.splice(i, 1); } } if (params_arr.length) rtn = rtn + "?" + params_arr.join("&"); } return rtn; }
var originalURL = window.location.href; var newURLwithout_param = removeParam("category", originalURL); |
Topic: MAP in js
This function helps to function at each element of the given array. It skips the empty element.
// array map. let arr = [10, 20, 30, "shimanta"]; arr.map(function (val, i) { console.log("Index: " + i + " Value: " + val); });
// map does functional work at each element. let brr = [1, 2, 4, 6];
let c = brr.map(function (x) { return x = x+2; }); // let c = brr.map(x => x+2); console.log(c); |
Topic: arrays, arrays of objects , objects in js
Arrays are those, which has a series of elements.
// array var arr = ["shimanta", 20, "coding"]; console.log(arr);
// array of objects var arr = [ { "product name":"samsung", "price":"435353", }, { "product name":"nokia", "price":"98569", }, ];
arr.map((x, y)=> { console.log(arr[y]["product name"]+" "+arr[y]["price"]); }); /** samsung 435353 nokia 98569 */
// object var arr = { "ID_100":{ "name":"samsung f20 5G", "price":"9599", }, "ID_101":{ "name":"Nokia g42 5G", "price":"10599", }, };
Object.keys(arr).forEach(function(index){ console.log("Product ID: ", index, "Product Name: "+arr[index]["name"]+" Price: "+arr[index]["price"]); }); /** Product ID: ID_100 Product Name: samsung f20 5G Price: 9599
Product ID: ID_101 Product Name: Nokia g42 5G Price: 10599 */ |
Topic: location suggestion - autocomplete location names Google map api
1.1.: If you only want map suggestions.
<!DOCTYPE html> <html> <head> <title>Place Autocomplete</title> <style> /* Basic styling for the input field */ #pac-input { background-color: #fff; font-family: Roboto; font-size: 15px; font-weight: 300; margin-left: 12px; padding: 10px 11px 10px 13px; text-overflow: ellipsis; width: 400px; border: 1px solid #ccc; border-radius: 3px; box-shadow: 0 2px 6px rgba(0, 0, 0, 0.1); }
#pac-input:focus { border-color: #4d90fe; outline: none; } </style> <script> function initAutocomplete() { const input = document.getElementById("pac-input"); const options = { fields: ["formatted_address", "geometry", "name"], };
const autocomplete = new google.maps.places.Autocomplete(input, options);
autocomplete.addListener("place_changed", () => { const place = autocomplete.getPlace();
if (!place.geometry || !place.geometry.location) { // User entered the name of a Place that was not suggested and // pressed the Enter key, or the Place Details request failed. window.alert("No details available for input: '" + place.name + "'"); return; } }); } </script> </head> <body> <input id="pac-input" type="text" placeholder="Enter a location" />
<script src="https://maps.googleapis.com/maps/api/js?key=AIzaSyCGZJ4klZsKGWBAVUuCpR1MuchkA1mpw8E&libraries=places&callback=initAutocomplete" defer ></script> </body> </html> |
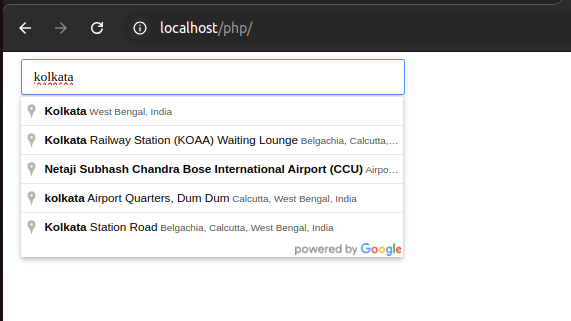
1.2: show full filtered location.
<html> <head> <title>Place Autocomplete</title>
<link rel="stylesheet" type="text/css" href="./style.css" /> <style> /* * Always set the map height explicitly to define the size of the div element * that contains the map. */ #map { height: 100%; }
/* * Optional: Makes the sample page fill the window. */ html, body { height: 100%; margin: 0; padding: 0; }
#description { font-family: Roboto; font-size: 15px; font-weight: 300; }
#infowindow-content .title { font-weight: bold; }
#infowindow-content { display: none; }
#map #infowindow-content { display: inline; }
.pac-card { background-color: #fff; border: 0; border-radius: 2px; box-shadow: 0 1px 4px -1px rgba(0, 0, 0, 0.3); margin: 10px; padding: 0 0.5em; font: 400 18px Roboto, Arial, sans-serif; overflow: hidden; font-family: Roboto; padding: 0; }
#pac-container { padding-bottom: 12px; margin-right: 12px; }
.pac-controls { display: inline-block; padding: 5px 11px; }
.pac-controls label { font-family: Roboto; font-size: 13px; font-weight: 300; }
#pac-input { background-color: #fff; font-family: Roboto; font-size: 15px; font-weight: 300; margin-left: 12px; padding: 0 11px 0 13px; text-overflow: ellipsis; width: 400px; }
#pac-input:focus { border-color: #4d90fe; }
#title { color: #fff; background-color: #4d90fe; font-size: 25px; font-weight: 500; padding: 6px 12px; } </style>
<script> // This example requires the Places library. Include the libraries=places // parameter when you first load the API. For example: // <script src="https://maps.googleapis.com/maps/api/js?key=YOUR_API_KEY&libraries=places"> function initMap() { const map = new google.maps.Map(document.getElementById("map"), { center: { lat: 40.749933, lng: -73.98633 }, zoom: 13, mapTypeControl: false, }); const card = document.getElementById("pac-card"); const input = document.getElementById("pac-input"); const biasInputElement = document.getElementById("use-location-bias"); const strictBoundsInputElement = document.getElementById("use-strict-bounds"); const options = { fields: ["formatted_address", "geometry", "name"], strictBounds: false, };
map.controls[google.maps.ControlPosition.TOP_LEFT].push(card);
const autocomplete = new google.maps.places.Autocomplete(input, options);
// Bind the map's bounds (viewport) property to the autocomplete object, // so that the autocomplete requests use the current map bounds for the // bounds option in the request. autocomplete.bindTo("bounds", map);
const infowindow = new google.maps.InfoWindow(); const infowindowContent = document.getElementById("infowindow-content");
infowindow.setContent(infowindowContent);
const marker = new google.maps.Marker({ map, anchorPoint: new google.maps.Point(0, -29), });
autocomplete.addListener("place_changed", () => { infowindow.close(); marker.setVisible(false);
const place = autocomplete.getPlace();
if (!place.geometry || !place.geometry.location) { // User entered the name of a Place that was not suggested and // pressed the Enter key, or the Place Details request failed. window.alert("No details available for input: '" + place.name + "'"); return; }
// If the place has a geometry, then present it on a map. if (place.geometry.viewport) { map.fitBounds(place.geometry.viewport); } else { map.setCenter(place.geometry.location); map.setZoom(17); }
marker.setPosition(place.geometry.location); marker.setVisible(true); infowindowContent.children["place-name"].textContent = place.name; infowindowContent.children["place-address"].textContent = place.formatted_address; infowindow.open(map, marker); });
// Sets a listener on a radio button to change the filter type on Places // Autocomplete. function setupClickListener(id, types) { const radioButton = document.getElementById(id);
radioButton.addEventListener("click", () => { autocomplete.setTypes(types); input.value = ""; }); }
setupClickListener("changetype-all", []); setupClickListener("changetype-address", ["address"]); setupClickListener("changetype-establishment", ["establishment"]); setupClickListener("changetype-geocode", ["geocode"]); setupClickListener("changetype-cities", ["(cities)"]); setupClickListener("changetype-regions", ["(regions)"]); biasInputElement.addEventListener("change", () => { if (biasInputElement.checked) { autocomplete.bindTo("bounds", map); } else { // User wants to turn off location bias, so three things need to happen: // 1. Unbind from map // 2. Reset the bounds to whole world // 3. Uncheck the strict bounds checkbox UI (which also disables strict bounds) autocomplete.unbind("bounds"); autocomplete.setBounds({ east: 180, west: -180, north: 90, south: -90 }); strictBoundsInputElement.checked = biasInputElement.checked; }
input.value = ""; }); strictBoundsInputElement.addEventListener("change", () => { autocomplete.setOptions({ strictBounds: strictBoundsInputElement.checked, }); if (strictBoundsInputElement.checked) { biasInputElement.checked = strictBoundsInputElement.checked; autocomplete.bindTo("bounds", map); }
input.value = ""; }); }
window.initMap = initMap; </script>
</head> <body> <div class="pac-card" id="pac-card"> <div> <div id="title">Autocomplete search</div> <div id="type-selector" class="pac-controls"> <input type="radio" name="type" id="changetype-all" checked="checked" /> <label for="changetype-all">All</label>
<input type="radio" name="type" id="changetype-establishment" /> <label for="changetype-establishment">establishment</label>
<input type="radio" name="type" id="changetype-address" /> <label for="changetype-address">address</label>
<input type="radio" name="type" id="changetype-geocode" /> <label for="changetype-geocode">geocode</label>
<input type="radio" name="type" id="changetype-cities" /> <label for="changetype-cities">(cities)</label>
<input type="radio" name="type" id="changetype-regions" /> <label for="changetype-regions">(regions)</label> </div> <br /> <div id="strict-bounds-selector" class="pac-controls"> <input type="checkbox" id="use-location-bias" value="" checked /> <label for="use-location-bias">Bias to map viewport</label>
<input type="checkbox" id="use-strict-bounds" value="" /> <label for="use-strict-bounds">Strict bounds</label> </div> </div> <div id="pac-container"> <input id="pac-input" type="text" placeholder="Enter a location" /> </div> </div> <div id="map"></div> <div id="infowindow-content"> <span id="place-name" class="title"></span><br /> <span id="place-address"></span> </div>
<script src="https://maps.googleapis.com/maps/api/js?key=AIzaSympw8E&callback=initMap&libraries=places&v=weekly" defer ></script> </body> </html> |
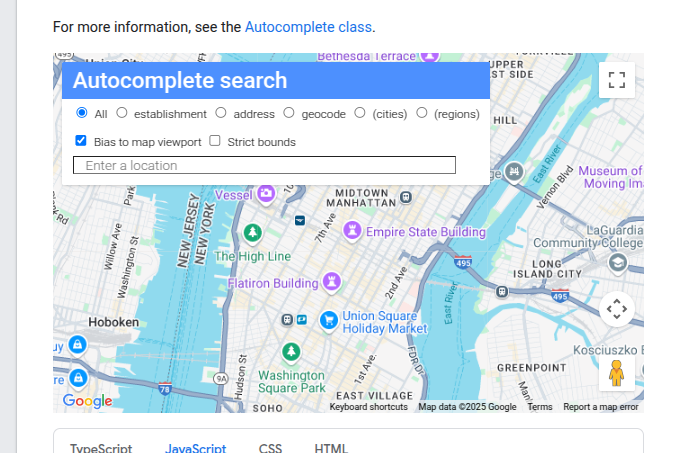
Doc URL: https://developers.google.com/maps/documentation/javascript/examples/places-autocomplete?csw=1
======================================================================
Topic: Laravel MVC
Laravel is a PHP based open-source framework. It helps with complex php applications and also helps to expand into large scale.
Laravel herd: it’s an editor developed by the laravel community , specially for developing laravel apps.
Geekyshows yt: https://www.youtube.com/watch?v=37NxsAu5ynk&list=PLbGui_ZYuhigy8M6ywFd3OOJBlNRlPA5N&index=4
MVC was introduced in 1987 as a “smalltalk programming language”. This application pattern is followed by 90% of web applications.
Topic:Routing concepts
We can start a laravel project, using laravel. Let’s see how to make routing inside our laravel apps.
<?php
use Illuminate\Support\Facades\Route;
// simple GET routes - triggered blade file Route::get('/', function () { // default route. return view('index'); }); Route::get('/dummy', function(){ return view('dummy'); }); Route::get('/blogs', function(){ return view('blogs'); });
// forcing from make redirection from 'dummy' to 'blogs' Route::redirect('dummy','blogs');
// optional parameters with numeric paramater filtering through helps method Route::get('/user/{id}/post_id/{pid?}', function($id, $pid = null){ echo "user id: ".$id." post id: ".$pid; })->whereNumber('id');
// group routing ... Route::prefix('admin')->group(function(){ Route::get('', function(){ return view('admin/admin'); }); Route::get('form', function(){ return view('admin/form'); }); }); |
So, now let’s see … if you want to list all the routes then …
“Php artisan route:list”
Or, view any specific routes … try … here ‘admin’ routes only should be listed .. .
“”Php artisan route:list –path=admin”
Topic: upload file - laravel
We can upload a file in laravel and get the path link of that.
For more: https://medium.com/@iqbal.ramadhani55/upload-file-in-laravel-9394efbd7867
Topic: SELECT statement/ find a column value in laravel
We can find a column value or can find multiple column value in laravel.
Help doc: https://devdojo.com/bobbyiliev/how-to-select-specific-columns-in-laravel-eloquent
======================================================================
Topic: HTMX with PHP
HTMX is just awesome, while writing 1000 lines of js or ajax code, we can use HTMX as alternatives. It supports all modern languages like php, go, rust etc.
Topic: Let’s make a simple INSERT operation with htmx and core PHP
insert.php |
<form hx-post="data.php" hx-swap="none" hx-on="htmx:afterRequest: showMessage" id="myform"> <div class="mb-3"> <label for="name" class="form-label">Full Name</label> <input type="text" class="form-control" name="name" id="name"> </div> <div class="mb-3"> <label for="exampleInputEmail1" class="form-label">Email address</label> <input type="email" class="form-control" name="email" id="exampleInputEmail1" aria-describedby="emailHelp"> <div id="emailHelp" class="form-text">We'll never share your email with anyone else.</div> </div> <div class="mb-3"> <label for="exampleInputPassword1" class="form-label">Password</label> <input type="password" class="form-control" name="password" id="exampleInputPassword1"> </div> <button type="submit" name="submit" class="btn btn-primary">Submit</button> </form>
// adding htmx and sweetalert cdn link here <script src="https://cdn.jsdelivr.net/npm/sweetalert2@11"></script> <script src="https://unpkg.com/htmx.org@2.0.2/dist/htmx.js" integrity="sha384-yZq+5izaUBKcRgFbxgkRYwpHhHHCpp5nseXp0MEQ1A4MTWVMnqkmcuFez8x5qfxr" crossorigin="anonymous"></script>
|
Let’s discuss about htmx parameters:
hx-post="data.php" => it will send POSTrequest to this file/route.
hx-swap="none" => it will help to no redirect functionality in the current page hich form request submit on.
hx-on="htmx:afterRequest: showMessage" => it will trigger showmessage() function, which will get the response from the ‘data.php’.
data.php |
<?php require('config.php');
$email = $_POST['email']; $pass = md5($_POST['password']); $name = $_POST['name'];
try{ $sql = "INSERT INTO customers(id,name,email,password) VALUES(NULL,'$name','$email','$pass')"; $query = mysqli_query($conn, $sql); if($query){ // echo "record saved"; // json message response echo json_encode(array('message'=>'your record saved!')); }else{ echo "error"; } }catch(Exception $e){ echo $e->getMessage(); }
?> |
======================================================================
Topic: HTML cheatsheets
Let’s follow some design cheat which resource from online.
Repo link: https://codepen.io/diyorbek0309/pen/mdwbEve

<!DOCTYPE html> <html lang="en"> <head> <meta charset="UTF-8"> <meta name="viewport" content="width=device-width, initial-scale=1.0"> <title>Backend Apis</title> </head> <style> * { margin: 0; padding: 0; } .wrapper { height: 100%; width: 100%; background: linear-gradient(180deg, #04fafd, 5%, #119dff, 50%, #030423); position: absolute; } .wrapper h1 { top: 50%; left: 50%; transform: translate(-50%, -50%); position: absolute; font-family: sans-serif; letter-spacing: 1px; word-spacing: 2px; color: #fff; font-size: 40px; font-weight: 888; text-transform: uppercase; } .wrapper div { height: 60px; width: 60px; border: 2px solid rgba(255, 255, 255, 0.7); border-radius: 50px; position: absolute; top: 10%; left: 10%; animation: 4s linear infinite; } div .dot { height: 10px; width: 10px; border-radius: 50px; background: rgba(255, 255, 255, 0.5); position: absolute; top: 20%; right: 20%; } .wrapper div:nth-child(1) { top: 20%; left: 20%; animation: animate 8s linear infinite; } .wrapper div:nth-child(2) { top: 60%; left: 80%; animation: animate 10s linear infinite; } .wrapper div:nth-child(3) { top: 40%; left: 40%; animation: animate 3s linear infinite; } .wrapper div:nth-child(4) { top: 66%; left: 30%; animation: animate 7s linear infinite; } .wrapper div:nth-child(5) { top: 90%; left: 10%; animation: animate 9s linear infinite; } .wrapper div:nth-child(6) { top: 30%; left: 60%; animation: animate 5s linear infinite; } .wrapper div:nth-child(7) { top: 70%; left: 20%; animation: animate 8s linear infinite; } .wrapper div:nth-child(8) { top: 75%; left: 60%; animation: animate 10s linear infinite; } .wrapper div:nth-child(9) { top: 50%; left: 50%; animation: animate 6s linear infinite; } .wrapper div:nth-child(10) { top: 45%; left: 20%; animation: animate 10s linear infinite; } .wrapper div:nth-child(11) { top: 10%; left: 90%; animation: animate 9s linear infinite; } .wrapper div:nth-child(12) { top: 20%; left: 70%; animation: animate 7s linear infinite; } .wrapper div:nth-child(13) { top: 20%; left: 20%; animation: animate 8s linear infinite; } .wrapper div:nth-child(14) { top: 60%; left: 5%; animation: animate 6s linear infinite; } .wrapper div:nth-child(15) { top: 90%; left: 80%; animation: animate 9s linear infinite; } @keyframes animate { 0% { transform: scale(0) translateY(0) rotate(70deg); } 100% { transform: scale(1.3) translateY(-100px) rotate(360deg); } }
</style> <body> <div class="wrapper"> <h1>Bubbles Animation</h1> <div><span class="dot"></span></div> <div><span class="dot"></span></div> <div><span class="dot"></span></div> <div><span class="dot"></span></div> <div><span class="dot"></span></div> <div><span class="dot"></span></div> <div><span class="dot"></span></div> <div><span class="dot"></span></div> <div><span class="dot"></span></div> <div><span class="dot"></span></div> <div><span class="dot"></span></div> <div><span class="dot"></span></div> <div><span class="dot"></span></div> <div><span class="dot"></span></div> <div><span class="dot"></span></div> </div> </body>
</html> |
==================================================================
Topic: headless CMS - WordPress
We can use wordpress as our rest api service.
Let’s first create a fresh wordpress project in your local system. Now, let’s create a few posts and pages on our own. Now for visiting all apis, you can visit: http://localhost/backend/wp-json/wp/v2
Now, Wordpress default rest api view is not so cool, so to make it awesome , we need to install swagger view into it.
For that get help from repo: https://github.com/agussuroyo/wp-api-swaggerui?tab=readme-ov-file
Rest APi Auth In wordpress(official): https://github.com/WP-API/Basic-Auth
Now, set the ‘username’ and ‘password’.
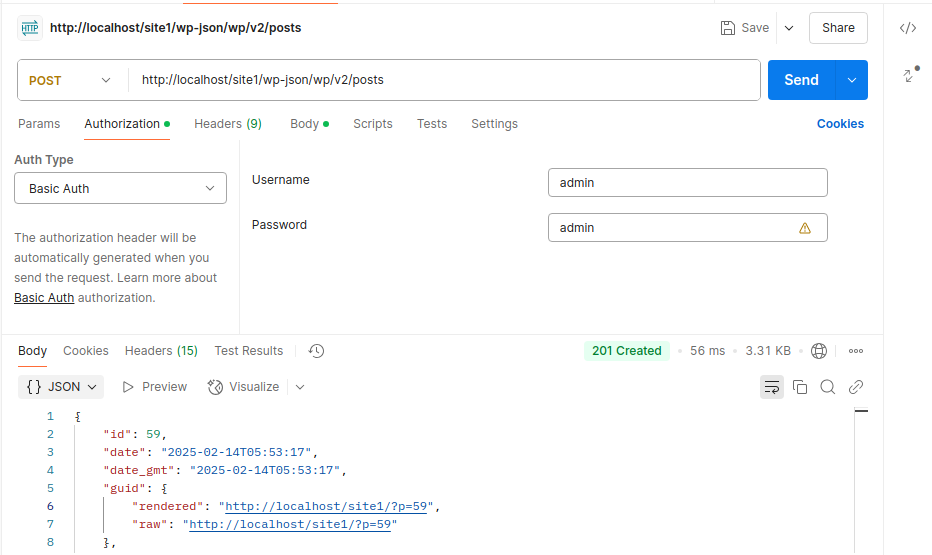
Now, let’s enter RAW Json data ….
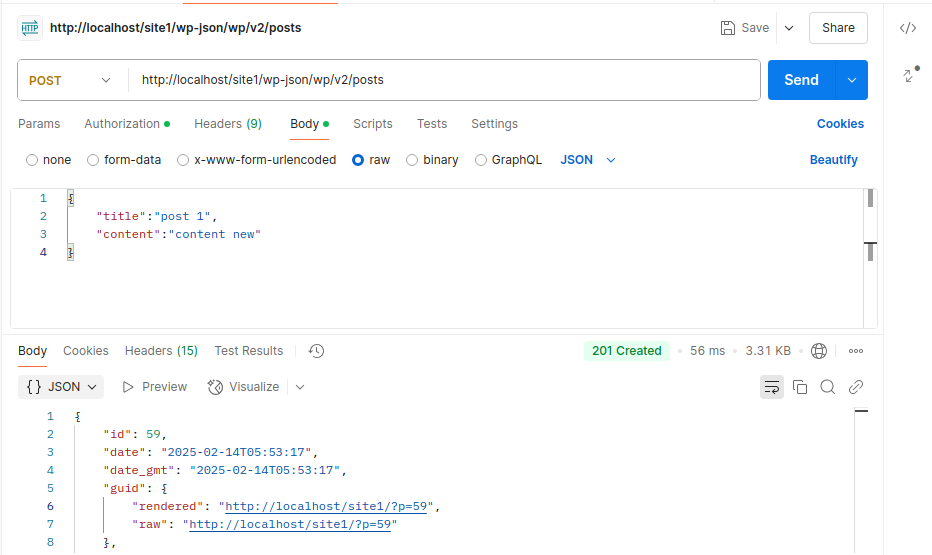
For getting swagger ui view looks… hit with your web url: http://localhost/backend/rest-api/docs/
After that, your wordpress backend looks like…
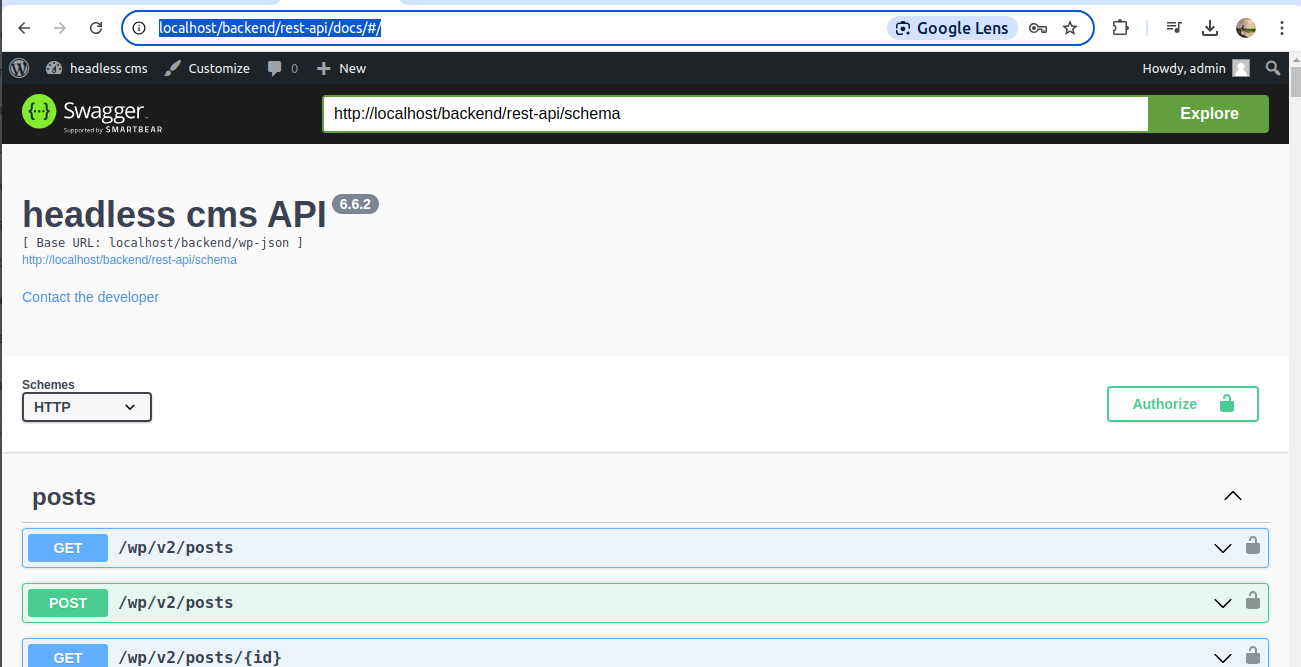
Let’s understand wordpress api basics…
Note: we need to authenticate via admin login.
Step 1: working with posts apis …
GET: /wp/v2/posts/ it will fetch all the posts at once. Note: only “publish“ posts will be fetched. While fetching posts from wordpress, we don’t need authentication.
POST: /wp/v2/posts/ it will help to publish a post as default post type = ‘post’ into wordpress. For this route you need to “administrator” role to publish the post.
PUT: same route with the “PUT” request, it can acts like updating post via it’s id. You can control post view status like - ‘publish’, ‘draft’ etc.
** You can follow the same thing for the DELETE method too.
Api endpoints best practices: https://medium.com/@nadinCodeHat/rest-api-naming-conventions-and-best-practices-1c4e781eb6a5
Note: User Roles For API’S
We can restrict users to control over post operations and other activities too. for that, while registering user , we need to assign user roles .
Doc link: https://wordpress.org/documentation/article/roles-and-capabilities/
Note: media files
In wordpress while you upload a featured image or other images related to post or pages or custom post type or sometimes your custom media also, you need to upload to ‘wp-content’ and after that it will send you featured image ID as return. This value can be used for your purpose.
Sob topic: featured image - rest api
First of all, set featured image support for rest apis.
Doc: https://dalenguyen.medium.com/how-to-get-featured-image-from-wordpress-rest-api-5e023b9896c6
For more follow online blog: https://rudrastyh.com/wordpress/upload-featured-image-rest-api.html
Follow the below code ….
Topic: JWT auth via plugin.
For making jwt authentication we have several plugins. But here I have used a custom github plugin …. By default it automatically adds this into “wp/v2” namespace.
Github repo: https://github.com/WP-API/jwt-auth
Note: timings with jwt tokens
It definitely is up to how you interpret the time.
One of possible scenarios I could make up is literally - when a token must last from some particular point in time til another point in time.
Say, you're selling some API or resource. And a client purchased access that lasts for one hour and the access starts tomorrow in the midday.
So you issue a JWT with:
iat set to now
nbf set to tomorrow 12:00pm
exp set to tomorrow 1:00pm
** But in general you need two main parameters: ‘iat’ and ‘exp’. For more follow this video: https://youtu.be/ZDiS3fbVqh8?si=k5cQvOfMQBGPjm7c
==================================================================
Topic: extensions cheatsheet
Let’s see super extensions list which supercharge dev journey.
CHROME
All extensions
Adblock Plus - free ad blocker Block YouTube™ ads and pop-ups & fight malware!
Convert WebP to PNG WebP to PNG converter. Convert WebP files to PNG images online and offline. Save WebP images on website as PNG, JPG, GIF, TIFF, ICO.
Google Docs Offline Edit, create and view your documents, spreadsheets and presentations – all without Internet access.
Grammarly: AI Writing and Grammar Checker App Improve your writing with all-in-one assistance—including generative AI, grammar check, and more.
JSON Formatter Makes JSON easy to read. Open source.
JSON Viewer The most beautiful and customizable JSON/JSONP highlighter that your eyes have ever seen. Open source at https://goo.gl/fmphc7
React Developer Tools Adds React debugging tools to the Chrome Developer Tools. Created from revision c7c68ef842 on 10/15/2024.
Reader View Strips away clutter like buttons, background images, and changes the page's text size, contrast and layout for better readability
WhatFont The easiest way to identify fonts on web pages.
Wraplyzer Helsp to web technology
URBAN vpn |
VS CODE
==================================================================
Topic: REACT JS
React JS is a javascript library.
** JS topics to know: Callback function, async await, map function, module import export.
React App Structure
public/ => contains all the site’s assets
src/ => contains components and assets and others.
Index.html => first trigger by hosting.
Package.json => contains all the package information.
** The main thing on production times is minify, public/ folder’s assets are not processed. But src/ folder assets get processed.
Topic: Components
Components are the building block of a React App. There was 2 type of components work. Class-based components & functional components. But we will move
Syntax:
Export const ComponentName = () => { return ( <> <h3>This is a child component</h3> </> ) } |
Topic: JS expression Invoke
We can invoke JS code inside components. For this we need to use “{ code execution }”.
Export const ComponentName = () => { Let car_name = “TATA TIAGO”; return ( <> <h3>This is a child component {car_name} </h3> </> ) } |
Topic: Props
Props basically help to transfer data between components.
/* old code */ export const PropsTry = (props) => { return( <> <table className="table"> <tr> <th>Name</th> <th>Position</th> </tr> <tr> <td> {props.u_name} </td> <td> {props.u_pos} </td> </tr> </table> </> ) }
/* new code */ export const PropsTry = ({u_name, u_pos}) => { return( <> <table className="table"> <tr> <th>Name</th> <th>Position</th> </tr> <tr> <td> {u_name} </td> <td> {u_pos} </td> </tr> </table> </> ) } |
Topic: Hooks
There are many hooks to work with … useState, useEffect etc.
Hooks can be inside react components.
useState
** useState hooks basically used to manage state variables in react components.
// Updating variable values const [email, setEmail] = useState("meshimanta@yahoo.com"); return( <> <h4>Email is: {email}</h4>
<button onClick={() => setEmail("iamshimantadas@gmail.com")}>change</button> </> |
Let’s update object values using state variables.
// update particular object key value const [employee, setEmployee] = useState({ "email":"rohitdas@gmail.com", "phone":"6867466464", "DOB":"18/09/2003", });
const updateEmployee = () =>{ setEmployee({...employee, "email":"awesomerohit@gmail.com"}); }
return( <> <table> <tr> <th>Email</th> <th>DOB</th> <th>PHONE</th> </tr> <tr> <td>{employee.email}</td> <td>{employee.DOB}</td> <td>{employee.phone}</td> </tr> </table>
<button className="btn btn-warning" onClick={updateEmployee}> change info </button>
</> |
Note: …employee is a spread operator which basically keeps all the existing object elements and updates the particular key value mentioned. If we want to update the whole object we just need to re-assign: setEmployee({"object_key":"object value"});
useEffect
These hooks especially trigger when components get mounted or re-render.
/* useEffect code inside react component */ useEffect(() => { console.warn("child useeffect called"); }, []); // output => child useeffect called.
// We should use createRoot(document.getElementById('root')).render( <App />,
// Instead of createRoot(document.getElementById('root')).render( <StrictMode> <App /> </StrictMode>, |
** we can trigger the “useEffect” hook when the state changes.
const [email, setEmail] = useState("shi@test.com"); useEffect(() => { // initially call when component mounted console.warn("child useeffect called");
// when the state variable value changes that time too. }, [email]); |
** use of useMemo in react application. This hook specialty is used when we want to cache some values into a react application.
***real life usages: React’s useMemo and useCallback hooks are powerful tools for optimizing the performance of your React applications. By memorizing values and functions, these hooks help prevent unnecessary re-renders and expensive computations.
Preventing Unnecessary Re-renders
Imagine a search results component that receives frequent updates but has minimal changes in its output. By memorizing the search results using useMemo, you can avoid unnecessary re-renders when the search query remains the same. This optimization reduces rendering overhead and improves the responsiveness of the component.
const [result, setResult]= useState(100); const is500 = useMemo(() => { if(result == 500){ return "Yes"; }else{ return "No"; } });
return( <> <h4>Result is: {result} goes to 500 ? {is500} </h4> <br /> <br /> <button onClick={() => setResult(result + 100)}>change</button> </> ) |
Topic: Inline CSS
We can write inline css into React applications.
<div className="text-center" style={{color: 'red', fontSize: 30}}>Register Form</div> |
Topic: env local
We can use the .env variable in react application. Perhaps we are using “vite” for creating our react app. So,
1. We will create a “.env.local” file inside the react project and define all the ENV CONSTANTS with the prefix “VITE_”.
Ex:
VITE_REST_API_URL: “234.45.67.789”
VITE_STRIPE_SECRET_KEY = “4u8y9ghergnjkdebhejib”
2. Now, for accessing that env variable value in component , we will use:
{import.meta.env.VITE_REST_API_URL}
Topic: include tailwind css
Step 1: Terminal:
npm install tailwindcss @tailwindcss/vite
step 2: vite.config.ts:
import tailwindcss from "@tailwindcss/vite";
export default defineConfig({
plugins: [
tailwindcss(),
reactRouter(),
tsconfigPaths(),
],
});
Step 3: Add into project css:
@import "tailwindcss";
Step 4: Restart server, like: npm run dev
==================================================================
Topic: NODE JS
Node js is a javascript run-time environment. It helps to run js outside the browser.
Topic: Import common JS modules using .js file.
** Node js support 2 types of modules: ECMAScript modules and Common JS modules.
1.1.: Import .json module in js
const arr = require("./data.json"); console.log(Object.keys(arr)); console.log(arr.title); |
We can simply import the .json file from the current directory in the node project.
1.2.: export function via module in js.
// export function in common js modules
// file1.js function abc(){ console.warn("this is abc function"); } module.exports = {abc};
// index.js const {abc} = require("./file1"); abc() |
1.3.: export object via module in js
// export object in common js modules
// file1.js obj_arr = { "name":"ryan dhal", "type":"programmer", "os":"windows", } module.exports = obj_arr
// index.js const d1 = require("./file1"); console.log(d1); // object console.warn(typeof(d1)); |
1.4.: export multiple things in modules in js
// we can export multiple data types
// file1.js function abc(){ console.warn("this is abc function"); } obj_arr = { "name":"ryan dhal", "type":"programmer", "os":"windows", }
module.exports = {obj_arr, abc}
// index.js const d1 = require("./file1"); console.log(d1.obj_arr); // print the object d1.abc(); |
2.1: export modules in ECMAScript.
// datamodules.mjs export function nandi(){ return "I am the rider of shiva"; }
// mainmodule.mjs import { nandi } from "./data_module.mjs"; console.warn(nandi()); |
2.2.: export multiple modules in ECMAScript
// datamodules.mjs export function nandi(){ return "I am the rider of shiva"; } export let person_name = "Lord Shiva"; export let bank = "SBI";
// mainmodule.mjs import { nandi, bank, person_name as fav} from "./data_module.mjs"; console.warn(nandi()); // I am the rider of shiva console.log(bank); // SBI console.warn(fav); // Lord Shiva |
Topic: use global module
Node has many built in modules like os,
1.1: Get Free Memory Info.
const os = require('os');
/** get free memory on GB */ function getFreeMemoryInGb() { const freeMemoryBytes = os.freemem(); const freeMemoryGb = freeMemoryBytes / (1024 * 1024 * 1024); return freeMemoryGb; }
const freeMemoryGb = getFreeMemoryInGb(); console.log(`Free memory: ${freeMemoryGb.toFixed(2)} GB`);
// free memory info into MB const freeMemoryBytes = os.freemem(); const freeMemoryMB = freeMemoryBytes / (1024 * 1024);
console.log(`Free memory: ${freeMemoryMB.toFixed(2)} MB`); |
Output:
Free memory: 0.94 GB
Free memory: 962.93 MB
Topic: URL handling in js
import url from 'node:url';
const myURL = url.parse("https://www.bing.com/search?q=pirates+of+the+caribbean&filters=ufn%3a%22Pirates+of+the+Caribbean+(film+series)%22+sid%3a%22ee9cdb31-0f39-e010-e7dc-fafb93504a83%22&asbe=AS&qs=MB&pq=pirates+of+the+&sc=12-15&cvid=B8D62E86C56D4269802CC6F7C11A4F63&FORM=QBLH&sp=1&ghc=1&lq=0", true); / // pass true as flag
console.log(Object.keys(myURL)); /* [ 'protocol', 'slashes', 'auth', 'host', 'port', 'hostname', 'hash', 'search', 'query', 'pathname', 'path', 'href' ] */ |
1.1.: Let’s deep drive into URL iteration.
import url from 'node:url';
const myURL = url.parse("https://www.bing.com/search?q=pirates+of+the+caribbean&filters=ufn%3a%22Pirates+of+the+Caribbean+(film+series)%22+sid%3a%22ee9cdb31-0f39-e010-e7dc-fafb93504a83%22&asbe=AS&qs=MB&pq=pirates+of+the+&sc=12-15&cvid=B8D62E86C56D4269802CC6F7C11A4F63&FORM=QBLH&sp=1&ghc=1&lq=0", true);
console.warn(Object.keys(myURL)); /** * [ 'protocol', 'slashes', 'auth', 'host', 'port', 'hostname', 'hash', 'search', 'query', 'pathname', 'path', 'href' ] */
console.log(myURL.protocol); // https console.log(myURL.hostname); // www.bing.com console.log(myURL.search); // ?q= ...... console.log(myURL.hostname.replace("www.","")); // bing.com console.log(myURL.query.q); // pirates of the caribbean |
Topic: file handling in js
import { existsSync, appendFile } from 'node:fs';
const filePath = './my_data.txt'; if (existsSync(filePath)) { console.log('File exists.'); } else { console.log('File does not exist.');
// append file/ create file of not exist appendFile('mynewfile1.txt', ' Hello content!3', function (err) { if (err) throw err; console.log('Saved!'); });
// we can write files content using writeFile => it will delete exist content
// we can delete entire file unlink()
} |
Topic: Events in Node JS
import { EventEmitter } from 'node:events';
class customEmit extends EventEmitter{}
const obj = new customEmit(); obj.on('order_notification', () => { setTimeout(() => { console.log("new notification"); }, 5000); });
console.log("first phase running"); obj.emit('order_notification'); console.log("second phase running"); /** * first phase running second phase running new notification */ |
==================================================================
Topic: STRAPI
Strapi helps us to provide pre-made cms backend.
Topic: Wired Things About STRAPI
Topic: Document Save States
When we want to store post into strapi, that time it gives us 2 options: “publish”, “save”.
** When we making a new post we need to click on publish and when we need to hit “publish”, and when you need to keep old post with that ID, that time you can use “save”.
==================================================================
Topic: SQUARESPACE
Squarespace
Header part
<script src="https://cdnjs.cloudflare.com/ajax/libs/jquery/3.6.4/jquery.min.js" integrity="sha512-pumBsjNRGGqkPzKHndZMaAG+bir374sORyzM3uulLV14lN5LyykqNk8eEeUlUkB3U0M4FApyaHraT65ihJhDpQ==" crossorigin="anonymous" referrerpolicy="no-referrer"></script>
<script>
$(document).ready(function () {
// Create the structure
var callElement = `
<a href="tel:214.643.6799" class="header-call">
<img src="https://static1.squarespace.com/static/65bac8d805f0a04a23668d03/t/677cca8eba60106c43810071/1736231566634/ic-call-care.png" alt="">
<span>
Please find out how we can help.
<b>214.643.6799</b>
</span>
</a>
`;
// Append the structure to the specified class
$('.header-nav-wrapper').append(callElement);
});
$(document).ready(function() {
// Get the current base URL (protocol + domain)
var baseUrl = window.location.origin;
// Get the current path (after the domain)
var path = window.location.pathname;
// Check if the path is empty or the homepage (i.e., only domain with no path)
if (path === '/' || path === '') {
// The current page is the homepage
$('header').addClass('transparent_logo');
}
// Check if the 'transparent_logo' class exists in the header
if ($('header').hasClass('transparent_logo')) {
// Check if the image element exists before modifying the src
var logoImage = $('img[elementtiming="nbf-header-logo-desktop"]');
if (logoImage.length) {
// Change the src of the logo image
logoImage.attr('src', 'https://static1.squarespace.com/static/65bac8d805f0a04a23668d03/t/677ce14c0b972d4a46cda3da/1736237388462/logo-transparent-header.png');
}
}
});
</script>
Page script part
<script src="https://cdnjs.cloudflare.com/ajax/libs/jquery/3.6.4/jquery.min.js" integrity="sha512-pumBsjNRGGqkPzKHndZMaAG+bir374sORyzM3uulLV14lN5LyykqNk8eEeUlUkB3U0M4FApyaHraT65ihJhDpQ==" crossorigin="anonymous" referrerpolicy="no-referrer"></script>
<script>
$(window).on('load', function(){
$('#page section').each(function(key, value){
$(this).addClass('home_section_'+key);
});
})
</script>
Auto slide
<!-- Auto Scroll Layout Sections from Will-Myers.com -->
<script>
(function() { let playInBackend = true, timing = 3, section = '', direction = 1; //1 = forwards, 0 = backwards
/*Do not Adjust below this line*/ function AutoScrollLayout(e) { if (null == (e = "" == e ? document.querySelector(".user-items-list-section") : document.querySelector(e))) return; let n, t, o, i, c, r = !1, u = e.querySelectorAll('button[class*="__arrow-button"]');
function s() { n = setInterval(d, t) }
function d() { o = document.querySelector("body.sqs-edit-mode-active"), i = document.querySelector(".sqs-modal-lightbox-open, .wm-mega-menu--open"), r || o || i || !c || u[direction].click() } t = 1e3 * timing; if (document.addEventListener("visibilitychange", (function() { r = !!document.hidden })), ["mousedown", "touchstart"].forEach((n => { e.addEventListener(n, (function() { r = !0 })) })), ["mouseup", "touchend"].forEach((t => { e.addEventListener(t, (function() { r = !1, clearInterval(n), s() })) })), window.IntersectionObserver) { new IntersectionObserver(((e, n) => { e.forEach((e => { c = !!e.isIntersecting })) }), { rootMargin: "-75px 0px -75px 0px" }).observe(e) } u[direction] && s() } window.addEventListener("load", (function() { let e = new Array; e.push(section), section.includes(",") && (e = section.split(",")), e.forEach((e => { (window.top == window.self || window.top !== window.self && playInBackend) && new AutoScrollLayout(e) })) })); }()); |
</script>